ge monogram fridge manual

Your GE Monogram fridge manual is a comprehensive guide to unlocking your appliance’s full potential. Discover features like advanced filtration, customizable door panels, and energy-efficient designs, ensuring optimal performance and seamless integration into your kitchen. This manual provides essential insights for installation, operation, and maintenance, helping you enjoy your refrigerator for years to come.

1.1 Overview of the GE Monogram Fridge

The GE Monogram fridge is a premium appliance designed to blend seamlessly into your kitchen while offering exceptional performance. Known for its sleek design and advanced features, it provides a perfect balance of style and functionality. The refrigerator is built with high-quality materials and cutting-edge technology, ensuring durability and reliability. Its customizable door panels allow for a tailored look, matching your kitchen decor effortlessly. With features like advanced filtration systems, energy-efficient operation, and spacious interiors, the Monogram fridge is crafted to meet the needs of discerning homeowners. It is engineered to deliver superior cooling performance while maintaining a quiet and efficient operation, making it a standout choice for modern kitchens.

1.2 Importance of the Manual for Optimal Usage

The GE Monogram fridge manual is essential for maximizing the appliance’s performance and longevity. It provides detailed instructions for proper installation, operation, and maintenance, ensuring users can enjoy all features effectively. The manual offers troubleshooting tips, energy-saving guidelines, and safety precautions, helping users avoid common issues. By following the manual, homeowners can maintain optimal cooling, extend the lifespan of the appliance, and ensure warranty compliance. It serves as a comprehensive resource for understanding advanced settings, customizing the fridge to your needs, and addressing any concerns promptly. Referencing the manual regularly ensures a seamless and satisfying ownership experience.

Key Features of the GE Monogram Refrigerator

The GE Monogram fridge boasts a sleek design, customizable door panels, and advanced filtration systems, offering enhanced functionality, energy efficiency, and seamless integration into modern kitchens.

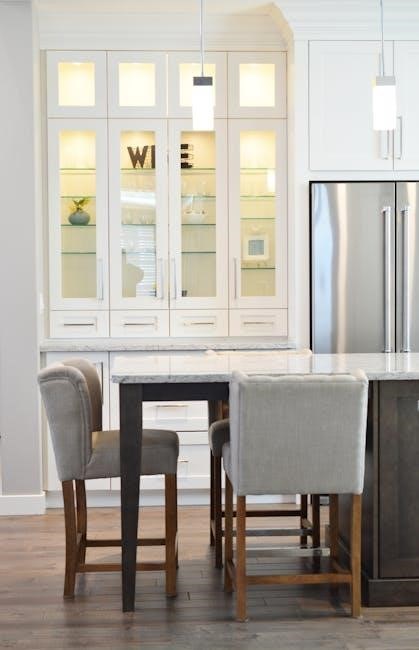
2.1 Design and Flexibility in Kitchen Integration

The GE Monogram refrigerator is designed to seamlessly integrate into any kitchen, offering a blend of style and functionality. With customizable door panels, it can match your kitchen cabinetry or decor, creating a cohesive look. The appliance’s flexibility allows it to adapt to various kitchen layouts, ensuring it fits perfectly without compromising on design. This adaptability makes it easy to maintain a streamlined and modern aesthetic, while also providing ample storage and advanced features for optimal performance. The refrigerator’s design ensures it becomes a central yet harmonious element in your kitchen space.

2.2 Decorative Door Insert Panels for Aesthetic Customization

The GE Monogram refrigerator offers decorative door insert panels, allowing for personalized aesthetic customization. These panels can be designed to match your kitchen cabinets or complement your interior decor, ensuring a seamless and stylish integration. Made from high-quality materials, the panels provide a durable and elegant finish. This feature allows homeowners to tailor their appliance’s appearance to suit their unique kitchen style, whether modern, traditional, or transitional. The ability to customize the doors enhances the overall visual appeal of the refrigerator, making it a standout piece in your kitchen while maintaining functionality and sophistication.

2.3 Advanced Filtration Systems for Water and Ice

The GE Monogram refrigerator features advanced filtration systems designed to provide clean and fresh water and ice. These systems utilize GE Appliances-branded filters, which meet rigorous NSF standards for removing impurities. The filters ensure optimal performance and reliability, delivering great-tasting water and ice. Regular replacement of these filters is recommended to maintain quality and prevent contamination. The filtration system is user-friendly, allowing for easy access and replacement. By using genuine GE filters, you ensure your refrigerator operates at its best, providing consistent and refreshing results. This feature enhances your drinking water experience while maintaining the overall efficiency of your appliance.

Installation Requirements and Guidelines

Ensure proper installation with pre-installation planning, precise measurements, and leveling for optimal performance. Follow guidelines for space, weight distribution, and utility connections to guarantee a smooth setup process.

3.1 Pre-Installation Planning and Measurements

Before installing your GE Monogram fridge, ensure accurate measurements of your kitchen space and the appliance. Measure doorways, hallways, and the allocated fridge area to guarantee smooth movement and proper fit. Account for clearance requirements, including side, top, and rear spacing, to maintain air circulation and functional access. Plan the layout to accommodate the fridge’s weight and dimensions, ensuring stability and balance. Verify door swing direction to align with kitchen workflow. Double-check all specifications against your kitchen’s dimensions to avoid installation issues. Proper pre-installation planning ensures a seamless and efficient setup process, preventing potential complications during the installation phase.

3.2 Step-by-Step Installation Process

Begin by carefully unpacking the refrigerator and inspecting for damage. Position the unit in its designated space, ensuring proper alignment with surrounding cabinetry. Connect the water supply lines to the dispenser and ice maker, following the manufacturer’s guidelines. Secure the refrigerator to the floor to prevent tipping. Install decorative door panels to match your kitchen aesthetic. Double-check all connections, including electrical and water lines, for leaks or loose fittings. Finally, test the appliance’s basic functions, such as cooling, ice production, and water dispensing, to ensure everything operates correctly. Refer to the manual for specific torque settings and safety precautions during installation.

3.3 Leveling the Refrigerator for Proper Operation

Proper leveling is essential for your GE Monogram fridge to function efficiently. Start by placing the refrigerator on a firm, level surface. Adjust the leveling legs by turning them clockwise or counterclockwise until the unit is evenly balanced. Use a spirit level to verify that the top and sides are perfectly horizontal. Ensure the doors align properly and close smoothly. If the fridge is not level, it may cause uneven cooling, poor door alignment, or drainage issues. Once leveled, secure the legs to prevent movement. This step ensures optimal performance, energy efficiency, and longevity of your appliance.

3.4 Connecting Water and Ice Dispenser Lines

To connect the water and ice dispenser lines, ensure the water supply is turned off. Locate the water inlet valve, typically behind the refrigerator or near the water dispenser. Attach one end of the water line to the inlet valve and the other to the refrigerator’s water inlet port. Tighten all connections securely to prevent leaks. Turn the water supply back on and check for any leaks by running water through the dispenser. Properly connecting these lines ensures your ice maker and water dispenser function correctly. Always use GE Appliances-branded filters for optimal performance and to maintain water quality.

Operating the GE Monogram Fridge

Operating the GE Monogram Fridge involves mastering temperature controls, navigating the user-friendly interface, and utilizing the ice and water dispensers efficiently. Optimize settings for energy efficiency.

4.1 Understanding Temperature Controls and Settings

Understanding the temperature controls and settings on your GE Monogram Fridge is crucial for maintaining optimal freshness and energy efficiency. The refrigerator features separate temperature controls for the fresh food and freezer compartments, allowing precise adjustments to suit your needs. The fresh food section typically operates between 37°F and 40°F, while the freezer ranges from 0°F to 5°F. Use the control panel to set your desired temperatures, ensuring the sensors accurately monitor and maintain these levels. Proper door seals and consistent temperature settings are key to preserving food quality and reducing energy consumption. Refer to your manual for detailed guidance on adjusting these settings effectively.

4.2 Navigating the Display and User Interface

The GE Monogram Fridge features an intuitive display and user-friendly interface designed for easy navigation. Located on the control panel, the display provides clear temperature readings, mode indicators, and status updates. Use the touch-sensitive controls to adjust settings, access advanced features, or view diagnostics. Customize preferences like ice and water dispenser settings, door alarm volume, and display brightness. The interface also includes prompts for filter replacements and maintenance reminders. Troubleshooting common issues is simplified with error code displays and on-screen guidance. Familiarize yourself with the interface to maximize convenience, efficiency, and personalized settings tailored to your lifestyle and preferences. Regular updates ensure optimal functionality and user experience.

4.3 Using the Ice and Water Dispenser Features

The GE Monogram Fridge offers convenient ice and water dispenser features for easy access to fresh water and ice. Ensure the water filter is properly installed and replaced as recommended to maintain water quality. Use the dispenser controls to select between cubed ice, crushed ice, or chilled water. The dispenser lever or touch-activated controls provide a hands-free experience. Regularly clean the dispenser area to prevent mineral buildup and bacteria growth. If issues arise, such as low ice production or water flow, check for blockages or consult the troubleshooting guide. Proper maintenance ensures the dispenser operates efficiently, delivering fresh water and ice at your convenience.

Maintenance and Care Tips

Regular cleaning, filter replacements, and defrosting ensure optimal performance. Troubleshoot common issues promptly to maintain efficiency and extend the lifespan of your GE Monogram fridge.

5.1 Cleaning the Interior and Exterior Effectively

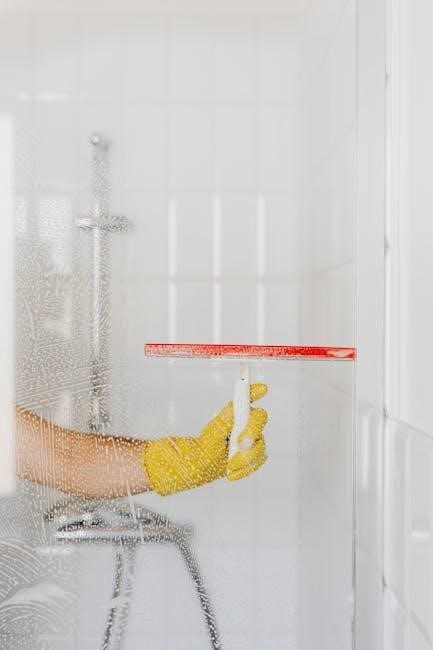
Cleaning your GE Monogram fridge regularly ensures optimal performance and hygiene. For the interior, use a mild detergent and warm water to wipe down shelves and compartments. Avoid harsh chemicals, as they may damage surfaces; The exterior can be cleaned with a soft cloth and gentle cleanser to maintain its sleek appearance. Regularly check and clean door seals to ensure proper closure and energy efficiency. For tougher stains, mix baking soda and water for a gentle yet effective solution. Always dry surfaces thoroughly after cleaning to prevent water spots. By following these steps, you can keep your refrigerator looking new and functioning at its best.

5.2 Replacing Water Filters for Optimal Performance

Regularly replacing the water filter in your GE Monogram fridge ensures clean water and ice. GE recommends using branded filters for reliability and performance. Locate the filter, typically behind the grille or in the top-right corner. Turn the filter counterclockwise to remove it, then install a new GE filter by turning it clockwise until it clicks. After replacement, flush the system by running several gallons of water through the dispenser to remove air and impurities. Replace the filter every 6 months or as indicated by the manual. Proper replacement maintains water quality, prevents odor, and ensures optimal ice production. Always refer to the mini-manual for specific instructions.

5.3 Defrosting and Maintaining the Freezer

Regular defrosting is essential for maintaining your GE Monogram freezer’s efficiency. If frost buildup exceeds 1/4 inch, manually defrost by turning off the refrigerator and removing all contents; Place towels or a drip pan at the bottom to catch water. Allow the freezer to thaw completely, then wipe down surfaces with a mild soap solution. After defrosting, ensure the drain is clear to prevent water accumulation. For optimal performance, defrost every 1-2 years or as needed. Proper maintenance prevents frost buildup, ensures even cooling, and prolongs the appliance’s lifespan. Always refer to your manual for specific defrosting instructions tailored to your model.

5.4 Troubleshooting Common Issues

Identifying and resolving common issues with your GE Monogram fridge ensures optimal performance. If the temperature fluctuates, check the settings or blocked vents. Ice buildup may indicate a clogged water filter or defective defrost system. For water dispenser problems, ensure the water supply is connected and the filter is clean. Unusual noises could result from misaligned shelves or faulty fans. Refer to the manual for specific error codes and solutions. Regular maintenance, like filter replacement and drain cleaning, prevents many issues. If problems persist, contact GE Appliances’ customer support for professional assistance. Troubleshooting early helps maintain efficiency and extends the lifespan of your appliance.

Safety Precautions and Guidelines

Ensure proper installation and usage to avoid hazards. Keep children away from sharp edges and moving parts. Use child safety locks to prevent accidental access. Always unplug during maintenance and avoid extreme temperatures. Follow guidelines to prevent damage and ensure safe operation. Refer to the manual for detailed safety measures and precautions to maintain appliance longevity and user safety.

6.1 General Safety Information for Appliance Usage

Ensure safe operation by following essential guidelines. Always keep the area around the refrigerator clear of clutter to prevent tripping hazards. Avoid overloading electrical circuits, as this can lead to fire risks. Never use damaged power cords or plugs, and keep children away from moving parts. Proper installation is crucial to prevent accidents. Regularly inspect door seals and hinges for wear. Follow the manual’s maintenance instructions to avoid mechanical failures. Use only genuine GE parts for repairs to maintain safety standards. By adhering to these precautions, you can ensure a safe and efficient appliance experience. Always consult a professional if unsure about any procedure.

6.2 Child Safety Features and Lock Mechanisms

GE Monogram refrigerators include advanced child safety features to ensure secure operation. The control lock prevents accidental changes to settings, while the dispenser lock disables ice and water access. These features are easily accessible through the user interface. Additionally, the appliance is designed with secure door handles to prevent unintended opening by children. For further safety, ensure the refrigerator is properly installed and leveled to avoid tipping hazards. Regularly check door seals and hinges to maintain tight closure. Always supervise children near the appliance and teach them to handle it responsibly. These mechanisms provide peace of mind for families with young children, ensuring a safer kitchen environment.

Energy Efficiency and Cost-Saving Tips

Optimize your GE Monogram fridge’s energy efficiency by adjusting temperature settings and using GE-branded filters. Regularly clean condenser coils to improve performance and reduce energy consumption. Ensure proper door seals to maintain consistent temperatures and minimize cold air loss. Utilize smart sensors to monitor usage patterns and adjust settings accordingly. For additional savings, refer to the energy efficiency guide provided by GE Appliances, which offers tailored recommendations for your specific model. By following these tips, you can lower your utility bills while maintaining optimal refrigerator performance and contributing to a more sustainable household.

7.1 Optimizing Settings for Energy Consumption

Optimizing your GE Monogram fridge’s settings can significantly reduce energy consumption. Start by adjusting the temperature settings to the recommended levels—typically around 37°F for the refrigerator and 0°F for the freezer. Avoid overcooling, as this increases energy usage. Utilize the energy-saving mode if available, which reduces power consumption during periods of low usage. Regularly cleaning the condenser coils ensures efficient operation and prevents unnecessary energy draw. Additionally, ensure proper door seals to maintain consistent temperatures and reduce cold air loss. For further guidance, refer to the energy efficiency guide provided in your manual, which offers model-specific tips to maximize energy savings while maintaining optimal performance.

7.2 Using GE Branded Filters for Efficiency

Using GE branded filters in your Monogram refrigerator ensures optimal water quality and ice performance. These filters meet rigorous NSF standards, guaranteeing superior filtration and taste. Regular replacement of GE filters maintains your appliance’s efficiency and prevents potential damage. The mini-manual, located behind the grille panel, provides detailed instructions for replacing filters. By using GE-branded filters, you ensure compatibility and reliability, preserving your refrigerator’s performance and longevity. Always refer to your manual for model-specific recommendations and guidelines to maintain peak efficiency and enjoy clean, fresh water and ice consistently.

Warranty and Customer Support Information

Your GE Monogram refrigerator comes with a limited warranty, ensuring coverage for parts and labor. For assistance, contact GE Appliances at 1-800-626-2005 or visit their support website for comprehensive resources and troubleshooting guides.

8.1 Understanding Your Warranty Coverage

Your GE Monogram refrigerator is protected by a limited warranty that covers parts and labor for one year from the date of purchase. Certain components, such as the sealed refrigeration system, may be covered for an extended period. The warranty ensures that defective parts are repaired or replaced free of charge during the covered period. To validate your warranty, keep your sales slip and registration documents. For detailed terms and conditions, refer to the mini-manual located behind the grille panel at the top of the refrigerator. Contact GE Appliances at 1-800-626-2005 for any warranty-related inquiries or assistance.

8.2 Contacting GE Appliances Customer Service

For assistance with your GE Monogram refrigerator, contact GE Appliances Customer Service at 1-800-626-2005. Representatives are available to address warranty questions, troubleshooting, and maintenance inquiries. Visit their official website for additional support resources, including user manuals, FAQs, and repair scheduling. You can also submit inquiries via email or through the live chat feature on their site. Ensure to have your model number and purchase details ready for efficient service. GE Appliances is committed to providing prompt and reliable support to ensure your refrigerator operates at its best, offering a seamless ownership experience with dedicated customer care.

The GE Monogram fridge manual ensures optimal performance, longevity, and satisfaction. It provides comprehensive guidance for installation, maintenance, and troubleshooting, maximizing your appliance’s value and efficiency.

9.1 Summary of Key Points and Benefits

The GE Monogram fridge manual is a detailed guide that enhances your appliance experience. It covers installation, operation, and maintenance, ensuring optimal performance. Key benefits include advanced filtration systems, customizable door panels for aesthetic integration, and energy-efficient designs. The manual also provides troubleshooting tips and warranty information, maximizing longevity and user satisfaction. By following the guidelines, you can maintain your refrigerator’s functionality and enjoy its features for years. This comprehensive resource empowers you to make the most of your investment, ensuring convenience, style, and reliability in your kitchen.

9.2 Final Tips for Longevity and Satisfaction

To ensure your GE Monogram fridge lasts for years, regular maintenance is key. Clean the interior and exterior periodically to prevent dust buildup and maintain hygiene. Replace water filters every six months for optimal performance and taste. Use GE-branded filters to ensure reliability. Defrost the freezer regularly to prevent ice accumulation and maintain efficiency. Check door seals for proper closure to preserve temperature settings and reduce energy consumption. Organize shelves and compartments wisely to maximize space and accessibility. Follow the manual’s guidelines for troubleshooting and address issues promptly. By adhering to these tips, you’ll enjoy a durable, efficient, and satisfying refrigerator experience.

manual refrigerador frigidaire 2 puertas

Welcome to the Frigidaire 2-Door Refrigerator Manual! This guide provides essential information for understanding, installing, and maintaining your appliance. Explore features, safety tips, and troubleshooting solutions to optimize performance and extend longevity. The manual is available online in PDF format for easy access and reference.

1.1 Overview of the Frigidaire 2-Door Refrigerator

The Frigidaire 2-Door Refrigerator is a versatile appliance designed for modern kitchens. It features adjustable shelving, spacious compartments, and advanced functions like ice makers and water dispensers. Available in various models, it offers a blend of efficiency, durability, and user-friendly design. With energy-saving technology and customizable storage options, this refrigerator caters to diverse household needs while maintaining sleek aesthetics. Its robust construction ensures long-lasting performance, making it a reliable choice for everyday use.

1.2 Importance of Reading the Manual

Reading the Frigidaire 2-Door Refrigerator manual is essential for understanding its features, proper installation, and maintenance. It provides safety precautions, installation guidelines, and troubleshooting tips. The manual helps users optimize energy efficiency, understand warranty details, and resolve common issues without professional assistance. By following the instructions, you ensure the appliance operates efficiently, prolong its lifespan, and maintain performance. It also highlights key features like the ice maker and water dispenser, ensuring you get the most out of your refrigerator.

Safety Instructions

Always follow safety guidelines to ensure safe operation of your Frigidaire 2-Door Refrigerator. This includes proper electrical connections, handling, and avoiding hazards to prevent accidents and damage.

2.1 General Safety Precautions

For safe operation, always follow these guidelines: avoid exposure to extreme temperatures, keep flammable materials away, and ensure proper ventilation. Never overload shelves or compartments, as this can cause instability. Regularly inspect door seals for damage to maintain efficiency and prevent air leaks. Avoid placing hot objects directly on surfaces, and ensure children are supervised near the appliance. Properly handle electrical components, and never attempt repairs without disconnecting power. These precautions help prevent accidents and ensure optimal performance of your Frigidaire 2-Door Refrigerator.

2.2 Electrical Safety Guidelines

Ensure your Frigidaire 2-Door Refrigerator is connected to a grounded electrical outlet rated for its power requirements. Avoid using extension cords or overloaded circuits, as this could cause electrical hazards. Keep the power cord away from water and heat sources to prevent damage. Never unplug the refrigerator by pulling the cord; always grasp the plug firmly. If the outlet or cord shows signs of wear, discontinue use until repaired. Proper electrical connections are crucial for safe and efficient operation of your appliance.

2.3 Handling and Moving the Refrigerator Safely

Before moving your Frigidaire 2-Door Refrigerator, disconnect it from power and drain water lines if applicable. Empty all compartments to reduce weight and prevent damage. Protect the floor with cardboard or a dolly to avoid scratches. Ensure the refrigerator is upright during transport to maintain internal components. Secure doors with tape to prevent opening during movement. Always lift carefully, using assistance if needed, and avoid sudden jerks. After moving, allow the appliance to stand upright for 24 hours before reconnecting to power. This ensures proper operation and prevents damage to the compressor.

Installation and Setup

Proper installation ensures optimal performance. Choose a well-ventilated area, level the refrigerator, and follow guidelines for electrical connections. Ensure doors align correctly for smooth operation.

3.1 Choosing the Right Location for Your Refrigerator

Selecting the right location for your Frigidaire 2-door refrigerator is crucial for optimal performance. Ensure the area is well-ventilated to maintain energy efficiency and prevent overheating. Avoid placing it near direct sunlight or moisture sources, as this can affect temperature regulation. The refrigerator should also be positioned away from heat-producing appliances like ovens or dishwashers. Additionally, choose a level surface to ensure proper door alignment and sealing. Keep sufficient space around the unit for easy maintenance and access. Proper placement enhances functionality and longevity.

3.2 Leveling the Refrigerator

Proper leveling ensures your Frigidaire 2-door refrigerator operates efficiently and prevents issues like door misalignment or noise. Begin by placing the appliance on a firm, level surface. Adjust the leveling feet by turning them clockwise or counterclockwise until the unit is stable. Use a spirit level to confirm even placement. Once leveled, tighten the adjustment locking nuts to secure the feet in position. Ensure the doors open and close smoothly to verify proper alignment. Correct leveling is essential for optimal performance and longevity of your refrigerator.

3.3 Removing and Reinstalling the Doors

To remove the doors, start by detaching the hinges. Gently lift the door off the hinge pins and set it aside securely. For reinstallation, align the door with the hinges and lower it carefully onto the pins. Ensure proper alignment and tighten the hinge screws firmly. If adjusting the door height is needed, use the adjustment screws on the hinge pins. Always handle doors with care to avoid damage or injury. Reinstalling correctly ensures smooth operation and proper sealing of the refrigerator.

3.4 Installing the Door Handles

Installing the door handles on your Frigidaire 2-door refrigerator is a straightforward process. Begin by aligning the handle with the pre-drilled holes on the door. Secure it using the provided screws, ensuring they are tightened firmly but avoid overtightening. Repeat the process for the second door if necessary. Handle installation ensures proper functionality and ease of use. Always follow the manufacturer’s guidelines for precise alignment to maintain the refrigerator’s aesthetic and performance. Properly installed handles will provide years of reliable service. Handle with care to prevent damage during installation.

Features of the Frigidaire 2-Door Refrigerator

The Frigidaire 2-door refrigerator offers ample storage, adjustable shelving, and door compartments for organization. Features include an ice maker, water dispenser, and energy-efficient cooling systems for optimal performance.

4.1 Storage Capacities and Compartments

The Frigidaire 2-door refrigerator offers spacious storage with adjustable shelves and door compartments. These features allow for efficient organization of groceries and perishables, ensuring optimal use of space. The compartments are designed to keep items fresh and easily accessible, making it ideal for everyday use. Additionally, the freezer compartment provides ample room for storing frozen foods, maintaining their quality with consistent temperatures. This setup ensures convenience and maximizes storage capacity for various household needs.

4.2 Ice Maker and Water Dispenser Functions

The Frigidaire 2-door refrigerator features an ice maker that automatically produces and dispenses ice cubes. The water dispenser provides fresh, filtered water at the touch of a button. Both functions are designed for convenience, with easy-to-use controls and indicators for when the ice bucket is full or the water filter needs replacement. Regular maintenance, such as cleaning the dispenser and replacing the water filter, ensures optimal performance and freshness. These features enhance everyday hydration and entertaining needs, offering added value to your kitchen experience.

4.3 Adjustable Shelving and Door Storage

The Frigidaire 2-door refrigerator offers adjustable shelving, allowing you to customize storage space according to your needs. The shelves can be easily moved or removed to accommodate taller items, ensuring efficient use of interior space. Additionally, the door storage compartments provide ample room for bottles, jars, and other essentials, keeping them within easy reach. This feature enhances organization and accessibility, making it simpler to manage your groceries and maintain a clutter-free fridge.

Operating the Refrigerator

Set temperature controls for optimal cooling, ensure proper door closure, and utilize features like the ice maker and water dispenser. Regular operation ensures efficient performance and food freshness.

5.1 Setting the Temperature Controls

Locate the temperature control dials in the refrigerator and freezer sections. Adjust the dials to achieve the desired cooling levels, ensuring optimal food preservation. The recommended temperature for the refrigerator is between 37°F and 40°F, while the freezer should be set at 0°F. Use the controls to maintain consistent temperatures, which helps in energy efficiency and prevents food spoilage. Regularly monitor the temperature settings to ensure proper functionality and adjust as needed based on usage patterns and seasonal changes.

5.2 Using the Ice Maker and Water Dispenser

To use the ice maker, ensure it is turned on and properly connected to a water supply. The ice maker will automatically produce ice once the freezer reaches the set temperature. For the water dispenser, press and hold your cup against the paddle or button to dispense water. Regularly check the water filter to ensure clean water flow and ice production. If issues arise, such as low ice production or slow water flow, refer to the troubleshooting section or consider replacing the water filter. Always use filtered water for optimal performance and taste.

5.3 Opening and Closing the Doors Properly

Always open and close the refrigerator doors gently to maintain proper alignment and door seal integrity. Avoid slamming the doors, as this can damage the hinges or seals. Ensure the doors close fully to prevent cold air from escaping and energy waste. Regularly inspect the door seals for wear or damage. If the doors do not align or close properly, adjust the leveling feet or consult the manual for alignment instructions. Proper door handling ensures efficient operation and extends the appliance’s lifespan.

Maintenance and Care

Regular maintenance ensures optimal performance and longevity of your Frigidaire refrigerator. Clean the interior and exterior, replace water filters, and inspect door seals to maintain efficiency and freshness.

6.1 Cleaning the Interior and Exterior

Regular cleaning is crucial for maintaining your Frigidaire 2-door refrigerator’s performance and hygiene. Start by removing all contents and shelves, then wipe the interior with a mild soap solution. Dry thoroughly to prevent moisture buildup. For the exterior, use a soft cloth and gentle detergent to avoid scratching the finish. Clean door seals with a mixture of warm water and baking soda to ensure proper sealing. Avoid harsh chemicals, as they may damage surfaces. Regular cleaning prevents odors and maintains your refrigerator’s efficiency and appearance.

6.2 Replacing the Water Filter

Regularly replacing the water filter in your Frigidaire 2-door refrigerator is essential for clean water and ice. Locate the filter, typically found in the top-right corner or behind the bottom grill. Turn off the water supply valve before removing the old filter by turning it counterclockwise. Install the new filter by aligning it properly and turning it clockwise until it clicks. Flush the system by running water through the dispenser for 2-3 minutes to remove air bubbles. Replace the filter every 6 months or as indicated in your manual to maintain optimal performance and water quality.

6.3 Checking and Replacing Door Seals

Regularly inspect the door seals of your Frigidaire 2-door refrigerator to ensure a tight seal, essential for energy efficiency and food freshness. To check the seal, place a dollar bill between the door and the refrigerator; if it falls out easily, the seal may be compromised. Visually inspect for wear, cracks, or tears. For replacement, purchase a compatible seal, remove the old one carefully with a screwdriver, clean the area, and press the new seal firmly into place. Ensure proper alignment and allow time for adhesion. If misaligned, adjust the door hinges or level the refrigerator. Replace seals every 2-5 years or as needed for optimal performance.

6.4 Defrosting the Freezer Compartment

To defrost the freezer compartment of your Frigidaire 2-door refrigerator, start by turning off the appliance and removing all contents; Take out shelves and compartments to allow ice to melt naturally. Use a towel to absorb excess water. After defrosting, clean the area with a mild detergent and rinse thoroughly. Ensure the compartment is dry before restarting the refrigerator. Regular defrosting, ideally every 6 months, improves efficiency and prevents ice buildup. Always check for proper door alignment and drainage after defrosting to avoid water accumulation issues.

Troubleshooting Common Issues

Address common problems like door alignment, temperature fluctuations, and noise by checking seals, adjusting settings, and ensuring proper installation. Consult the manual for detailed solutions.

7.1 Door Alignment and Closing Problems

Door alignment issues can prevent proper sealing, reducing efficiency. Check for misaligned doors, loose hinges, or worn door seals. Ensure the refrigerator is level, as uneven surfaces can cause poor closure. If the doors don’t close tightly, inspect the seals for damage or dirt. Clean or replace seals as needed. Adjust hinges to align doors correctly. If problems persist, consult the manual for further troubleshooting steps or contact Frigidaire support for assistance.

7.2 Temperature Fluctuations

Temperature fluctuations in your Frigidaire 2-door refrigerator can occur due to improper settings, sensor issues, or poor door sealing. Check if the temperature controls are set correctly. Ensure the doors close tightly and seals are intact. Overloading the compartments can also disrupt air circulation, leading to uneven cooling. If the issue persists, inspect the temperature sensors or restart the refrigerator. Refer to the manual for recalibration instructions or contact Frigidaire support for professional assistance to maintain optimal performance and energy efficiency.

7.3 Noise Issues

Noise issues with your Frigidaire 2-door refrigerator may stem from the compressor, fan motors, or ice maker. Ensure the appliance is level, as imbalance can cause vibration. Check for loose parts, such as shelves or door handles, and tighten them. If unusual noises persist, inspect the drain for blockages or defrost the freezer to remove ice buildup. Refer to the manual for troubleshooting steps or contact Frigidaire customer support for professional assistance to resolve the issue and restore quiet operation.

7.4 Ice Maker Malfunctions

If your Frigidaire 2-door refrigerator’s ice maker is not functioning properly, check the water supply line for kinks or blockages. Ensure the water filter is clean and properly installed, as a clogged filter can restrict water flow. Verify that the ice maker switch is turned on and the freezer temperature is set correctly. If issues persist, consult the manual for troubleshooting steps or contact Frigidaire customer support for assistance. Regular maintenance, such as replacing the water filter, can help prevent malfunctions and ensure optimal performance.

Energy Efficiency and Savings

Optimize energy savings with Energy Star-certified Frigidaire 2-door refrigerators. Proper door sealing and temperature adjustments reduce consumption. Refer to the manual for additional eco-friendly tips and settings.

8.1 Understanding Energy Consumption

Understanding energy consumption helps maximize efficiency. Frigidaire 2-door refrigerators are designed to minimize energy use while maintaining performance. Key factors include compressor operation, insulation quality, and door sealing. Regular maintenance, like cleaning condenser coils, ensures optimal energy efficiency. The manual provides guidelines to help you monitor and reduce energy usage effectively, contributing to lower utility bills and environmental impact. By following these tips, you can enjoy both savings and reliability.

8.2 Tips for Reducing Energy Usage

To reduce energy consumption, ensure your Frigidaire 2-door refrigerator operates efficiently. Regularly clean condenser coils to maintain airflow and check door seals for proper closure. Avoid overloading the fridge, as this can strain the compressor. Set temperatures between 37°F and 40°F for the refrigerator and 0°F for the freezer. Minimize door openings and ensure they close tightly. These practices help lower energy use while maintaining performance and extending appliance life.

8.4 Energy Star Certification

The Frigidaire 2-door refrigerator with Energy Star certification meets energy efficiency standards set by the U.S. Environmental Protection Agency. This certification ensures the appliance uses less energy than standard models, reducing utility bills and environmental impact. Energy Star certified models are designed to provide reliable performance while consuming fewer resources. Look for the Energy Star logo when selecting your refrigerator to support energy savings and sustainability.

Warranty and Customer Support

Frigidaire offers comprehensive warranty coverage for their 2-door refrigerators, ensuring protection against defects. Customers can contact support through the official website or authorized service providers for assistance and inquiries.

9.1 Understanding Your Warranty Coverage

Frigidaire’s warranty ensures your 2-door refrigerator is protected against manufacturing defects. Coverage typically includes parts and labor for a specified period, varying by model. Proper registration and adherence to maintenance guidelines are essential for validity. The warranty does not cover damage caused by misuse or improper installation. Refer to your manual for detailed terms and conditions. Understanding your coverage helps maximize protection and ensures peace of mind for your appliance investment.

9.2 Contacting Frigidaire Customer Service

For assistance with your Frigidaire 2-door refrigerator, contact customer service via phone, email, or live chat through their official website. Representatives are available to address questions, warranty claims, and repair requests. Ensure you have your model number and serial number ready for efficient support. Visit Frigidaire’s website for contact details and additional resources to resolve your inquiries promptly and effectively.

9.3 Finding Authorized Service Providers

To ensure your Frigidaire 2-door refrigerator receives proper care, use authorized service providers. Visit Frigidaire’s official website and use their service provider lookup tool. Enter your location and model number to find certified technicians near you. Additionally, trusted sites like ManualsLib and ManualPDF.es offer resources to locate authorized services. Always verify the provider’s credentials and read reviews to ensure reliable and warranty-compliant repairs.

Downloading the Manual Online

Visit Frigidaire’s official website or trusted platforms like ManualsLib and ManualPDF.es to download the manual for your 2-door refrigerator. Enter your model number to find and download the PDF guide.

10.1 Finding the Correct Manual for Your Model

To find the correct manual for your Frigidaire 2-door refrigerator, visit the official Frigidaire website or trusted platforms like ManualsLib and ManualPDF.es. Enter your specific model number in the search bar to locate the corresponding guide. Ensure the model number matches your appliance to download the accurate manual. Websites like ManualPDF.es host over 4,600 Frigidaire manuals, including detailed instructions for 2-door refrigerator models. Verify the document title and model compatibility before downloading to ensure relevance.

10.2 Websites to Download the Frigidaire Manual

Access the Frigidaire 2-door refrigerator manual through trusted websites like ManualsLib and ManualPDF.es. These platforms offer free downloads, with ManualsLib hosting over 1,890 Frigidaire refrigerator manuals. Visit the official Frigidaire website for direct access to your model’s guide. Ensure you’re on a secure site to avoid unauthorized downloads. Enter your model number, such as FFHS2622MS or FPRU19F8RF, to find the exact manual. These resources provide comprehensive guides for installation, operation, and troubleshooting your appliance efficiently.

10.3 Troubleshooting Manual Download Issues

If you encounter issues downloading the Frigidaire manual, ensure your internet connection is stable. Verify the model number, such as FFHS2622MS or FPRU19F8RF, to avoid downloading the wrong manual. Check for broken links or slow download speeds, which may require retrying the process. If the manual fails to open, ensure your device supports PDF format. Contact Frigidaire customer support or visit trusted sites like ManualsLib or ManualPDF.es for assistance. These platforms often resolve common download problems promptly.

Additional Resources

Frigidaire offers video tutorials on their official website and platforms like YouTube, covering installation, maintenance, and troubleshooting for models like FFHS2622MS and FPRU19F8RF.

11.1 Frigidaire Official Website

The Frigidaire official website is a comprehensive resource for users, offering detailed product information, downloadable manuals, and troubleshooting guides. Visitors can explore features of specific models, such as the FFHS2622MS and FPRU19F8RF, and access user-friendly guides for installation, maintenance, and operation. The site also provides links to video tutorials and customer support services, ensuring a seamless experience for owners of Frigidaire 2-door refrigerators.

11.2 User Forums and Communities

User forums and communities are valuable resources for Frigidaire 2-door refrigerator owners. Platforms like ManualsLib and ManualPDF.es host discussions where users share experiences, troubleshooting tips, and solutions. These forums allow owners to ask questions, receive advice, and learn from others who have encountered similar issues. They also provide access to user-generated guides and real-world insights, making them a great supplement to the official manual for resolving common problems like door alignment or temperature fluctuations.

11.3 Video Tutorials and Guides

Video tutorials and guides are excellent resources for visual learners seeking to understand and maintain their Frigidaire 2-door refrigerator. Official Frigidaire channels and platforms like YouTube offer step-by-step instructions for tasks such as installing water filters, adjusting shelves, and troubleshooting common issues. These videos provide hands-on demonstrations, making complex procedures easier to follow. Additionally, user-generated content often includes practical tips and real-world applications, enhancing your ability to optimize your refrigerator’s performance and address any challenges effectively.

manual gearbox service

A manual gearbox, or transmission, requires regular maintenance to ensure smooth operation and longevity. Servicing involves checking fluids, inspecting components, and addressing wear or damage. Proper care prevents costly repairs and enhances performance. This guide provides a comprehensive overview of manual gearbox service procedures.

1.1 Importance of Regular Servicing

Regular servicing of a manual gearbox is essential to maintain optimal performance and prevent premature wear. It ensures smooth gear shifting, reduces the risk of costly repairs, and extends the lifespan of components. By checking transmission fluid, inspecting the clutch system, and monitoring gear operation, potential issues can be identified early. Proper maintenance also enhances driving comfort and reliability, making it a critical part of vehicle care. Neglecting servicing can lead to major failures, emphasizing the need for consistent attention to this vital system.

1.2 Overview of Manual Gearbox Components

A manual gearbox consists of several key components, including gears, shafts, bearings, synchronizers, and seals. The gears and shafts transmit power and facilitate speed changes. Bearings support moving parts, ensuring smooth operation. Synchronizers enable smooth gear transitions, while seals and gaskets prevent fluid leaks. The clutch system, connected to the gearbox, engages and disengages power from the engine. Understanding these components is crucial for effective servicing, as each part plays a vital role in overall transmission functionality and performance.

Benefits of Manual Gearbox Maintenance

Regular servicing ensures smoother gear shifts, extends component lifespan, and prevents costly repairs. Proper maintenance enhances overall performance and reliability, making driving more enjoyable and efficient.

2.1 Improved Gear Shifting Smoothness

Regular manual gearbox maintenance significantly enhances gear shifting smoothness by ensuring proper lubrication and reducing wear on components. Fresh transmission fluid prevents sludge buildup, allowing gears to engage seamlessly. Cleaning or replacing the gearbox filter removes contaminants that can cause rough shifting. Inspecting and addressing worn synchronizers or bearings early prevents hesitation or grinding during gear changes. A well-maintained clutch system also contributes to smoother transitions between gears. These steps collectively ensure a more responsive and enjoyable driving experience, making manual shifting feel effortless and precise.

2.2 Extended Lifespan of Gearbox Components

Regular manual gearbox maintenance extends the lifespan of components by preventing excessive wear and tear. Changing gearbox oil removes contaminants and reduces friction, protecting gears and bearings. Inspecting and replacing worn parts, such as synchronizers or seals, before they fail prevents further damage. Proper lubrication ensures smooth operation, reducing stress on moving parts. Addressing issues early avoids costly repairs and prolongs the durability of the entire system. Consistent care ensures that gearbox components function optimally for years, maintaining reliability and performance.

2.3 Prevention of Costly Repairs

Regular manual gearbox maintenance helps prevent costly repairs by identifying and addressing issues before they escalate. Replacing worn components, such as bearings or synchronizers, early can avoid major damage. Checking transmission fluid condition ensures proper lubrication, reducing wear on gears and shafts. Inspecting seals and gaskets prevents leaks, which can lead to catastrophic failure. By addressing minor problems during servicing, you avoid expensive overhauls and ensure the gearbox operates reliably. Early detection of issues saves time and money, keeping your vehicle on the road without unexpected breakdowns or repair bills.

Preparing for Manual Gearbox Service

Preparing for manual gearbox service involves gathering tools, materials, and safety gear. Locate the gearbox, drain the fluid, and ensure proper access to components for inspection and maintenance.

3.1 Tools and Materials Needed

Servicing a manual gearbox requires specific tools and materials. Essential tools include a socket set, wrenches, drain pan, and gasket scraper. Materials needed are gearbox oil, filters, and gaskets. Additional items like sealants and cleaning fluids ensure proper maintenance. Always refer to the manufacturer’s manual for specific requirements. Using high-quality materials, such as OEM-approved oils and filters, is crucial for optimal performance. Proper tools and materials ensure the service is done efficiently and effectively, preventing further damage and ensuring longevity of the gearbox.

3.2 Safety Precautions

When servicing a manual gearbox, safety is paramount. Always wear protective gear, including gloves and goggles, to prevent injury from sharp edges or fluid splatters. Ensure the vehicle is securely lifted on jack stands and apply the parking brake. Avoid working near open flames or sparks, as transmission fluid can be flammable. Properly ventilate the workspace to avoid inhaling harmful fumes. Be cautious of hot components, such as the exhaust system, which may be warm during service. Never attempt to drain gearbox fluid while the engine is running. Always follow proper procedures for handling and disposing of transmission fluid to protect the environment.

3.3 Locating the Gearbox and Accessing Components

Locating the manual gearbox typically involves accessing it from underneath the vehicle or through the transmission tunnel. For most models, the gearbox is positioned between the engine and the driveshaft, connected to the clutch system. To access components, remove the gearbox housing bolts and gently pry it open. Be careful not to damage the mating surfaces. For front-wheel-drive vehicles, the gearbox is often transverse-mounted, requiring removal of the lower covers. Always consult the vehicle’s repair manual for specific disassembly instructions, as some models may have unique access points or fasteners. Proper alignment is crucial when reassembling.

Diagnostic Procedures

Diagnosing manual gearbox issues involves checking fluid condition, identifying noises, and inspecting for vibrations or gear wear. These steps help pinpoint problems before they lead to major repairs.

4.1 Identifying Common Problems

Common manual gearbox issues include worn bearings, damaged gears, and faulty synchronizers. Noises like whining or grinding during operation often indicate these problems. Transmission fluid leaks, difficulty shifting gears, and vibrations while driving are other key signs. Regular inspection of the clutch system and gearbox fluid condition can help identify issues early. Addressing these problems promptly prevents further damage and costly repairs. Early detection ensures smoother operation and extends the lifespan of the gearbox components. Always refer to the service manual for specific diagnostic procedures and guidelines.

4.2 Checking Transmission Fluid Condition

Checking the transmission fluid is crucial for maintaining manual gearbox health. Locate the filler plug, drain the fluid, and inspect its color and consistency. Clean, amber-colored fluid indicates good condition, while dark or gritty fluid suggests contamination. Check for metal shavings, which indicate worn components. If the fluid level is low or the fluid is degraded, replace it with the recommended type. Regular fluid checks prevent damage to gears and bearings, ensuring smooth operation. Always refer to the manufacturer’s guidelines for the correct fluid type and replacement interval.

4.3 Diagnosing Noises and Vibrations

Noises and vibrations in a manual gearbox can indicate underlying issues. Common causes include worn bearings, damaged gears, or misaligned shafts. A grinding noise during gear shifts may signal worn synchronizers or gear teeth. Whining or humming sounds could point to faulty bearings. Vibrations might stem from imbalanced components or loose mounts. To diagnose, listen carefully to the noise, feel for vibrations, and inspect components for wear or damage. Addressing these issues promptly prevents further damage and ensures smooth operation. Regular maintenance, such as lubrication, can help reduce wear and noise.

Maintenance Tasks

Regular maintenance ensures smooth operation and extends gearbox life. Tasks include draining and replacing gearbox fluid, inspecting filters, checking the clutch system, and replacing worn components promptly.

5.1 Draining and Replacing Gearbox Fluid

Draining and replacing gearbox fluid is essential for maintaining smooth operation. Locate the drain plug, position a pan, and carefully drain the old fluid. Inspect the fluid for contaminants or sludge, which indicate wear. Use a high-quality gearbox oil suitable for your vehicle, as specified in the manual. Refill to the recommended level, ensuring no overfilling. Replace the drain plug and test the gearbox to ensure proper shifting. Regular fluid changes prevent corrosion, reduce wear, and extend the lifespan of gears and bearings. This task is typically recommended every 30,000 to 50,000 miles, depending on usage.

5.2 Inspecting and Replacing the Gearbox Filter

Inspecting and replacing the gearbox filter is crucial for maintaining optimal performance. Locate the filter, typically near the pan or attached to the gearbox casing. Remove it carefully and examine for debris or contamination. If damaged or clogged, replace it with a high-quality filter designed for your specific gearbox. Ensure proper installation to avoid leaks or improper sealing. Replace the filter every 30,000 to 50,000 miles, or as recommended by the manufacturer. A clean filter prevents contamination of gears and bearings, ensuring smooth operation and extending the gearbox lifespan. Always use the correct replacement part for your vehicle.

5.3 Checking the Clutch System

Checking the clutch system is essential for ensuring smooth gear engagement and preventing premature wear. Inspect the clutch pedal for proper travel and resistance, ensuring it disengages fully. Examine the slave and master cylinders for leaks or damage. Check the release bearing and clutch fork for wear or misalignment. Look for signs of excessive wear on the clutch disc, pressure plate, and flywheel. If the clutch shows significant wear or slippage, replace it promptly to avoid damaging the gearbox. Regular inspection helps maintain optimal performance and avoids costly repairs down the line.

5.4 Inspecting and Replacing Seals and Gaskets

Inspecting and replacing seals and gaskets is crucial for preventing leaks and ensuring the gearbox operates efficiently. Start by examining the input and output shaft seals for signs of wear or damage. Check the gaskets between the gearbox casing and other components for any leaks or deterioration. If leaks or wear are found, replace the affected seals or gaskets promptly using high-quality materials compatible with the gearbox oil. Proper installation ensures a tight seal, preventing fluid loss and contamination. Regular inspection and replacement of these components help maintain gearbox performance and prevent costly repairs. Always follow manufacturer guidelines for replacement procedures.

Common Repairs

Common manual gearbox repairs include replacing worn bearings, fixing damaged gears, and updating synchronizers. Addressing these issues promptly ensures smooth operation and prevents further damage.

6.1 Replacing Worn Bearings

Replacing worn bearings in a manual gearbox is essential for maintaining smooth gear rotation and overall transmission performance. Bearings are typically located on the input and output shafts, where gears spin. To access them, the transmission must be removed, and the gearbox casing disassembled. Worn bearings are usually pressed onto shafts, requiring a bearing puller for safe removal. After cleaning the area, new bearings are installed, ensuring proper alignment. A hydraulic press or bearing installer tool may be necessary. Reassembly involves securing all components and reattaching the transmission. Testing the car post-replacement is crucial to ensure smooth operation and to check for any unusual noises. Proper lubrication with recommended gearbox oil is also important for longevity.

6.2 Repairing or Replacing Damaged Gears

Damaged gears in a manual gearbox can cause grinding noises, difficulty shifting, and poor power transmission. Repairing or replacing gears requires disassembling the transmission to access the gear train. Each gear is inspected for wear, chipping, or breakage. Minor damage, like light wear, may be polished out, but severely damaged gears must be replaced. New gears are installed, and the gearbox is reassembled. Proper lubrication is essential to prevent future wear. Testing the transmission post-repair ensures smooth operation and eliminates any lingering issues. Regular maintenance can help identify gear damage early, preventing costly overhauls.

6.3 Replacing Synchronizers

Synchronizers are critical for smooth gear shifting in a manual gearbox. When worn or damaged, they cause difficulties in engaging gears, often accompanied by grinding noises. Replacement involves dismantling the transmission to access the synchronizer rings and hubs. Each synchronizer is inspected and replaced if necessary. New synchronizers are installed, ensuring proper alignment and function. After reassembly, the gearbox is tested to confirm smooth shifting. Regular inspection of synchronizers during maintenance can prevent major issues. Proper lubrication and adjustment are essential for optimal performance and longevity of the gearbox components. This procedure ensures reliable gear engagement and enhances driving experience.

Troubleshooting Common Issues

Identifying problems early prevents major repairs. Common issues include noisy operation, fluid leaks, and gear shifting difficulties. Regular checks and addressing symptoms promptly ensure smooth functionality and longevity.

7.1 Difficulties in Shifting Gears

Difficulties in shifting gears are common issues in manual gearboxes, often caused by worn synchronizers, faulty clutch systems, or low transmission fluid levels. Noises during shifting, such as grinding or clunking, may indicate damaged gears or bearings. Regular checks of the clutch system and transmission fluid condition can help identify problems early. Replacing worn components and ensuring proper lubrication are key solutions. Addressing these issues promptly prevents further damage and ensures smooth gear transitions, enhancing overall driving performance and extending gearbox lifespan. Proper diagnosis and timely repairs are essential for maintaining optimal functionality.

7.2 Transmission Fluid Leaks

Transmission fluid leaks are a common issue in manual gearboxes, often caused by worn seals, gaskets, or damaged drain plugs. Over time, these components can degrade, allowing fluid to escape. Leaks may appear around the gearbox housing, input or output shafts, or pan gasket. Inspecting the gearbox regularly can help identify leaks early. Replacing faulty seals or gaskets and tightening connections are typical solutions. Ignoring leaks can lead to fluid loss, overheating, and potential gearbox damage. Addressing leaks promptly ensures proper lubrication and prevents costly repairs. Regular checks are crucial for maintaining gearbox health and performance.

7.3 Unusual Noises During Operation

Unusual noises during operation can indicate issues within the manual gearbox. Grinding or clunking sounds while shifting may suggest worn synchronizers or damaged gear teeth. Whining or humming noises could point to faulty bearings or gears. Clattering sounds might indicate loose or damaged components. Identifying the source of the noise is crucial for proper diagnosis. Regular inspection of gearbox components, such as gears, bearings, and shafts, can help detect problems early. Addressing these issues promptly prevents further damage and ensures smooth operation. Ignoring unusual noises can lead to costly repairs, emphasizing the importance of timely intervention and maintenance.

Lubrication and Cooling

Proper lubrication and cooling are essential for maintaining manual gearbox performance. Using the correct gearbox oil ensures smooth operation and protects components from wear. Regular cooling system inspections prevent overheating, which can damage gears and bearings. Adequate lubrication enhances efficiency and extends gearbox lifespan, while a well-functioning cooling system maintains optimal operating temperatures, ensuring reliability and durability.

8;1 Recommended Gearbox Oil Types

Choosing the right gearbox oil is crucial for optimal performance. Manual transmissions typically require high-performance oils with viscosity grades suitable for varying temperatures. Synthetic or semi-synthetic oils are preferred due to their superior lubrication properties and thermal stability. Some manufacturers specify particular formulations, such as those with additives to reduce wear on gears and bearings. It’s essential to consult the vehicle’s service manual or manufacturer guidelines to select the correct oil type. Using the wrong oil can lead to premature wear, noise, and even gearbox failure, emphasizing the importance of adhering to recommendations.

8.2 Checking and Refilling Gearbox Oil

Regularly checking the gearbox oil level ensures proper lubrication and prevents damage. Locate the oil filler plug, typically at the top of the gearbox, and the drain plug at the bottom. Use a dipstick or consult the manual for specific instructions. If the oil level is low, top it up with the recommended type. Avoid overfilling, as it can lead to leaks or damage. Always refer to the manufacturer’s guidelines for the correct procedure, ensuring the oil level is accurate. This simple maintenance step is vital for the longevity and smooth operation of the manual gearbox.

8.3 Inspecting the Gearbox Cooling System

Inspecting the gearbox cooling system is crucial for maintaining its performance and longevity. Start by examining the coolant hoses for cracks, leaks, or damage. Ensure the radiator is clean and free of debris to allow proper airflow. If equipped, check the oil cooler for blockages or damage. Verify that the cooling system is functioning correctly by monitoring the temperature gauge during operation. Consult the service manual for specific procedures. Neglecting the cooling system can lead to overheating, which may cause irreversible damage to the gearbox components. Regular inspections help prevent such issues.

Reassembly and Testing

Reassembly requires careful attention to detail to ensure all components are correctly aligned and secured. After reassembly, test the gearbox by shifting through all gears smoothly to confirm proper function and eliminate any issues.

9.1 Proper Reassembly Techniques

Reassembling the manual gearbox requires meticulous attention to detail. Start by ensuring all components, such as bearings and gears, are thoroughly cleaned and lubricated. Use torque wrenches to tighten bolts and nuts to manufacturer specifications. Pay special attention to the alignment of the main shaft and gear clusters to avoid misalignment, which can lead to premature wear. Always refer to the service manual for specific instructions, as improper reassembly can result in poor performance or complete gearbox failure. Proper sequencing of reassembly steps is crucial for optimal functionality and longevity.

9.2 Testing the Gearbox After Service

After reassembling the gearbox, perform a thorough test to ensure proper functionality. Check for smooth gear shifting and engagement, ensuring no unusual noises or vibrations. Test drive the vehicle under various conditions to verify performance. Listen for any abnormal sounds that may indicate issues. Inspect for leaks around seals and gaskets. Verify the clutch system operates smoothly without slippage. Ensure all gears engage evenly and there are no delays in shifting. If any problems arise, revisit the reassembly process to identify and correct potential errors. Proper testing ensures the gearbox operates reliably and efficiently.

Cost Estimation

Manual gearbox service costs vary depending on parts and labor. DIY servicing saves money, while professional repair shops charge labor fees. Estimate parts between $50–$200 and labor at $100–$300. Total costs range from $150–$500, excluding complex repairs. Regular maintenance reduces long-term expenses by preventing major overhauls. Compare prices for oils, filters, and seals to budget effectively. DIY kits are cost-effective, while specialized tools may add to expenses; Plan according to your vehicle’s specific needs and local service rates. Always check for discounts or promotions to minimize spending. Proper planning ensures affordable and efficient servicing.

10.1 Parts and Labor Costs

Parts costs for manual gearbox service vary based on quality and brand. Transmission fluid typically ranges from $10 to $30 per liter, while filters cost between $10 to $25. Seals and gaskets can range from $20 to $100, depending on the type and quantity. Labor costs vary by mechanic or shop, averaging $75 to $150 per hour. For a standard service, expect labor fees of $200 to $400. Combining parts and labor, a basic service can cost $300 to $600. However, complex repairs or component replacements, like bearings or synchronizers, can increase costs significantly, potentially reaching $1,000 or more.

10.2 DIY vs. Professional Service

DIY manual gearbox service can save money but requires mechanical expertise and specialized tools. It suits knowledgeable enthusiasts who can follow detailed repair manuals. Professional service, while more expensive, ensures expert handling, warranty coverage, and access to genuine parts. DIY risks include improper reassembly and potential damage, while professionals guarantee quality and efficiency. For complex repairs, professional service is highly recommended to avoid further complications. Balancing cost, skill level, and desired outcomes helps determine the best approach for servicing a manual gearbox.

Regular servicing of a manual gearbox is essential for smooth operation and longevity. Addressing wear and leaks early prevents costly repairs. DIY and professional options cater to different expertise levels, ensuring optimal gearbox performance and durability.

11.1 Summary of Key Points

Regular maintenance is crucial for manual gearbox longevity. Key tasks include fluid changes, clutch inspections, and seal replacements. Addressing issues like leaks or noise early prevents major repairs. Proper lubrication enhances smooth shifting and reduces wear. DIY servicing can save costs, but complex repairs may require professional expertise. Consistent care ensures optimal performance and extends gearbox life, making it a cost-effective investment for vehicle reliability and driver satisfaction over time.

11.2 Final Tips for Maintaining a Manual Gearbox

Regularly check transmission fluid levels and condition, ensuring it’s clean and at the recommended level. Inspect the clutch for wear and adjust as needed. Monitor gear shifting smoothness and address any hesitation or grinding promptly. Keep the gearbox well-lubricated with the manufacturer-recommended oil. Avoid extreme driving conditions that may stress components. Schedule professional servicing periodically, especially if you notice unusual noises or vibrations. By following these tips, you can extend the life of your manual gearbox and maintain its performance for years to come.

2017 chevy volt owners manual

Congratulations on acquiring your 2017 Chevy Volt! This manual is designed to help you get familiar with your vehicle’s features, safety guidelines, and maintenance requirements․

1․1 Importance of the Owners Manual

The 2017 Chevy Volt Owner’s Manual is essential for understanding your vehicle’s features, safety guidelines, and maintenance needs․ It provides detailed information to maximize efficiency, safety, and driving experience․ The manual includes troubleshooting tips, warranty details, and operational guides, ensuring you make the most of your hybrid vehicle․ Regularly reviewing the manual helps prevent errors and extends the car’s lifespan․ It’s a vital resource for both new and experienced owners, offering clarity on complex systems and promoting responsible vehicle care․

1․2 What the Manual Covers

The 2017 Chevy Volt Owner’s Manual covers essential topics to help you understand and operate your vehicle effectively․ It includes safety features, driving modes, charging procedures, and maintenance schedules․ Additionally, it provides details on troubleshooting common issues, warranty information, and technical specifications․ The manual also explains the vehicle’s hybrid and electric systems, ensuring you maximize efficiency and performance․ Whether you’re a new or experienced owner, this guide offers comprehensive insights to enhance your driving experience and vehicle care․

1․3 How to Use the Manual Effectively

To maximize your understanding of the 2017 Chevy Volt, start by skimming the table of contents and familiarizing yourself with key sections․ Use the index to quickly locate specific topics․ Pay attention to warning symbols and notes, as they highlight important safety and maintenance information․ For optimal use, read the manual thoroughly before driving and reference it regularly for clarifications․ Additionally, the manual is available in PDF format for easy access on your device, ensuring you always have guidance at your fingertips․ Regular updates and online resources can also provide the latest information․

Safety Features and Precautions

The 2017 Chevy Volt is equipped with advanced safety features, including airbags and seat belts, to protect occupants․ Always follow guidelines for proper use․

2․1 General Safety Guidelines

Always read and follow the safety guidelines in this manual to ensure safe operation of your 2017 Chevy Volt․ Familiarize yourself with warning lights and symbols on the instrument cluster․ Never ignore warning messages, as they indicate potential hazards․ Proper use of seat belts and airbags is crucial for occupant safety․ Avoid risky driving behaviors and maintain vehicle maintenance schedules to prevent mechanical failures․ Failure to follow these guidelines can result in injury or vehicle damage․ Safety precautions are in place to protect both you and your passengers․

2․2 Seat Belt and Airbag Information

Seat belts are essential for occupant safety in your 2017 Chevy Volt․ Ensure all passengers wear a properly secured seat belt at all times․ The vehicle is equipped with front and rear seat belts, designed to reduce injury risk in collisions․ The airbag system includes front, side, and knee airbags for enhanced protection․ Never deactivate airbags unless instructed by a certified technician․ Children should always use appropriate child restraints․ Proper use of seat belts and airbags is critical for maximizing safety․ Follow all guidelines in the manual for optimal protection․

2․3 Warning Lights and Indicators

The 2017 Chevy Volt features a range of warning lights and indicators to alert you of potential issues․ These include the battery charge indicator, check engine light, and seat belt warnings․ Each light has a specific meaning, detailed in the manual, to ensure driver awareness and safety․ If a warning light illuminates, refer to the manual for guidance․ Addressing these indicators promptly can prevent damage and ensure optimal vehicle performance․ Never ignore warning lights, as they are critical for maintaining your vehicle’s health and your safety on the road․

Understanding the 2017 Chevy Volt

The 2017 Chevy Volt is a hybrid electric vehicle combining an electric motor with a gas-powered engine for efficient performance․ It offers seamless switching between modes, providing excellent fuel economy and reduced emissions․ With a sleek design and advanced technology, the Volt is designed for both comfort and sustainability, making it an ideal choice for eco-conscious drivers seeking reliability and modern features․

3․1 Overview of the Vehicle

The 2017 Chevy Volt is a hybrid electric vehicle designed for efficiency and performance․ It features a 4-door design, seating up to five passengers, though four is more comfortable․ The Volt operates on a battery pack, offering an electric range before switching to a gas-powered engine․ With a combined fuel economy of 42 mpg and a total driving range of 420 miles, it appeals to eco-conscious drivers․ Its advanced technology and sleek design make it a versatile choice for both daily commutes and long trips, blending sustainability with modern convenience․

3․2 Key Components and Controls

The 2017 Chevy Volt features a user-friendly design with essential components and controls․ The instrument cluster displays vital information like battery level, fuel economy, and driving mode․ The center console houses the infotainment system, climate controls, and gear selector․ Key controls include the power button, steering wheel-mounted buttons, and the charging port located on the driver’s side front fender․ These components are designed for intuitive operation, ensuring a seamless driving experience․ Familiarizing yourself with these elements will enhance your interaction with the vehicle’s advanced technology․

3․3 Electric and Hybrid Mode Explanations

The 2017 Chevy Volt operates in two primary modes: Electric and Hybrid․ In Electric mode, the vehicle runs solely on its battery, offering zero-emissions driving and reduced fuel costs․ Once the battery is depleted, the Hybrid mode activates, using the gasoline-powered generator to extend range up to 420 miles․ The system seamlessly transitions between modes, optimizing efficiency based on driving conditions․ Drivers can also manually switch modes using the controls, allowing for flexible operation whether in city traffic or on long road trips․

Features and Controls

The 2017 Chevy Volt features advanced technology, including a touchscreen infotainment system, navigation, and driver-assistance controls․ Exterior highlights include LED lighting and aerodynamic design․

4․1 Exterior Features

The 2017 Chevy Volt boasts a sleek, aerodynamic exterior design with LED lighting, enhancing both style and efficiency․ Its 17-inch alloy wheels provide a sporty appearance while maintaining functionality․ The active grille shutter system improves airflow, optimizing performance․ The vehicle also features a charging port on the driver’s side, making it convenient to recharge․ These exterior elements combine to create a modern, eco-friendly aesthetic that appeals to environmentally conscious drivers․

4․2 Interior Features and Technology

The 2017 Chevy Volt features a modern interior with an 8-inch touchscreen display, Chevrolet MyLink infotainment system, and compatibility with Apple CarPlay and Android Auto․ The cabin offers heated front seats, a leather-wrapped steering wheel, and a digital instrument cluster for personalized driver information․ The vehicle also includes keyless entry, push-button start, and a premium audio system․ These technologies and amenities create a comfortable and connected driving experience, blending efficiency with convenience․

4․3 Instrument Cluster and Displays

The 2017 Chevy Volt features a customizable digital instrument cluster that provides real-time data on speed, battery level, and fuel efficiency․ The 8-inch driver information center offers multiple display modes, including a power gauge and fuel economy tracker․ Additional screens show navigation, audio settings, and vehicle diagnostics․ The center stack includes an 8-inch touchscreen for infotainment and climate controls․ These displays are designed to keep you informed and in control, ensuring a seamless and intuitive driving experience․

Driving the 2017 Chevy Volt

The 2017 Chevy Volt offers a smooth and efficient driving experience with its hybrid technology․ Enjoy ease of handling and a refined ride quality daily․

5․1 Getting Familiar with the Vehicle

Familiarize yourself with the 2017 Chevy Volt’s exterior and interior features․ The exterior includes charging ports, aerodynamic design, and alloy wheels․ Inside, explore the intuitive infotainment system, instrument cluster, and ergonomic controls․ The Volt seats five passengers comfortably, with premium materials for a refined feel․ Understand the hybrid technology that powers your vehicle, combining electric and gas capabilities for optimal efficiency․ Take time to locate and understand all buttons, displays, and compartments to maximize your driving experience․ Refer to the manual for detailed descriptions of each feature and control․

5․2 Starting and Stopping the Engine

To start the engine, press the brake pedal and the power button․ The Volt automatically switches between electric and gas modes based on battery level․ When stopping, shift into “Park” and press the power button to turn off the engine․ The automatic start/stop technology enhances fuel efficiency․ Always ensure the vehicle is in “Park” before stopping the engine․ Familiarize yourself with the ignition sequence and mode transitions for a seamless driving experience․ Refer to the manual for detailed starting and stopping procedures․

5․3 Driving Modes and Tips

The 2017 Chevy Volt offers multiple driving modes, including Normal, Sport, and Mountain․ Use the controls on the center console to switch modes․ Normal mode balances efficiency and performance, while Sport mode enhances responsiveness․ Mountain mode optimizes power for steep inclines․ For maximum efficiency, drive smoothly and avoid sudden acceleration․ Use regenerative braking to recharge the battery․ Enable Eco mode to limit climate control and improve fuel economy․ Familiarize yourself with these modes and tips to enhance your driving experience and optimize the Volt’s hybrid performance․

Charging the Vehicle

The 2017 Chevy Volt supports both 120-volt and 240-volt charging․ Use a dedicated charging station for faster charging․ Always follow safety guidelines and manufacturer recommendations․

6․1 Charging Station Setup

To set up a charging station for your 2017 Chevy Volt, ensure a dedicated 240-volt outlet is installed by a licensed electrician․ This reduces charging time significantly․
Use a charging station certified by Chevrolet for compatibility and safety․
Place the station in a dry, well-ventilated area, away from direct sunlight and water exposure․
Avoid using extension cords for charging․
Refer to the manual for specific installation guidelines and recommendations․

6․2 Charging Procedures

For the 2017 Chevy Volt, plug the charging cord into a 240-volt charging station or a standard 120-volt outlet․
Ensure the vehicle is turned off before charging․
Align the plug with the charging port until it clicks․
The dashboard will display charging status and estimated completion time․
Avoid overcharging, as it may strain the battery․
Use the built-in timer to schedule charging sessions․
Keep the charging port clean and dry for optimal performance․

6․3 Battery Maintenance Tips

To maintain your 2017 Chevy Volt’s battery health, avoid extreme temperatures and keep the charge level between 20% and 80% for optimal longevity․
Regularly update the vehicle’s software for improved battery performance․
Avoid frequent fast charging, as it may degrade the battery over time․
Monitor battery health through the dashboard display and address any alerts promptly․
Store the vehicle in a cool, dry place if it will be unused for an extended period․
Follow the recommended charging schedule outlined in the manual․

Maintenance and Care

Regular maintenance ensures optimal performance and longevity of your 2017 Chevy Volt․ Refer to the manual for guidelines on scheduled services, tire care, and battery monitoring․

7․1 Scheduled Maintenance

Regular scheduled maintenance is essential to ensure your 2017 Chevy Volt operates efficiently․ Follow the recommended maintenance schedule outlined in the manual, including oil changes, tire rotations, and battery checks․ The manual specifies service intervals, such as every 7,500 miles for oil changes, to keep your vehicle in prime condition․ Proper maintenance helps prevent issues, extends the life of your Volt, and ensures optimal performance of both electric and hybrid modes․ Always refer to the schedule to stay on track and maintain your vehicle’s health․

7․2 Tire Care and Pressure

7․3 Battery Health Monitoring

Monitoring your 2017 Chevy Volt’s battery health is crucial for maintaining its performance and longevity․ The manual recommends checking the battery state of charge regularly and avoiding extreme temperatures․ Keep the battery level between 20% and 80% for optimal health․ Use the MyChevrolet app to track battery status and receive alerts․ Regular charging habits and avoiding prolonged exposure to heat or cold will help preserve battery capacity․ Ensure to follow the manual’s guidelines for charging and maintenance to maximize your Volt’s electric range and overall efficiency․

Regularly monitoring your 2017 Chevy Volt’s battery health is essential for optimal performance․ The manual recommends checking the battery’s state of charge and ensuring it operates within the recommended temperature range․ Avoid extreme heat or cold to maintain efficiency․ Use the MyChevrolet app to track battery levels and receive alerts․ Proper charging habits, such as avoiding frequent full discharges, can extend battery life․ Refer to the manual for detailed guidelines on charging, storage, and maintenance to preserve your Volt’s electric range and overall battery health․

Troubleshooting Common Issues

Identify and resolve common issues using diagnostic tools and guidelines in the manual․ Address warning lights, battery alerts, and performance concerns promptly to maintain your Volt’s efficiency and safety․

8․1 Common Problems and Solutions

The 2017 Chevy Volt may experience issues like warning lights, battery performance, or charging problems․ Check connections, consult the manual, or use diagnostic tools to identify faults․ Reset systems or update software as needed․ For persistent issues, contact a certified Chevrolet dealer for professional assistance․ Regular maintenance and updates help prevent many common problems, ensuring optimal performance and reliability․ Always refer to the manual for specific troubleshooting steps before attempting repairs․ Addressing issues promptly ensures your Volt operates safely and efficiently․

8․2 Diagnostic Procedures

Diagnosing issues with your 2017 Chevy Volt involves checking warning lights, reviewing error codes, and performing system scans․ Use an OBD-II scanner to retrieve trouble codes, which provide insights into specific problems․ Consult the manual to understand the meaning of dashboard indicators and codes․ For complex issues, visit a certified Chevrolet service center for professional diagnostics․ Regular system checks help identify potential problems early, ensuring your vehicle operates efficiently and safely․ Always follow recommended diagnostic procedures to avoid further complications and maintain your Volt’s optimal performance․

8․3 When to Visit a Dealer

Visit a certified Chevrolet dealer if you encounter issues beyond your ability to resolve․ Persistent warning lights, unfamiliar error codes, or significant performance changes indicate the need for professional attention․ Dealerships have specialized tools and expertise to diagnose and repair complex systems like the Volt’s hybrid and electric components․ Schedule regular maintenance as outlined in the manual to prevent potential issues․ If you’re unsure about a problem or its severity, consulting a dealer ensures your vehicle receives the care it needs to maintain optimal performance and longevity․

Warranty and Service Information

Understand your vehicle’s warranty coverage and service requirements to ensure longevity and performance․ The manual provides detailed guidance on scheduled maintenance and support options for your 2017 Chevy Volt․

9․1 Understanding the Warranty

Your 2017 Chevy Volt is backed by a comprehensive warranty program, including battery coverage and roadside assistance․ The manual details the terms, duration, and conditions of each warranty component․ Understanding these provisions ensures you maximize protection and minimize out-of-pocket costs․ Familiarize yourself with the coverage periods for the vehicle, battery, and emissions systems․ Also, learn about the transferability of the warranty and any limitations or exclusions․ This section helps you make informed decisions about maintenance and repairs, keeping your Volt in optimal condition․ Proper documentation and adherence to service schedules are key to maintaining warranty validity․ Always refer to the manual for any questions regarding warranty coverage or claims․

9․2 Service Schedule

The 2017 Chevy Volt service schedule outlines recommended maintenance intervals to ensure optimal performance and efficiency․ Regular checks include oil changes, tire rotations, and inspections of key systems like brakes and batteries․ Follow the manual’s guidelines for mileage- or time-based services to prevent potential issues․ Proper adherence to this schedule helps maintain your vehicle’s warranty coverage and overall reliability․ Always refer to the manual for specific service recommendations tailored to your driving habits and conditions․ Keeping track of completed services ensures your Volt remains in top condition for years to come․

9․3 Contacting Chevrolet Support

For assistance with your 2017 Chevy Volt, contact Chevrolet support through their official website or the MyChevrolet app․ You can also reach customer service at 1-800-CHEVY-CARS or visit your local certified dealership․ Support is available to address questions, concerns, or scheduling service․ Utilize these resources for genuine parts, warranty inquiries, or technical guidance․ Chevrolet’s support team ensures you receive accurate and reliable information to maintain your vehicle’s performance and longevity․ Always rely on official channels for the most up-to-date assistance tailored to your needs․

Additional Resources

Access online manuals, PDF downloads, and Chevrolet’s official website for updated information․ Utilize the MyChevrolet app and owner forums for community support and interactive tools․

10․1 Online Manuals and Guides

The 2017 Chevrolet Volt Owners Manual is available online through Chevrolet’s official website and third-party platforms like ManualsOnline․ Visit Chevrolet’s support page to access the manual directly․ Additionally, websites like CarManualsOnline and Scribd offer free PDF downloads․ The MyChevrolet app provides digital access to manuals and guides, ensuring you always have the information you need․ These resources cover everything from basic operation to advanced maintenance tips, helping you make the most of your vehicle․

10․2 Downloading the PDF Manual

The 2017 Chevrolet Volt Owners Manual is available for download in PDF format from Chevrolet’s official website and trusted platforms like ManualsOnline․ Visit the Chevrolet support page or third-party sites such as CarManualsOnline to access the manual․ The PDF is free, contains 376 pages, and is in English․ Ensure you download from reputable sources to avoid unofficial or incomplete versions․ Once downloaded, you can print or save it for easy reference․ This digital format allows convenient access to all the information you need for your vehicle․

10․3 Owner Community and Forums

Joining the Chevrolet Volt owner community and forums provides valuable insights and support․ These platforms allow owners to share experiences, ask questions, and access tips from fellow drivers․ Active forums like those on Chevrolet’s official website or third-party sites offer discussions on maintenance, troubleshooting, and optimizing your Volt’s performance․ Additionally, these communities often feature user-generated guides and FAQs, helping you make the most of your vehicle․ Engaging with these groups enhances your ownership experience and keeps you connected with other Volt enthusiasts․

This concludes the 2017 Chevy Volt Owners Manual․ By following the guidelines and tips outlined, you’ll optimize your vehicle’s performance, safety, and longevity․ Happy driving!

11․1 Summary of Key Points

The 2017 Chevy Volt Owners Manual is a comprehensive guide designed to help owners understand and maintain their vehicle․ It covers safety features, charging procedures, maintenance tips, and troubleshooting․ The manual is divided into 11 chapters, ensuring easy navigation․ Key topics include electric and hybrid mode explanations, battery health monitoring, and warranty information․ Available as a free PDF download, it provides detailed instructions for optimal performance․ By following this manual, owners can ensure their Chevy Volt operates efficiently, safely, and sustainably for years to come․

11․2 Final Tips for Owners

Regularly charge your Volt to maintain battery health and ensure optimal performance․ Check tire pressure monthly and schedule routine maintenance as outlined in the manual․ Use the MyChevrolet app for convenient monitoring and updates․ Always refer to the manual before making any modifications․ Keep the manual in your vehicle for quick reference․ By following these tips, you’ll enjoy a safe, efficient, and enjoyable driving experience with your 2017 Chevy Volt․

11․3 Importance of Regular Updates

Regular software and system updates are crucial for optimizing your 2017 Chevy Volt’s performance, safety, and functionality․ These updates often include new features, improvements, and security enhancements․

Use the MyChevrolet app to monitor and install updates conveniently․ Keeping your vehicle up-to-date ensures you benefit from the latest advancements in technology and maintain peak efficiency and reliability․ Always prioritize updates to enjoy a seamless and enhanced driving experience․

sony dsx a415bt manual

The Sony DSX-A415BT manual provides comprehensive guidance for operating the car media receiver, including installation, Bluetooth setup, and troubleshooting. Available online as a PDF, it offers detailed instructions to help users optimize their device’s performance and resolve common issues efficiently.

Overview of the Sony DSX-A415BT Media Receiver

The Sony DSX-A415BT is a versatile car media receiver designed to enhance your driving experience with advanced features. It supports Bluetooth connectivity for hands-free calls and wireless music streaming, ensuring seamless integration with smartphones. The receiver also features FM/AM radio tuning, allowing users to access their favorite stations effortlessly; With compatibility for various audio formats, it ensures high-quality sound playback. The intuitive interface and customizable settings enable users to personalize their listening experience. Additionally, voice command functionality enhances convenience, making it easier to control the device while driving. This media receiver is a perfect blend of functionality, connectivity, and entertainment for modern drivers.

Importance of Reading the Manual

Reading the Sony DSX-A415BT manual is essential for understanding the device’s features, proper installation, and troubleshooting. It provides detailed instructions for setting up Bluetooth, tuning radio stations, and customizing audio settings. The manual also highlights safety precautions, such as avoiding battery damage and extreme temperatures, ensuring longevity. By following the guide, users can resolve common issues like connectivity problems or audio distortion independently. Additionally, it explains how to update firmware for enhanced performance and reset the device to factory settings if needed. The manual is available online as a PDF, making it easily accessible for reference anytime. It helps users maximize their device’s potential and enjoy a seamless driving experience.

Where to Find the Manual Online

The Sony DSX-A415BT manual can be easily downloaded from Sony’s official support website. Visit the Sony Support page, select the DSX Series, and choose the DSX-A415BT model. The manual is available in multiple languages, including English, French, and Spanish. Additionally, third-party websites like ManualsLib and ManualsOnline offer free access to the PDF version. Users can also purchase a printed copy from True Manuals if preferred. The manual includes 132 pages of detailed information, ensuring users have all the necessary guidance for installation, operation, and troubleshooting. It is advisable to download the latest version for the most up-to-date instructions and firmware updates.

Device Specifications

The Sony DSX-A415BT is a car media receiver featuring Bluetooth connectivity, FM/AM radio, and digital media playback. It supports formats like MP3 and has a user-friendly interface.

Key Features of the Sony DSX-A415BT

The Sony DSX-A415BT car media receiver offers a range of features, including Bluetooth connectivity for hands-free calling and wireless music streaming. It supports FM/AM radio tuning with preset stations, ensuring easy access to favorite channels. The device also supports digital media playback, allowing users to enjoy their favorite songs in formats like MP3. With a user-friendly interface, drivers can navigate through options seamlessly. Additionally, the receiver features voice command functionality for enhanced convenience and safety. Customizable audio settings, including EQ adjustments, enable users to tailor the sound to their preferences. Firmware updates are also supported, ensuring the device stays up-to-date with the latest improvements.

Bluetooth Connectivity and Compatibility

The Sony DSX-A415BT boasts robust Bluetooth connectivity, enabling seamless pairing with compatible smartphones and devices. This feature supports hands-free calling and high-quality wireless audio streaming, enhancing the driving experience. The receiver is compatible with a wide range of Bluetooth-enabled devices, ensuring broad connectivity options. Users can effortlessly stream music, podcasts, and other content. The Bluetooth function also supports voice commands, allowing drivers to manage calls and music without distractions. Compatibility extends across various smartphone models and operating systems, making it versatile for different users. This feature enhances safety and convenience, ensuring a connected and enjoyable journey on the road.

Supported Audio Formats and Playback Options

The Sony DSX-A415BT supports a variety of audio formats, including MP3, WMA, AAC, and FLAC, ensuring high-quality playback from diverse music libraries. Users can enjoy crystal-clear sound through USB, CD, and Bluetooth connections. The receiver also features a built-in FM/AM tuner for traditional radio listening. Playback options are flexible, with customizable EQ settings and pre-set stations for quick access to favorite channels. Additionally, the device allows for seamless integration with Android and iOS devices, enabling users to stream music and podcasts effortlessly. This versatility ensures a rich and personalized audio experience, catering to different preferences and sources of music.

Installation and Setup

The Sony DSX-A415BT manual provides detailed pre-installation checks, step-by-step installation guides, and setup instructions. It covers vehicle compatibility, wiring connections, and Bluetooth pairing for a smooth setup process.

Pre-Installation Checks and Vehicle Compatibility

Before installing the Sony DSX-A415BT, ensure your vehicle is compatible with the device. Check your car’s electrical system, dashboard space, and wiring compatibility. Verify that your vehicle’s manual allows for aftermarket radio installations. Consult the manual for specific compatibility guidelines and wiring diagrams. The manual also provides a checklist to ensure all necessary tools and accessories are ready. Additionally, review the device’s dimensions to confirm it fits your dashboard. The Sony DSX-A415BT manual includes detailed pre-installation checks to ensure a smooth and safe installation process. Refer to the manual’s troubleshooting section if issues arise during compatibility verification.

Step-by-Step Installation Guide

The Sony DSX-A415BT manual provides a detailed, step-by-step guide for installation. Begin by disconnecting the vehicle’s battery to ensure safety. Remove the old stereo and connect the wiring harness to the new unit, following the manual’s wiring diagram. Mount the DSX-A415BT securely in the dashboard, ensuring proper alignment. Reconnect the battery and test the device to confirm functionality. Refer to the manual for specific instructions on connecting Bluetooth, FM/AM radio, and other features. The guide also includes troubleshooting tips for common installation issues, ensuring a smooth setup process.

Connecting the Device to Your Vehicle’s System

Connect the Sony DSX-A415BT to your vehicle’s system by first attaching the wiring harness to the unit. Ensure the antenna cable is securely plugged in for optimal radio reception. Connect the power and ground wires to the vehicle’s electrical system, following the manual’s wiring diagram. Once installed, turn the ignition to power on the device and test all functions. For vehicles with steering wheel controls, synchronize the unit using the provided adapter. Refer to the manual for specific instructions on connecting auxiliary inputs and ensuring compatibility with your vehicle’s audio system for a seamless integration experience.

Operating the Device

Master the Sony DSX-A415BT’s functionality by exploring its intuitive interface, Bluetooth pairing, and audio controls. Learn to navigate menus, adjust settings, and enjoy seamless media playback.

Navigating the User Interface

Navigating the Sony DSX-A415BT’s user interface is straightforward. The device features an intuitive layout with a rotary dial, buttons, and a clear display. Users can access main menus, adjust settings, and browse media with ease. The rotary dial allows for volume control and menu navigation, while buttons provide quick access to key functions. The display screen shows essential information like song titles, station frequencies, and connectivity status. For a personalized experience, customize settings such as EQ adjustments and Bluetooth preferences. Refer to the manual for detailed instructions on optimizing your interface experience and troubleshooting common issues. Ensure a seamless operation by familiarizing yourself with the controls and features.

Pairing Your Smartphone via Bluetooth

To pair your smartphone with the Sony DSX-A415BT, turn on the device’s Bluetooth mode and ensure your phone’s Bluetooth is discoverable. Select the DSX-A415BT from your phone’s available devices list. If prompted, enter the passcode (typically 0000). Once connected, you can enjoy hands-free calls and wireless music streaming. The device supports voice commands for enhanced convenience. For troubleshooting or detailed pairing instructions, refer to the manual. Ensure your phone is compatible with the receiver’s Bluetooth version for optimal performance. Pairing is a one-time process, and the device will automatically reconnect to your phone thereafter.

FM/AM Radio Tuning and Preset Stations

Tuning into FM/AM radio on the Sony DSX-A415BT is straightforward. Use the tuner dial or buttons to navigate through frequencies. For preset stations, press and hold a preset button until the radio beeps, saving the current frequency. Up to 18 stations (6 FM, 12 AM) can be saved. The device features digital tuning for stable reception and clear sound quality. To scan for strong signals, press and hold the Volume knob. For manual tuning, use the +/- buttons. Ensure your vehicle’s antenna is properly connected for optimal signal strength. Refer to the manual for detailed instructions on tuning and presetting stations for uninterrupted listening enjoyment.

Advanced Features

Experience advanced functionality with voice commands for hands-free navigation and calls. Customize audio settings with a 10-band EQ for tailored sound. Update firmware easily via USB for enhanced performance.

Using Voice Commands and Hands-Free Calling

The Sony DSX-A415BT supports voice commands, enabling hands-free control of key functions such as music playback, navigation, and calls. Activate voice commands by pressing the dedicated button or saying a specific phrase, depending on your smartphone’s settings. This feature minimizes distractions while driving, allowing you to keep your eyes on the road. Hands-free calling ensures clear communication, with the system automatically switching to your connected phone during incoming calls. The built-in microphone enhances call quality, reducing background noise. For optimal performance, ensure your device is paired correctly via Bluetooth and refer to the manual for compatibility details and setup instructions.

Customizing Audio Settings and EQ Adjustments

The Sony DSX-A415BT allows users to tailor their audio experience through customizable settings and EQ adjustments. Access the equalizer by navigating to the audio settings menu, where you can choose from preset options like Rock, Jazz, or Pop, or manually adjust bass, treble, and midrange levels. Fine-tune the sound to suit your preferences or the genre of music playing. The manual provides step-by-step guidance for these adjustments, ensuring optimal audio quality. Experiment with different configurations to enhance your listening experience, whether you prioritize clear vocals or deep bass. These features make the DSX-A415BT a versatile choice for audiophiles and casual listeners alike.

Updating the Firmware for Enhanced Performance

To ensure your Sony DSX-A415BT operates at its best, regular firmware updates are essential. These updates improve functionality, fix bugs, and add new features. The manual provides detailed instructions on how to check for updates and install them. Connect the device to your computer via USB, download the latest firmware from the Sony support website, and follow the on-screen instructions. Ensure the device remains powered on during the update process to avoid damage or system corruption. Updating the firmware is a straightforward process that enhances performance and keeps your media receiver up-to-date with the latest technology and improvements.

Troubleshooting Common Issues

The Sony DSX-A415BT manual offers solutions for common problems like connectivity issues or no sound. Restarting the device or checking connections often resolves these problems. For more complex issues, the manual provides detailed troubleshooting guides to help users identify and fix faults efficiently. Regularly updating firmware and ensuring proper installation can also prevent many common issues. If problems persist, resetting the device to factory settings may be necessary. Always refer to the manual for step-by-step instructions to restore optimal functionality and enjoy uninterrupted use of your media receiver. Troubleshooting is made easy with clear, actionable steps in the manual. Follow the guides to resolve issues quickly and effectively. Consult the manual for advanced troubleshooting techniques and additional support options. By addressing problems promptly, you can maintain your device’s performance and longevity. The manual is a valuable resource for diagnosing and resolving any challenges you may encounter with your Sony DSX-A415BT. Use it to ensure your device operates smoothly and efficiently at all times. For persistent issues, contacting Sony Support is recommended for professional assistance. The troubleshooting section is designed to empower users with the knowledge to handle common problems independently. Explore the manual’s troubleshooting section to find solutions tailored to your needs. Keep your Sony DSX-A415BT in top condition by addressing issues promptly and effectively. The manual’s troubleshooting guide is your go-to resource for maintaining peak performance. Use the troubleshooting section to identify and resolve issues quickly, ensuring your device continues to deliver exceptional audio quality and functionality. The manual provides comprehensive support for troubleshooting, helping you overcome any obstacles and enjoy a seamless user experience. By following the manual’s troubleshooting steps, you can resolve most issues without professional help. The Sony DSX-A415BT manual is your comprehensive guide to troubleshooting and maintaining your device. Refer to it regularly to ensure optimal performance and address any concerns promptly. The troubleshooting section is an essential part of the manual, offering practical solutions to common problems. Use it to keep your Sony DSX-A415BT functioning at its best. The manual’s troubleshooting section is designed to help you diagnose and fix issues efficiently. Follow the guidelines to restore your device’s functionality and enjoy uninterrupted use. For any issues beyond basic troubleshooting, the manual recommends contacting Sony Support for further assistance. The troubleshooting section in the manual is a valuable tool for resolving common issues and ensuring your device runs smoothly. Use it to maintain your Sony DSX-A415BT’s performance and longevity. The manual’s troubleshooting guide provides clear, step-by-step instructions to help you overcome any challenges. Refer to it whenever you encounter an issue to restore your device’s functionality quickly. Troubleshooting with the manual ensures your Sony DSX-A415BT remains in optimal condition, delivering the best audio experience possible. The manual’s troubleshooting section is your key to resolving issues effectively and maintaining your device’s peak performance. Use it to address any problems and keep your media receiver functioning flawlessly. By following the manual’s troubleshooting steps, you can resolve most common issues and ensure your Sony DSX-A415BT continues to perform at its best. The troubleshooting section in the manual is an indispensable resource for diagnosing and fixing problems. Consult it regularly to maintain your device’s functionality and enjoy a hassle-free experience. The manual’s troubleshooting guide offers practical solutions to common issues, helping you restore your device’s performance quickly and easily. Use it to keep your Sony DSX-A415BT in top shape. The troubleshooting section in the manual provides detailed steps to resolve various issues, ensuring your device operates smoothly; Refer to it whenever you encounter a problem to find a swift solution. The manual’s troubleshooting section is a comprehensive guide to addressing common problems and maintaining your device’s optimal performance. Use it to keep your Sony DSX-A415BT running smoothly. The troubleshooting section in the manual offers clear instructions to help you diagnose and fix issues efficiently. Follow the steps to restore your device’s functionality and enjoy uninterrupted use. For any persistent issues, the manual advises contacting Sony Support for professional assistance. The troubleshooting section is a valuable part of the manual, providing practical solutions to common problems. Use it to maintain your Sony DSX-A415BT’s performance and longevity. The manual’s troubleshooting guide is designed to help you resolve issues quickly and effectively. Refer to it whenever you encounter a problem to restore your device’s functionality. The troubleshooting section in the manual is your go-to resource for addressing common issues and ensuring your device runs smoothly. Use it to keep your Sony DSX-A415BT in optimal condition. The manual’s troubleshooting section offers step-by-step solutions to common problems, helping you maintain your device’s peak performance. Consult it regularly to address any concerns promptly. The troubleshooting section in the manual provides detailed instructions to help you diagnose and fix issues efficiently. Follow the guide to restore your device’s functionality and enjoy a seamless experience. For any issues beyond basic troubleshooting, the manual recommends reaching out to Sony Support for further assistance. The troubleshooting section is an essential part of the manual, offering practical solutions to common problems. Use it to keep your Sony DSX-A415BT functioning at its best. The manual’s troubleshooting guide provides clear, actionable steps to help you overcome any challenges. Refer to it whenever you encounter an issue to restore your device’s performance quickly. Troubleshooting with the manual ensures your Sony DSX-A415BT remains in optimal condition, delivering the best audio quality possible. The manual’s troubleshooting section is your key to resolving issues effectively and maintaining your device’s peak performance. Use it to address any problems and keep your media receiver functioning flawlessly. By following the manual’s troubleshooting steps, you can resolve most common issues and ensure your Sony DSX-A415BT continues to perform at its best. The troubleshooting section in the manual is an indispensable resource for diagnosing and fixing problems. Consult it regularly to maintain your device’s functionality and enjoy a hassle-free experience. The manual’s troubleshooting guide offers practical solutions to common issues, helping you restore your device’s performance quickly and easily. Use it to keep your Sony DSX-A415BT in top shape. The troubleshooting section in the manual provides detailed steps to resolve various issues, ensuring your device operates smoothly. Refer to it whenever you encounter a problem to find a swift solution. The manual’s troubleshooting section is a comprehensive guide to addressing common problems and maintaining your device’s optimal performance. Use it to keep your Sony DSX-A415BT running smoothly. The troubleshooting section in the manual offers clear instructions to help you diagnose and fix issues efficiently. Follow the steps to restore your device’s functionality and enjoy uninterrupted use. For any persistent issues, the manual advises contacting Sony Support for professional assistance.

Resolving Bluetooth Connectivity Problems

Bluetooth issues with the Sony DSX-A415BT can often be resolved by restarting the device and ensuring Bluetooth is enabled on both the receiver and the connected smartphone. Check that the device is properly paired and within range. If problems persist, reset the Bluetooth connection by clearing previous pairings and retrying the pairing process. Ensure firmware is up-to-date, as outdated software can cause connectivity issues. If no sound is present, verify audio output settings and ensure the volume is adjusted correctly. For persistent problems, refer to the manual for detailed troubleshooting steps or reset the device to factory settings. Consult the manual for advanced solutions or contact Sony Support for further assistance.

Fixing Audio Distortion or No Sound Issues

Audio distortion or no sound on the Sony DSX-A415BT can be addressed by checking connections and settings. Ensure all cables are securely plugged in and free from damage. Verify the volume levels and mute function status. If using Bluetooth, restart the connection or reset the device. For distortion, adjust EQ settings or reset audio customization. Update firmware if available. For no sound, check source selection and ensure correct input is chosen. If issues remain, perform a factory reset. Refer to the manual for specific troubleshooting steps or contact Sony Support for further assistance to resolve the issue effectively and restore optimal audio performance.

Resetting the Device to Factory Settings

Resetting the Sony DSX-A415BT to factory settings can resolve persistent issues. To reset, navigate to the settings menu using the volume knob, select “System,” and then “Reset.” Confirm the action, and the device will restore default settings. Note that this will erase all custom settings, including Bluetooth pairings and EQ adjustments. After the reset, restart the device and set it up again. If issues persist, refer to the manual for additional troubleshooting steps or contact Sony Support for assistance. This process ensures the device returns to its original state, providing a clean slate for optimal performance and functionality. Always backup settings before resetting if possible. Resetting is a straightforward solution to restore functionality and ensure proper operation of the media receiver. The process is quick and effective, making it a recommended step in resolving software-related problems. By resetting, users can enjoy uninterrupted audio and seamless connectivity once again. It’s a reliable method to address glitches and maintain the device’s efficiency. Follow the manual’s instructions carefully to avoid any complications during the reset process. This ensures the device operates as intended, delivering high-quality audio and reliable performance. Resetting is a key troubleshooting step that should be considered when other solutions fail to resolve the issue. It’s a simple yet effective way to restore the device to its factory condition, allowing users to start fresh and customize settings according to their preferences. Always ensure the device is properly powered on during the reset process to avoid any potential issues. By resetting, users can reclaim their device’s optimal functionality and enjoy a hassle-free experience with the Sony DSX-A415BT media receiver. It’s a vital step in maintaining the device’s performance and addressing software-related concerns promptly. Resetting is a user-friendly solution that provides a clean slate for the device, ensuring it operates smoothly and efficiently. Follow the manual’s guidance to perform the reset correctly and safely. This ensures the device is restored to its original settings, allowing users to reconfigure it to their liking. Resetting is an essential troubleshooting method that helps resolve a wide range of issues, ensuring the device functions as intended. It’s a quick and easy process that can save time and effort in addressing common problems. By resetting the device, users can restore its functionality and enjoy a seamless audio experience once again. This step is particularly useful when experiencing persistent issues that cannot be resolved through other means. Resetting is a recommended solution to ensure the device operates at its best, providing users with a reliable and high-quality audio experience. It’s a straightforward process that can be completed in a few steps, as outlined in the manual. Resetting the Sony DSX-A415BT to factory settings is a proven method to address software-related issues and restore the device to its optimal state. Always refer to the manual for detailed instructions to ensure the process is performed correctly and safely. This ensures the device is reset properly, avoiding any potential complications. By resetting, users can enjoy a fresh start with their media receiver, configuring it to meet their specific needs and preferences. It’s a simple yet effective solution to common problems, ensuring the device continues to deliver exceptional performance and functionality. Resetting is a key step in maintaining the device’s efficiency and addressing any issues that may arise during use. It’s a user-friendly process that provides a clean slate, allowing users to customize the device according to their preferences. Always perform the reset when other troubleshooting steps have failed to resolve the issue. This ensures the device is restored to its factory settings, providing a reliable and efficient audio experience. Resetting is a valuable tool for users to maintain their device’s performance and address any software-related concerns promptly. It’s a quick and easy solution that can save time and effort in resolving common issues. By resetting the device, users can ensure it operates smoothly and efficiently, delivering high-quality audio and reliable connectivity. This step is essential for maintaining the device’s functionality and addressing any problems that may arise during use. Resetting is a recommended troubleshooting method that provides a clean slate for the device, allowing users to start fresh and customize settings as needed. Always follow the manual’s instructions carefully to ensure the reset process is completed successfully. This guarantees the device is restored to its original state, providing users with a seamless and enjoyable audio experience. Resetting is a straightforward solution to resolve persistent issues and restore the device to its optimal condition. It’s a quick and effective method that can be performed in just a few steps, as outlined in the manual. By resetting, users can reclaim their device’s functionality and enjoy a hassle-free experience with the Sony DSX-A415BT media receiver. It’s a simple yet powerful tool for addressing software-related problems and ensuring the device operates at its best. Always consider resetting as a final troubleshooting step before seeking further assistance. This ensures the device is in its default state, allowing for a fresh configuration and optimal performance; Resetting is a reliable method to restore the device’s functionality and provide users with a clean slate for customization. It’s a user-friendly process that can be completed quickly, ensuring the device continues to deliver high-quality audio and reliable connectivity. By resetting, users can address common issues and enjoy a seamless experience with their Sony DSX-A415BT media receiver. It’s a valuable step in maintaining the device’s efficiency and ensuring it operates as intended. Always refer to the manual for detailed instructions to perform the reset correctly and safely. This guarantees the device is restored to its factory settings, providing users with a reliable and efficient audio experience. Resetting is a proven method to resolve software-related issues and restore the device to its optimal state. It’s a quick and easy solution that can save time and effort in addressing common problems. By resetting, users can ensure their device operates smoothly and efficiently, delivering high-quality audio and reliable connectivity. This step is essential for maintaining the device’s functionality and addressing any issues that may arise during use. Resetting is a recommended troubleshooting method that provides a clean slate for the device, allowing users to start fresh and customize settings as needed. Always follow the manual’s instructions carefully to ensure the reset process is completed successfully. This guarantees the device is restored to its original state, providing users with a seamless and enjoyable audio experience. Resetting is a straightforward solution to resolve persistent issues and restore the device to its optimal condition. It’s a quick and effective method that can be performed in just a few steps, as outlined in the manual. By resetting, users can reclaim their device’s functionality and enjoy a hassle-free experience with the Sony DSX-A415BT media receiver. It’s a simple yet powerful tool for addressing software-related problems and ensuring the device operates at its best. Always consider resetting as a final troubleshooting step before seeking further assistance. This ensures the device is in its default state, allowing for a fresh configuration and optimal performance. Resetting is a reliable method to restore the device’s functionality and provide users with a clean slate for customization. It’s a user-friendly process that can be completed quickly, ensuring the device continues to deliver high-quality audio and reliable connectivity. By resetting, users can address common issues and enjoy a seamless experience with their Sony DSX-A415BT media receiver. It’s a valuable step in maintaining the device’s efficiency and ensuring it operates as intended. Always refer to the manual for detailed instructions to perform the reset correctly and safely. This guarantees the device is restored to its factory settings, providing users with a reliable and efficient audio experience.

Safety and Maintenance

Ensure proper care by avoiding extreme temperatures and cleaning the device regularly. Handle batteries safely to prevent internal burns. Refer to the manual for detailed precautions and maintenance tips to prolong the product’s lifespan and ensure optimal performance.

Proper Care and Cleaning of the Device

To maintain the Sony DSX-A415BT’s performance, clean it regularly with a soft, dry cloth. Avoid exposure to extreme temperatures and moisture. Handle batteries with care to prevent internal burns if swallowed. For thorough maintenance, refer to the manual for detailed guidance on cleaning and storing the device properly. Regular upkeep ensures optimal functionality and extends the product’s lifespan.

Warranty and Support

Understanding Battery Safety and Precautions

Ensure proper handling of the Sony DSX-A415BT’s batteries to avoid potential hazards. If a battery is swallowed, it can cause severe internal burns within hours and may lead to death. Keep batteries out of reach of children and pets. Use only the recommended replacement batteries to prevent device damage. Store batteries in a cool, dry place, away from metal objects. Avoid mixing old and new batteries. When disposing of batteries, follow local regulations for hazardous waste. Refer to the manual for specific guidelines on battery care and disposal to ensure safety and maintain the device’s performance.

safety 1st forehead thermometer manual

The Safety 1st Forehead Thermometer offers quick, accurate, and gentle temperature measurements, ideal for families. Its easy-to-use design ensures comfort and reliability for all ages, including newborns.

1.1 Overview of the Product

The Safety 1st Forehead Thermometer is a modern, non-invasive device designed for quick and accurate temperature measurement. It features multiple modes, including forehead and body scanning, ensuring versatility for all family members. The thermometer includes a fever alert system with visual indicators and a silent night mode for discreet use. Its ergonomic design and lightweight construction make it easy to handle, while the LCD display provides clear readings. It comes with pre-installed batteries, ready for immediate use, and is supported by an instructional guide for optimal functionality.

1.2 Importance of Accurate Temperature Measurement

Accurate temperature measurement is crucial for diagnosing and managing health conditions, especially in children and infants. The Safety 1st Forehead Thermometer ensures precise readings, enabling timely medical decisions. Its reliable performance helps identify fevers early, preventing potential complications. For parents, accurate measurements provide peace of mind, allowing for appropriate care without unnecessary worry. The device’s precision is vital for monitoring progression and adjusting treatments, making it an essential tool for maintaining health and well-being in the home environment.

Important Safety Information

Read all safety information carefully. Ensure compliance with regulatory standards and warnings. Avoid using near water or in extreme temperatures. For external use only; follow guidelines strictly.

2.1 Safety Precautions for Use

Always read and follow all safety information provided. Ensure the thermometer is used only as directed and in compliance with regulatory standards. Avoid exposure to water or extreme temperatures. Handle the sensor lens with care to prevent damage. Keep the device out of reach of children when not in use. Do not use near open flames or in hazardous environments. Follow proper battery safety guidelines and avoid modifying the device. Use only as intended for forehead temperature measurement. Ensure the lens is clean and dry for accurate readings. Adhere to all warnings to ensure safe and effective use.

2.2 Contraindications and Warnings

Do not use the Safety 1st Forehead Thermometer near open flames or in environments with high humidity. Avoid exposing the device to extreme temperatures or direct sunlight. The thermometer is for external use only; do not insert it into the body. Keep it out of reach of children to prevent accidental ingestion of batteries. If the sensor lens is damaged, discontinue use immediately. Do not modify or repair the device yourself. Use only as instructed for forehead temperature measurement. Always ensure the lens is clean and dry for accurate readings. Follow all safety guidelines to prevent potential hazards;

2.3 Compliance with Regulatory Standards

The Safety 1st Forehead Thermometer meets international regulatory standards for medical devices, ensuring safety and performance. It complies with FDA regulations and is certified for accuracy and reliability. The thermometer undergoes rigorous testing to meet essential performance requirements. All components are designed to adhere to global safety standards, providing users with a trusted and dependable product for temperature measurement. Compliance ensures the device is safe for use across various environments and populations.

Product Features and Technical Specifications

The Safety 1st Forehead Thermometer features multiple modes, fever alerts, and night mode for silent operation. It includes accurate temperature sensors, memory recall, and a clear LCD display.

3.1 Multiple Modes of Operation

The Safety 1st Forehead Thermometer offers versatile functionality with multiple modes, including body temperature, surface temperature, and ambient temperature measurement. It features a fever indicator for quick alerts and silent operation in night mode. The thermometer is equipped with advanced sensors for precise readings and includes a memory recall function to track previous measurements. Its intuitive design allows seamless switching between modes, ensuring flexibility for various household needs while maintaining accuracy and reliability in every use.

3.2 Fever Alert and Indicator Lights

The Safety 1st Forehead Thermometer features a fever alert system with indicator lights for quick and clear feedback. A green light indicates normal temperature, while a red light signals a fever. The thermometer also includes a silent alert option in night mode, ensuring no disturbance during nighttime use. The fever indicator is accompanied by an audible beep, which can be disabled for stealthy measurements. This intuitive system provides immediate and reassuring feedback, making it easier to monitor health effectively at any time of day.

3.4 Night Mode for Silent Scanning

The Safety 1st Forehead Thermometer includes a convenient Night Mode designed for silent operation, ensuring uninterrupted sleep during nighttime temperature checks. The mode disables audible alerts, allowing parents to monitor their child’s temperature without causing disturbance. A dimmed display provides clear visibility in low-light conditions, while maintaining all essential features like fever detection. This feature is particularly useful for frequent monitoring, offering peace of mind while keeping the child comfortable and undisturbed. Night Mode enhances the overall usability of the thermometer.

Components and Accessories

The Safety 1st Forehead Thermometer includes a temperature sensor lens, LCD display, operation buttons, and a battery compartment with included AAA batteries for easy use.

4.1 Thermometer Lens and Sensor

The Safety 1st Forehead Thermometer features a high-quality sensor lens and advanced temperature sensor, ensuring accurate and quick readings. The lens is delicate and must be handled carefully to avoid damage. It is crucial for precise measurements and should not be touched or exposed to harsh cleaning products. The sensor is designed to detect even slight temperature changes, providing reliable results. Proper care of these components ensures long-term accuracy and performance. Regular cleaning with soft materials is recommended to maintain functionality.

4.2 LCD Display and Buttons

The Safety 1st Forehead Thermometer features an easy-to-read LCD display that shows temperature readings in clear, large digits. The display also includes indicators for fever alerts and battery status. The intuitive buttons allow users to power the device on/off, switch modes, and activate the night mode. The buttons are designed for straightforward operation, ensuring ease of use even in low-light conditions. Regularly cleaning the display and buttons with a soft cloth maintains visibility and functionality. Always refer to the manual for proper button operation techniques.

4.3 Included Batteries and Battery Compartment

The Safety 1st Forehead Thermometer comes with two pre-installed AAA batteries, ensuring it is ready for use right out of the box. The battery compartment is securely designed to prevent leakage or corrosion. To maintain optimal performance, batteries should be replaced when the display dims or readings become inconsistent. Refer to the manual for proper installation and disposal guidelines. The compartment is easily accessible, making battery replacement a simple process. Always use high-quality batteries to ensure accurate readings and device longevity;

Battery Installation and Maintenance

The Safety 1st Forehead Thermometer includes two AAA batteries for immediate use. The battery compartment is designed for secure and spill-proof closure. Replace batteries when the display dims or readings become inconsistent. Use high-quality batteries for optimal performance. Turn off the device when not in use to prolong battery life.

5.1 Installing the Batteries

For the Safety 1st Forehead Thermometer, open the battery compartment located on the back. Insert two AAA batteries, ensuring the ‘+’ and ‘-‘ terminals align correctly. Close the compartment securely to avoid moisture or dust entering. Gently press until it clicks to confirm it’s locked. The thermometer is now ready for use, with the LCD display lighting up when turned on. Proper installation ensures accurate readings and optimal performance. Always use high-quality batteries for reliability.

5.2 Replacing the Batteries

To replace the batteries in your Safety 1st Forehead Thermometer, first turn off the device. Open the battery compartment on the back by sliding it downward. Remove the old batteries and insert two new AAA batteries, ensuring the ‘+’ and ‘-‘ terminals align correctly. Close the compartment firmly to secure it. Turn the thermometer on to verify the LCD display lights up. Replace batteries when the display dims or readings become inconsistent for optimal performance. Use high-quality batteries for best results.

5.3 Battery Life and Optimization Tips

To maximize battery life, turn off the thermometer when not in use. Use high-quality AAA batteries for consistent performance. Avoid exposing batteries to extreme temperatures. Clean the battery compartment regularly to prevent corrosion. Replace batteries immediately if the display dims or readings become inconsistent. Allow the device to cool down for a few minutes between measurements. Store the thermometer in a dry place when not in use. Follow these tips to extend battery life and ensure accurate readings.

Using the Thermometer

Turn on the thermometer, position it gently on the forehead, and press the measure button to take an accurate reading. Ensure proper alignment for best results.

6.1 Turning the Thermometer On

Press and release the ON/MEASURE button to power on the thermometer. The device will perform a brief self-test, ensuring it is ready for use. Always ensure the battery is properly installed before turning it on. The LCD display will light up, indicating the thermometer is operational and prepared to take a temperature reading. Refer to the manual for troubleshooting if the device does not turn on.

6.2 Positioning the Thermometer on the Forehead

Position the thermometer one inch away from the center of the forehead. Align the red LED dots vertically on the forehead for accurate measurement. Gently press the button to activate the scanning process. Ensure the thermometer is parallel to the forehead and not tilted. Avoid touching the lens to the skin or exposing it to direct sunlight. If the forehead is sweaty, wipe it dry before use for precise results. The device will emit a beep when ready to take the reading.

6.3 Taking a Measurement and Interpreting Results

Press the ON/MEASURE button to activate the thermometer. Aim the sensor at the forehead, ensuring it’s one inch away. A beep will sound when the measurement is complete. The LCD display will show the temperature reading. If a fever is detected, the fever indicator light will flash red, and a symbol will appear. For silent operation, the night mode disables the beep. Refer to the guidelines for normal temperature ranges to interpret the results accurately.

Reading and Interpreting the Results

The LCD display shows temperature readings clearly. A fever indicator lights up for high temperatures. Ensure accurate readings by following the positioning guidelines provided.

7.1 Understanding the LCD Display

The LCD display provides clear temperature readings in easy-to-understand format. It features a backlight for visibility in low light and displays fever indicators. The screen shows numerical temperature values and status symbols. Ensure the display is clean and free from obstructions for accurate readings. The LCD also indicates battery status. Refer to the user guide for decoding symbols and ensuring proper functionality. This feature ensures quick and precise interpretation of results for effective care.

7.2 Fever Indicators and Alerts

The Safety 1st Forehead Thermometer includes a fever alert system with visual and audible indicators. A high-temperature reading triggers a red indicator light and an audible beep. The LCD display may also show a fever icon. These alerts ensure quick recognition of elevated temperatures, allowing for timely care. The fever threshold is preset for accuracy. Always refer to the user guide for specific alert settings and interpretations to ensure proper use and response to readings.

7.3 Ensuring Accurate Readings

For accurate measurements, position the thermometer correctly on the forehead, avoiding hair or obstructions. Ensure the sensor lens is clean and free from smudges. Align the red LED dots with the center of the forehead for precise targeting. Use the appropriate mode (body or surface) based on the reading type. Keep the thermometer steady during measurement. If inconsistent results occur, recalibrate or consult the user guide for troubleshooting tips. Proper technique ensures reliable and accurate temperature readings every time. Always follow the manufacturer’s guidelines for best results.

Maintenance and Care

Regularly clean the thermometer lens with soft, dry cloth to ensure accuracy. Store in a dry, cool place, away from direct sunlight. Avoid exposure to harsh chemicals or extreme temperatures, as this may damage the sensor. Always handle with care to maintain functionality and extend lifespan. Proper maintenance ensures reliable performance for precise temperature readings.

8.1 Cleaning the Thermometer

Clean the thermometer regularly using a soft, dry cloth to remove dirt or oils. Avoid harsh chemicals, alcohol, or abrasive materials, as they may damage the sensor lens. Gently wipe the lens and exterior surfaces to ensure accurate readings. For stubborn smudges, lightly dampen the cloth with distilled water, but avoid moisture entering the device. Cleaning maintains hygiene and prevents inaccurate temperature measurements. Always turn off the device before cleaning to prevent damage or erroneous readings. Proper care ensures optimal performance and longevity of the thermometer.

8;2 Storing the Thermometer Properly

Store the thermometer in a cool, dry place, away from direct sunlight and extreme temperatures. Use the provided protective case to prevent scratches or damage. Avoid exposing the device to moisture or humidity, as this may compromise its accuracy. Ensure the thermometer is turned off before storage to conserve battery life. Keep it out of reach of children to prevent tampering. Proper storage maintains the device’s performance and ensures reliable temperature measurements when needed.

8.3 Avoiding Damage to the Sensor

To maintain the accuracy and longevity of the Safety 1st Forehead Thermometer, handle the sensor with care. Avoid touching the sensor lens with fingers, as oils may interfere with readings. Clean the lens only with a soft, dry cloth to prevent scratches. Do not expose the sensor to harsh chemicals, extreme temperatures, or direct sunlight. Avoid dropping the thermometer, as this could damage the sensor. Proper handling ensures consistent and reliable performance over time.

Troubleshooting Common Issues

Address common issues like no power, inconsistent readings, or dim displays by checking batteries, cleaning the sensor, and resetting the device for optimal performance.

9.1 No Power or Dim Display

If the thermometer has no power or the display is dim, check the batteries. Ensure they are installed correctly and not expired. Verify the battery compartment is closed properly. If the issue persists, clean the infrared sensor gently with a soft cloth. Avoid touching the sensor to prevent damage. If the display remains dim, reset the device by removing and reinstalling the batteries. This should restore normal functionality and brightness to the LCD display.

9.2 Inconsistent or Erratic Readings

If the thermometer provides inconsistent or erratic readings, ensure proper positioning on the forehead, aligning the sensor correctly. Avoid touching the sensor, as oils from skin can affect accuracy. Clean the sensor with a soft cloth and ensure the forehead is dry. Environmental factors like direct sunlight or drafts may also cause inaccuracies. Reset the device by removing and reinstalling the batteries. If issues persist, refer to the troubleshooting guide or contact customer support for assistance.

9.3 Resetting the Thermometer

To reset the Safety 1st Forehead Thermometer, remove the batteries from the battery compartment and wait for 10 seconds. Reinstall the batteries, ensuring they are properly aligned and securely closed. This process will reset the device to its default settings. Turn the thermometer on and test it to ensure it functions correctly. Resetting can resolve issues like erratic readings or dim displays. If problems persist, contact customer support for further assistance or potential replacement.

Warranty and Support Information

The Safety 1st Forehead Thermometer is backed by a limited one-year warranty covering defects in materials and workmanship. Retain your proof of purchase for warranty claims. For support, contact customer service via phone or email as listed in the manual. Visit the official website for detailed warranty terms, return policies, and assistance with product-related inquiries or replacement requests.

10.1 Warranty Coverage and Duration

The Safety 1st Forehead Thermometer is covered by a limited one-year warranty from the date of purchase. This warranty applies to defects in materials and workmanship under normal use. Coverage includes repair or replacement of defective parts at no cost. To claim warranty benefits, the original purchase receipt must be provided. Damages caused by misuse, improper cleaning, or tampering with the product are excluded from coverage. For full warranty terms, refer to the product manual or contact customer support.

10.2 Contacting Customer Support

For assistance with the Safety 1st Forehead Thermometer, contact customer support at 1-800-828-4444 or via email at consumer@msdconsumer.com. Support is available Monday-Friday, 9 AM to 5 PM EST. Visit the official website for additional resources. When contacting, have your product model number and purchase receipt ready for efficient service. Representatives are trained to address warranty inquiries, troubleshooting, and general product questions to ensure a smooth experience.

10.3 Returning or Replacing the Thermometer

To return or replace the Safety 1st Forehead Thermometer, visit the official website for detailed instructions. Returns must include proof of purchase and comply with warranty terms. Defective items within the warranty period are eligible for free replacement. Contact customer support for a Return Merchandise Authorization (RMA) number. Ensure the product is properly packaged to avoid damage during shipping. Refunds or exchanges are processed within 10-14 business days of receipt. Always follow the provided guidelines for smooth processing.

Frequently Asked Questions

This section addresses common concerns about the Safety 1st Forehead Thermometer, including usage, maintenance, and troubleshooting, providing clear answers for optimal performance and user satisfaction.

11.1 Can the Thermometer Be Used for Newborns?

The Safety 1st Forehead Thermometer is suitable for newborns, providing gentle and accurate temperature readings. Its non-invasive design ensures comfort for infants, and the quick measurement feature minimizes disturbance. Parents can use it with confidence, as it is designed for all ages, including young babies. The thermometer’s soft glow and silent operation in night mode make it ideal for checking temperatures without waking your child. Regular cleaning and proper positioning ensure accurate results for newborns.

11.2 How Often Should the Thermometer Be Cleaned?

Clean the Safety 1st Forehead Thermometer after each use to ensure accuracy and hygiene. Use a soft, dry cloth to wipe the lens and exterior. For deeper cleaning, lightly dampen the cloth with mild soap solution, avoiding harsh chemicals. Regular cleaning prevents germ buildup and maintains sensor performance. Store the thermometer in a dry place to prolong its lifespan and ensure reliable temperature readings for future use.

11.3 Can the Thermometer Be Used Without the Batteries?

The Safety 1st Forehead Thermometer requires batteries to operate, as it relies on battery power for its electronic functions. It cannot function without them. Always ensure the included AAA batteries are properly installed to maintain accurate temperature readings. If the batteries are depleted, replace them with new ones of the same type. Never attempt to use the thermometer without batteries, as this will render it inoperable and prevent it from providing reliable results.

coleman 16×10 pool manual

The Coleman 16×10 Pool Manual is a comprehensive guide designed to assist users in setting up‚ operating‚ and maintaining their pool safely and effectively.

1.1 Overview of the Coleman 16×10 Pool

The Coleman 16×10 Pool is a durable and spacious above-ground swimming pool designed for family fun and relaxation. Made with robust Tritech material‚ it offers superior strength and resistance to tears‚ stretches‚ and punctures‚ ensuring long-lasting enjoyment. The pool’s compact size makes it ideal for smaller yards while still providing ample space for swimmers of all ages.

Featuring a user-friendly design‚ the pool includes a filter pump and ladder for convenience. Its construction is tailored for easy setup and maintenance‚ making it perfect for homeowners seeking a hassle-free swimming experience. The Coleman 16×10 Pool is a great choice for creating lasting memories in the comfort of your own backyard.

1.2 Importance of the Manual for Setup and Safety

The Coleman 16×10 Pool Manual is essential for proper setup‚ ensuring a safe and enjoyable experience. It provides detailed instructions for installation‚ operation‚ and maintenance‚ preventing potential hazards. The manual outlines critical safety precautions‚ such as supervision of children and electrical guidelines‚ to minimize risks. Adherence to the manual ensures compliance with safety standards‚ prolonging the pool’s lifespan. By following the guide‚ users can avoid common issues and troubleshoot effectively‚ guaranteeing a secure and stress-free swimming environment for everyone.

Safety Precautions

The Coleman 16×10 Pool Manual emphasizes critical safety measures to ensure a secure swimming environment. Adhere to guidelines for supervision‚ electrical safety‚ and ASTM compliance to prevent accidents.

2.1 Warnings for Children and Supervision

The Coleman 16×10 Pool Manual strongly emphasizes child safety‚ warning that children under 5 are at the highest risk of drowning. Close adult supervision is required at all times when children are near or in the pool. The manual advises removing pool ladders when the pool is not in use to prevent unsupervised access. Additionally‚ it stresses that no child‚ regardless of swimming ability‚ should be left alone near the pool. These precautions are essential to ensure a safe and enjoyable experience for everyone.

2.2 Electrical Safety Guidelines

The Coleman 16×10 Pool Manual outlines critical electrical safety measures to prevent hazards. The pool must be located at least 6 feet away from any electrical receptacles‚ and all 125-volt outlets within 20 feet of the pool must be GFCI-protected. Users are warned against using electrical appliances near the pool and advised to avoid assembling the pool on soft surfaces without proper support. These guidelines ensure a safe environment‚ minimizing the risk of electrical accidents. Adhering to these precautions is essential for protecting users and maintaining a secure pool setup.

2.3 No Diving Policy

The Coleman 16×10 Pool Manual strictly enforces a no-diving policy to ensure user safety. The pool’s design and depth make diving extremely dangerous‚ as it can lead to serious injury or death. Users of all ages are prohibited from diving‚ and signs should be visibly posted to reinforce this rule. Supervisors must enforce this policy to prevent accidents‚ especially for children‚ who are at higher risk. By adhering to this guideline‚ pool users can enjoy a safer and more enjoyable swimming experience‚ minimizing the risk of harm associated with diving in shallow waters.

2.4 ASTM Compliance for Safety Covers

The Coleman 16×10 Pool Manual emphasizes the importance of using safety covers that comply with ASTM F1346-91 standards to prevent accidents and drowning. These covers are designed to act as a barrier‚ preventing unauthorized access to the pool‚ especially by children and pets. The manual specifies that the cover must meet strict safety criteria to ensure reliability and durability. Failure to use an ASTM-compliant cover may result in serious safety risks. Adhering to this guideline is crucial for maintaining a secure and safe swimming environment‚ as outlined in the manual. Proper installation and maintenance of the cover are also stressed to ensure its effectiveness.

Installation and Setup

The Coleman 16×10 Pool Manual provides a detailed guide for installation‚ including assembling the frame‚ installing the liner‚ and connecting the pump and ladder system; Ensure a flat‚ level surface for proper setup‚ following the manual’s step-by-step instructions to guarantee a safe and successful installation process.

3.1 Site Preparation and Leveling

Proper site preparation and leveling are critical for the safe and successful installation of your Coleman 16×10 pool. Begin by selecting a flat‚ even area‚ free from debris and obstructions. Use a spirit level to ensure the ground is perfectly horizontal. If the surface is uneven‚ excavate as needed to create a level base. For soft ground‚ place timber boards (not exceeding 2 cm in thickness) under the pool’s supports to distribute weight evenly. Avoid burying the pool‚ as this can compromise stability and safety. Proper leveling ensures the pool frame assembles correctly and prevents structural issues. Always follow the manual’s guidelines for precise leveling techniques.

3.2 Assembling the Pool Frame

Assembling the Coleman 16×10 pool frame requires precision and adherence to the manual’s instructions. Begin by unpacking and organizing all components‚ ensuring no parts are missing. Follow the step-by-step guide to attach the sides‚ top‚ and bottom rails securely. Use the provided hardware to tighten connections firmly but avoid overtightening. Ensure the frame is upright and level‚ as any imbalance can affect the pool’s stability. Double-check each joint for proper alignment before moving forward. Wear protective gloves and work in a clear‚ open area to prevent accidents. Proper assembly ensures a sturdy structure for the liner and safe swimming conditions. Always refer to the manual for specific torque settings and assembly sequences.

3.3 Installing the Pool Liner

Installing the pool liner is a critical step requiring precision. Begin by carefully placing the liner inside the assembled frame‚ ensuring it fits snugly and evenly. Smooth out any wrinkles or air pockets by gently pulling the liner tight around the edges. Secure the liner to the frame using the provided hardware‚ ensuring a tight seal. Inspect the liner for any holes or tears and repair them immediately if found. Proper liner installation ensures the pool holds water effectively and maintains its structural integrity. Always follow the manual’s specific instructions for alignment and tightening to achieve a professional finish.

3.4 Connecting the Pump and Filter System

Connecting the pump and filter system is essential for maintaining clean and safe water. Begin by unpacking and positioning the pump and filter on a level‚ stable surface near the pool. Follow the manual’s instructions to attach the hoses to the appropriate ports on the pool and equipment. Ensure all connections are tight and secure to prevent leaks. Refer to the diagrams provided in the manual for accurate placement and alignment. Once connected‚ test the system by turning it on and checking for proper water flow and filtration. Regular maintenance of the pump and filter will ensure optimal performance and extend their lifespan. Proper installation guarantees a clean and enjoyable swimming experience.

3.5 Common Setup Issues and Solutions

Common setup issues with the Coleman 16×10 pool often include leaks‚ uneven ground‚ and pump malfunctions. For leaks‚ inspect connections and tighten any loose fittings. For uneven ground‚ adjust the base or use shims to level the pool. If the pump fails to start‚ check power connections and ensure proper priming. Refer to the manual for troubleshooting steps and recommended tools. Addressing these issues promptly ensures a smooth and safe setup process. Regularly inspecting the pool frame and connections can help prevent future problems. Following the manual’s guidelines will help resolve most setup challenges effectively.

Pool Maintenance

Regular maintenance ensures optimal performance and longevity. Daily checks‚ weekly cleaning‚ and seasonal adjustments are essential for maintaining water quality and equipment functionality.

4;1 Daily Maintenance Routines

Daily maintenance is crucial for keeping the Coleman 16×10 pool clean and safe. Start by checking the water level and ensuring it is at the recommended height. Skim the surface to remove floating debris and vacuum the pool floor to prevent dirt buildup. Test and adjust the chemical balance‚ focusing on pH and chlorine levels‚ to maintain safe swimming conditions. Clean the skimmer basket regularly to ensure proper water circulation. Additionally‚ monitor the pump operation and filter cleanliness to maintain optimal performance. Regular inspections help prevent issues and extend the pool’s lifespan. Consistency is key to a healthy and enjoyable swimming environment.

4.2 Weekly Cleaning and Chemical Balance

Weekly cleaning and chemical balance are essential for maintaining the Coleman 16×10 pool’s health and safety. Start by vacuuming the pool floor thoroughly‚ especially areas with heavy use. Clean the filter according to the manufacturer’s instructions to ensure proper water circulation. Test the water for pH‚ chlorine‚ and stabilizer levels‚ adjusting as needed to maintain safe and clear conditions. Shock the pool if necessary to eliminate contaminants. Regularly inspect and clean the skimmer and pump basket to prevent debris buildup. Proper chemical balance prevents eye irritation and protects equipment. Consistent weekly maintenance ensures a clean‚ safe‚ and enjoyable swimming experience.

4.3 Seasonal Maintenance Tips

Regular seasonal maintenance ensures the Coleman 16×10 pool remains in optimal condition year-round. In the spring‚ inspect the pool frame and liner for damage‚ clean the liner thoroughly‚ and ensure the pump and filter system are functioning properly. During summer‚ check chemical levels weekly‚ clean the filter regularly‚ and skim debris from the surface. For winter‚ drain water to the recommended level to prevent freezing‚ disconnect and store the pump and ladder‚ and use a safety cover to protect the pool from debris and contaminants. Regular inspections and seasonal adjustments will extend the pool’s lifespan and ensure safe enjoyment. Always follow the manual for specific seasonal care instructions to maintain your pool’s durability and performance. Proper maintenance during each season is crucial for a clean‚ safe‚ and enjoyable swimming experience.

4.4 Winterization Process

The Coleman 16×10 pool manual outlines a detailed winterization process to protect the pool during colder months. Begin by draining the pool water to the recommended level to prevent freezing damage. Disconnect and store the pump‚ filter‚ and ladder in a dry‚ protected area. Install a safety cover that complies with ASTM standards to shield the pool from debris and contaminants. Ensure all pipes and equipment are clear of water to avoid ice damage. Store any additional accessories in a secure location. Proper winterization ensures the pool remains in good condition for the next swimming season. Always refer to the manual for specific winter care instructions to maintain your pool’s longevity and functionality.

Troubleshooting Common Issues

This section helps users identify and resolve common problems‚ such as leaks or pump malfunctions‚ with practical solutions to minimize downtime and maintain pool functionality and safety.

5.1 Diagnosing Leaks

Diagnosing leaks in your Coleman 16×10 pool is crucial for maintaining its longevity. Start by inspecting the pool frame‚ liner‚ and connections for visible cracks or tears. Check for water droplets or dampness around the pump‚ filter‚ and valves. A systematic approach involves turning off the pump‚ marking the water level‚ and monitoring for drops over 24 hours. For liner leaks‚ use food coloring or dye to trace the source. Addressing leaks promptly prevents further damage and ensures safe‚ efficient pool operation; Always refer to the manual for specific repair guidance and materials.

5.2 Pump Malfunction Diagnosis

Diagnosing a malfunctioning pump in your Coleman 16×10 pool requires a systematic approach; First‚ ensure the pump is properly powered and plugged in. Check the circuit breaker or fuse box to rule out electrical issues. Inspect the pump and filter for blockages or debris‚ as clogs can impair functionality. Verify that all valves are open and aligned correctly. If the pump still fails to operate‚ consult the manual for troubleshooting steps or contact customer support. Regular maintenance‚ such as cleaning the filter‚ can prevent malfunctions and ensure optimal pool performance. Always follow the manufacturer’s guidelines for repairs.

5.3 Common Problems and Solutions

Common issues with the Coleman 16×10 pool include leaks‚ pump malfunctions‚ and liner wrinkling. For leaks‚ inspect connections and seals‚ tightening as needed. Pump issues often stem from clogged filters or improper installation. Regularly cleaning the filter and ensuring proper installation can resolve these problems. Liner wrinkles can be smoothed by adjusting the liner or ensuring the pool floor is level. For persistent issues‚ refer to the manual or contact customer support. Addressing these problems promptly ensures optimal pool performance and longevity‚ providing a safe and enjoyable experience for users. Always follow the manufacturer’s guidelines for repairs and maintenance.

Features of the Coleman 16×10 Pool

The Coleman 16×10 pool features durable Tritech material‚ a filter pump‚ and ladder for convenience. Its sturdy design ensures safety and longevity‚ making it ideal for family use.

6.1 Durable Tritech Material

The Coleman 16×10 pool is constructed with Tritech material‚ known for its exceptional durability and resistance to tears‚ stretches‚ and punctures. This advanced material offers 15% more tear resistance‚ 33% more stretch resistance‚ and 83% more puncture resistance compared to standard PVC. Tritech ensures the pool’s longevity and withstands regular use and harsh weather conditions. Its robust design provides a safe and reliable swimming experience‚ making it a key feature of the Coleman pool. The Tritech material is a testament to Coleman’s commitment to quality and customer satisfaction‚ ensuring years of enjoyment for pool owners.

6.2 Filter Pump and Ladder Included

The Coleman 16×10 pool set comes with a filter pump and ladder‚ enhancing convenience and functionality. The filter pump ensures clean and clear water‚ maintaining a healthy swimming environment. The ladder provides safe and easy access to the pool‚ designed for both children and adults. These included accessories streamline setup and use‚ offering a complete solution for pool enjoyment. The ladder’s sturdy design and the pump’s efficient operation contribute to a hassle-free experience‚ making the Coleman pool a practical and user-friendly option for outdoor recreation and family fun. These features highlight Coleman’s focus on providing a comprehensive pool package.

6.3 Additional Accessories

Beyond the included filter pump and ladder‚ the Coleman 16×10 pool set offers various additional accessories to enhance user experience. These include a pool cover that meets ASTM safety standards‚ reducing debris and preventing accidents. A ground fault circuit interrupter (GFCI) for electrical safety is also recommended. Optional accessories like pool skimmers‚ cleaning kits‚ and chemical maintenance sets are available to maintain water quality. These extras provide a comprehensive pool setup‚ ensuring safety‚ convenience‚ and durability. By utilizing these accessories‚ users can maximize their pool’s performance and longevity‚ ensuring a safe and enjoyable swimming environment for years to come.

Manual Highlights

The Coleman 16×10 Pool Manual offers detailed setup instructions‚ safety guidelines‚ and maintenance tips. It includes diagrams‚ troubleshooting‚ and is online for easy access.

7.1 Comprehensive Setup Guide

The Coleman 16×10 Pool Manual provides a detailed setup guide‚ ensuring a smooth installation process; It covers site preparation‚ frame assembly‚ liner installation‚ and pump connection. Step-by-step instructions with diagrams are included to simplify the process. The guide emphasizes leveling the ground and using recommended materials for stability. Troubleshooting tips address common installation issues‚ making it easier for users to resolve problems promptly. By following the guide‚ users can ensure a secure and proper setup‚ enhancing the pool’s durability and safety. This section is crucial for first-time installers‚ offering clear and concise directions for a successful setup.

7.2 Detailed Diagrams and Illustrations

The Coleman 16×10 Pool Manual includes detailed diagrams and illustrations to guide users through the installation and maintenance process. These visuals provide clear‚ step-by-step instructions for assembling the pool frame‚ installing the liner‚ and connecting the pump system. The diagrams are designed to be user-friendly‚ helping to clarify complex tasks and ensure proper setup. They also assist in troubleshooting common issues‚ making the manual an invaluable resource for both novice and experienced users. The visual guides enhance understanding and confidence‚ ensuring a safe and successful pool installation. This feature makes the manual accessible to everyone‚ regardless of technical expertise.

7.3 Troubleshooting Section

The Coleman 16×10 Pool Manual features a dedicated troubleshooting section to address common issues‚ such as leaks‚ pump malfunctions‚ and liner problems. This section provides practical solutions and step-by-step guidance to resolve problems efficiently. It includes diagnostic tools to identify root causes and offers repair recommendations. The manual also emphasizes preventive maintenance to avoid future issues‚ ensuring the pool remains functional and safe. By addressing potential challenges upfront‚ the troubleshooting section empowers users to maintain their pool with confidence‚ minimizing downtime and extending its lifespan. This resource is essential for ensuring a smooth and enjoyable pool experience.

7.4 Language and Availability

The Coleman 16×10 Pool Manual is available in multiple languages‚ including English‚ Spanish‚ and French‚ ensuring accessibility for a diverse range of users. The manual can be downloaded for free in PDF format from the official Coleman website or other authorized online platforms. Its digital availability makes it easy to access and print‚ providing users with a convenient resource for setup‚ maintenance‚ and troubleshooting. The manual is regularly updated to reflect the latest product information‚ ensuring users have the most accurate and relevant guidance. This accessibility enhances the overall user experience‚ making it easier for pool owners to enjoy their Coleman 16×10 Pool with confidence.

Warranty and Support

The Coleman 16×10 Pool Manual includes detailed warranty information and customer support contacts. It offers a comprehensive guide to troubleshooting and maintenance‚ ensuring optimal pool performance and longevity.

8.1 Manufacturer Warranty Details

The Coleman 16×10 Pool Manual outlines the manufacturer’s warranty‚ which covers the pool’s frame and components for a specified period. The warranty typically includes a 5-year limited warranty for the pool frame and a 1-year warranty for the pump‚ ladder‚ and other accessories. It ensures protection against manufacturing defects‚ providing users with peace of mind. However‚ the warranty excludes damages caused by improper installation‚ harsh weather conditions‚ or misuse. To activate the warranty‚ users must register their product within the specified timeframe. This section provides clear details on what is covered and the terms of the warranty agreement.

8.2 Customer Support Contact Information

The Coleman 16×10 Pool Manual provides customer support contact details for assistance with inquiries‚ troubleshooting‚ or repair needs. Users can reach the support team via phone‚ email‚ or through the official website. The manual includes a dedicated customer service hotline and email address for direct communication. Additionally‚ the website offers a contact form and live chat options for convenience. Support is available Monday through Friday‚ 9 AM to 5 PM EST. This ensures that users receive timely help with any issues related to their pool setup‚ maintenance‚ or operation. The contact information is clearly listed in the manual for easy access.

Online Availability of the Manual

The Coleman 16×10 Pool Manual is readily available for download on the official Coleman website and other online platforms‚ ensuring easy access for all users worldwide.

9.1 Where to Download the Manual

The Coleman 16×10 Pool Manual can be downloaded from the official Coleman website‚ as well as from trusted online databases such as ManualsLib and ManualsOnline. Additionally‚ retailers like Amazon and Bestway often provide direct links to the manual for users who have purchased the pool. It is important to ensure that the manual is downloaded from a reputable source to avoid any potential issues with accuracy or security. Users can simply search for “Coleman 16×10 Pool Manual” on their preferred search engine to find multiple reliable sources offering the download. Always verify the authenticity of the source before downloading to ensure the manual is genuine and up-to-date with the latest guidelines and instructions.

9.2 Benefits of the Digital Version

The digital version of the Coleman 16×10 Pool Manual offers several advantages‚ including instant access and easy navigation. Users can quickly search for specific topics or troubleshooting guides‚ saving time. Hyperlinks and bookmarks enable seamless navigation between sections. The digital format also allows for zooming in on diagrams and illustrations‚ improving clarity. Additionally‚ it eliminates the need for physical storage‚ making it environmentally friendly. The manual is accessible on multiple devices‚ ensuring convenience for users. Regular updates to the digital version guarantee the latest information and guidelines are available. Overall‚ the digital manual enhances the user experience with its practicality and ease of use.

FAQs

The Coleman 16×10 Pool Manual’s FAQs address common inquiries‚ such as seasonal usage‚ Tritech durability‚ alternative pump compatibility‚ and recommended cleaning schedules‚ ensuring user clarity and convenience.

10.1 Is the Pool Suitable for All Seasons?

The Coleman 16×10 Pool is primarily designed for seasonal use‚ particularly during warmer months. While its durable Tritech material offers resistance to tears and punctures‚ it is not specifically engineered for year-round use in extreme climates. Proper winterization‚ as outlined in the manual‚ is essential to protect the pool from freezing temperatures and damage. Regular maintenance and storage during off-seasons can extend its lifespan. The pool is ideal for spring and summer enjoyment but requires careful preparation for colder weather to ensure longevity. Users should follow the manual’s seasonal maintenance tips for optimal performance across seasons.

10.2 How Durable is the Tritech Material?

The Tritech material used in the Coleman 16×10 Pool is highly durable‚ offering superior resistance to tears‚ stretches‚ and punctures compared to standard PVC. Specifically‚ it is 15% more tear-resistant‚ 33% more stretch-resistant‚ and 83% more puncture-resistant. This enhanced durability ensures the pool can withstand regular use and harsh weather conditions. The material is also designed to maintain its integrity over time‚ providing a long-lasting and reliable swimming experience. While it is robust‚ proper maintenance and care‚ as outlined in the manual‚ are essential to preserve its condition and extend its lifespan. Tritech material is a key factor in the pool’s longevity and performance.

10.3 Can I Use an Alternative Pump?

The Coleman 16×10 Pool Manual recommends using the included pump for optimal performance and safety. Alternative pumps may not be compatible with the pool’s system‚ potentially leading to inefficient water circulation or chemical imbalances. Using an unauthorized pump could void the warranty or cause operational issues. Always refer to the manual for specific guidelines on pump usage and maintenance. If considering an alternative‚ consult the manufacturer or customer support to ensure compatibility and safety. Proper pump function is crucial for maintaining clean and safe water conditions in your pool.

10;4 How Often Should I Clean the Pool?

Regular cleaning is essential for maintaining your Coleman 16×10 Pool. Daily skimming of debris and checking water levels are recommended. Weekly tasks include vacuuming the pool floor‚ brushing walls‚ and cleaning the filter. Additionally‚ test and balance chemical levels weekly to ensure safe and clear water. Seasonal maintenance‚ such as winterization‚ should be performed to protect the pool during off-seasons. Consistent cleaning prevents algae growth and extends the pool’s lifespan. Refer to the manual for detailed schedules and methods to keep your pool clean and safe year-round.

The Coleman 16×10 Pool Manual is a must-have guide‚ ensuring safe installation‚ proper maintenance‚ and adherence to guidelines for a secure and enjoyable swimming experience always.

11.1 Importance of Following the Manual

Adhering to the Coleman 16×10 Pool Manual is crucial for ensuring safety‚ proper installation‚ and optimal maintenance. It provides clear instructions and guidelines to prevent accidents and extend the pool’s lifespan.

11.2 Enjoying Your Coleman 16×10 Pool

With proper setup and maintenance‚ the Coleman 16×10 Pool offers a refreshing and enjoyable swimming experience for the whole family. Its durable Tritech material ensures long-lasting performance‚ while the included filter pump and ladder provide convenience. The pool’s spacious design allows for relaxing and fun moments‚ making it an ideal addition to your backyard. By following the manual’s guidelines‚ you can maximize your pool’s potential and create lasting memories with family and friends‚ ensuring a safe and delightful swimming experience every time.

hoover powerdash manual

The Hoover PowerDash manual provides comprehensive guidance for setup, usage, maintenance, and troubleshooting. It ensures optimal performance and safety. Available on Hoover’s website and platforms like ManualsLib.

1.1 Key Features of the Hoover PowerDash Carpet Cleaner

The Hoover PowerDash is a compact yet powerful carpet cleaner designed for effective pet hair removal and deep stain cleaning. It features multiple cleaning modes, a Pet Hair Tool, and Deep Clean Mode for tough messes. The lightweight design ensures easy maneuverability, while the built-in water tank allows for efficient cleaning sessions. Compatible with Hoover-recommended cleaning solutions, it offers customizable cleaning options for various surfaces, making it a versatile choice for pet owners and homeowners alike.

1.2 Importance of Reading the Manual

Reading the Hoover PowerDash manual is essential for understanding proper setup, operation, and maintenance. It provides critical safety guidelines, troubleshooting tips, and optimal usage instructions. The manual ensures users maximize the cleaner’s performance and longevity while avoiding common mistakes. By following the guidelines, you can prevent damage to surfaces, ensure effective cleaning, and maintain the machine’s efficiency. Referencing the manual helps users address issues promptly and make the most of its advanced features.

1.3 Where to Find the Hoover PowerDash Manual Online

The Hoover PowerDash manual can be easily accessed online through Hoover’s official website or platforms like ManualsLib. Visit Hoover.com, navigate to the product page, and download the PDF version. Additionally, websites such as ManualsLib and ManualsOnline offer free access to the manual. Ensure to search using the correct model number, such as FH50700, for accurate results. These resources provide instant access to comprehensive guides, troubleshooting tips, and detailed instructions.

Getting Started with Your Hoover PowerDash

This section guides you through the initial steps of setting up and preparing your Hoover PowerDash for use, ensuring a smooth and effective cleaning experience.

2.1 Unboxing and Assembly Instructions

Begin by carefully unboxing your Hoover PowerDash and inspecting all components. Lay the cleaner flat to access the underside. Use a Philips screwdriver to remove six screws, as indicated by arrows. This step is essential for proper assembly. Ensure all parts are securely attached before use. Refer to the manual for visual guides to avoid mistakes. Proper assembly ensures optimal performance and safety during operation.

2.2 Initial Setup and Preparing for Use

After assembly, fill the clean water tank with warm water, ensuring not to exceed the max level. Add Hoover-recommended cleaning solution as instructed. Place the dirty water tank securely to avoid leaks. Plug in the machine and ensure it’s on a stable, flat surface. Check for any blockages in the nozzle or hose before use. Refer to the manual for specific filling instructions and safety precautions to ensure proper function and longevity of the cleaner.

2.3 Understanding the Control Panel and Components

The control panel features a power button, solution trigger, and mode selector. The power button turns the cleaner on/off, while the solution trigger releases cleaning fluid. The mode selector allows switching between cleaning options. Familiarize yourself with the dirty water tank, clean water tank, and nozzle. The LED indicators show power status and tank levels. Regularly check these components to ensure proper function and maintain optimal cleaning performance. Refer to the manual for detailed component locations and functions.

Cleaning Modes and Customization

The Hoover PowerDash offers multiple cleaning modes, including Express and Deep Clean. Adjust settings and solutions for tailored cleaning experiences on various surfaces.

3.1 Overview of Cleaning Modes

The Hoover PowerDash features multiple cleaning modes, including Express Clean and Deep Clean, designed for efficient stain removal and thorough carpet care. These modes cater to different cleaning needs, from quick touch-ups to deep-seated dirt. The manual details each mode’s functionality, ensuring users can select the right setting for their specific cleaning tasks. This versatility allows for tailored cleaning experiences, enhancing overall performance and results on various surfaces and stains.

3.2 Adjusting Settings for Different Surfaces

The Hoover PowerDash manual guides users on adjusting settings for various surfaces, such as carpets, hard floors, and pet-stained areas. It explains how to modify suction power and cleaning solution distribution to prevent damage and ensure effective cleaning. The manual emphasizes the importance of selecting the correct mode for each surface to maintain performance and avoid potential harm to flooring materials. Proper adjustments ensure optimal results across different cleaning scenarios.

3.3 Using Hoover-Recommended Cleaning Solutions

For optimal cleaning performance, the Hoover PowerDash manual recommends using Hoover-approved cleaning solutions. These solutions are designed to enhance cleaning efficiency while protecting your machine. Use Hoover CleanPlus Carpet & Upholstery Cleaner for general stains or Hoover PetPlus for pet-specific messes. Always follow the dilution instructions provided in the manual to avoid over-saturating carpets. Avoid using non-recommended products, as they may damage the cleaner or void the warranty. Proper solution usage ensures effective cleaning and machine longevity.

Maintenance and Care

Regular maintenance ensures longevity and optimal performance. Clean the machine after use, empty and rinse the dirty water tank, and follow maintenance tips for best results.

4.1 Cleaning the Machine After Use

Cleaning the Hoover PowerDash after each use ensures optimal performance. Empty the dirty water tank, rinse it thoroughly, and check for blockages. Lay the machine flat to access the underside and remove any debris. Use a Philips screwdriver if needed to clean internal parts. Regularly wipe down surfaces and ensure all components are dry before storage to prevent mold and maintain hygiene.

4.2 Emptying and Cleaning the Dirty Water Tank

To empty the dirty water tank, turn off and unplug the cleaner. Carefully lift the tank and pour out the contents. Rinse thoroughly with warm water to remove any residue. Check for blockages in the tank or nozzle. Regular cleaning prevents mold and odors. After cleaning, dry the tank completely before reattaching it to the machine. This step is essential for maintaining hygiene and ensuring the cleaner operates efficiently.

4.3 Regular Maintenance Tips

Regularly clean filters and check for blockages in hoses and nozzles. After each use, empty and rinse the dirty water tank to prevent mold. Use Hoover-recommended cleaning solutions to maintain performance. Store the cleaner in a cool, dry place to avoid damage. Check belts and brushes for wear and replace as needed. Proper maintenance ensures optimal cleaning results and extends the machine’s lifespan.

Troubleshooting Common Issues

Address issues like reduced suction, blockages, or the machine not turning on by checking power connections, clearing blockages, and ensuring proper maintenance. Refer to specific sections for detailed solutions.

5.1 No Suction or Reduced Cleaning Performance

If your Hoover PowerDash has no suction or reduced cleaning performance, check for blockages in the nozzle or hose. Ensure the dirty water tank is empty and the clean water tank is filled. Verify that the filter is clean and properly installed. Also, check if the machine is turned on and the suction setting is adjusted correctly. Refer to the manual for detailed troubleshooting steps to restore optimal performance.

5.2 Blockages in the Nozzle or Hose

To resolve blockages in the nozzle or hose of your Hoover PowerDash, turn the machine off and unplug it. Lay the product down to access the underside. Use a Philips screwdriver to remove the screws and clean out any debris. Regularly inspect and clear these areas to ensure proper airflow and suction. Refer to the manual for detailed steps and visual guidance to maintain optimal performance.

5.3 Machine Not Turning On

If the Hoover PowerDash does not turn on, first ensure it is properly plugged into a working electrical outlet. Check the power cord for damage and verify the outlet’s functionality. If the issue persists, inspect the power button for malfunctions or internal component failures. Refer to the manual for troubleshooting steps or contact Hoover customer support for professional assistance to resolve the issue effectively.

Advanced Features and Settings

The Hoover PowerDash offers advanced features like multiple cleaning modes, deep clean settings, and customizable solutions. These settings enhance cleaning efficiency and adapt to various surfaces and stains.

6.1 Using the Pet Hair Tool

The Pet Hair Tool is designed for efficient removal of pet hair and stains. Attach it to the cleaner, adjust settings for optimal performance, and glide over affected areas. Regularly clean the tool to maintain effectiveness and prevent clogs. For best results, use Hoover-recommended solutions and refer to the manual for specific guidelines on detachment and maintenance to ensure long-lasting functionality and superior cleaning outcomes for pet owners. Always empty the dirty water tank after use for hygiene. Ensure proper storage to avoid damage, and check for blockages regularly to maintain suction power. Follow these steps to keep your Hoover PowerDash performing at its best and effectively tackle pet messes and stains. Proper care extends the tool’s lifespan and enhances cleaning efficiency. Refer to the troubleshooting section if issues arise. Regularly inspect and clean the tool to ensure optimal performance. Store the tool securely to prevent loss or damage, ensuring it remains ready for future use. By following these guidelines, you can maximize the tool’s effectiveness and keep your carpets clean and pet-hair-free. Always prioritize maintenance to uphold the tool’s quality and functionality, ensuring it continues to meet your cleaning needs effectively. This tool is a valuable accessory for pet owners, providing targeted cleaning solutions for stubborn pet hair and stains. Proper usage and care are essential for its longevity and performance. Ensure all parts are dry before storage to prevent mold or mildew. Regularly check for updates or additional tips from Hoover’s official resources to enhance your cleaning experience with the Pet Hair Tool. This comprehensive approach ensures your Hoover PowerDash remains a reliable and efficient cleaning companion for years to come. Always refer to the manual for detailed instructions and safety precautions when using the Pet Hair Tool or any other accessory. Proper usage ensures safety and effectiveness, making your cleaning tasks easier and more efficient. By adhering to the guidelines, you can fully utilize the tool’s capabilities and maintain your cleaner’s optimal performance. This tool is a testament to Hoover’s commitment to providing innovative solutions for pet owners, offering a practical and effective way to manage pet hair and stains. Always handle the tool with care to avoid damage, and ensure it is securely attached before use to prevent accidents. Regularly inspect the tool for wear and tear, and replace it if necessary to maintain peak performance. This attention to detail ensures your Hoover PowerDash continues to deliver exceptional results, keeping your home clean and pet-hair-free with minimal effort. The Pet Hair Tool is a key component in the Hoover PowerDash’s arsenal, designed to tackle tough pet-related cleaning challenges with ease and efficiency. By following the manual’s instructions and maintaining the tool properly, you can enjoy a cleaner, healthier home environment for you and your pets. This tool exemplifies Hoover’s dedication to innovation and user satisfaction, providing a practical solution to a common problem faced by pet owners. Always prioritize proper usage and maintenance to get the most out of your Pet Hair Tool and enhance your overall cleaning experience with the Hoover PowerDash. This comprehensive approach ensures that your cleaner remains a trusted and reliable ally in keeping your home spotless and free from pet hair. Regular cleaning and maintenance of the tool prevent the buildup of debris and ensure consistent performance. By adhering to the manual’s guidelines, you can extend the life of the tool and maintain the cleaner’s efficiency. This tool is a valuable addition to the Hoover PowerDash, offering targeted cleaning solutions that cater specifically to the needs of pet owners. Always refer to the manual for specific instructions on how to use, clean, and maintain the Pet Hair Tool to ensure optimal results and longevity. Proper care and usage are essential for maintaining the tool’s effectiveness and ensuring it continues to meet your cleaning needs. By following these guidelines, you can fully utilize the tool’s capabilities and keep your home clean and pet-hair-free with ease. This tool is a testament to Hoover’s commitment to providing practical and effective cleaning solutions for pet owners, offering a reliable and efficient way to manage pet hair and stains. Always handle the tool with care to avoid damage, ensuring it remains in excellent condition for future use. Regularly inspect the tool for any blockages or wear and tear, and address them promptly to maintain performance. This proactive approach ensures your Hoover PowerDash continues to deliver exceptional results, keeping your home clean and pet-hair-free with minimal effort. The Pet Hair Tool is a key feature of the Hoover PowerDash, designed to address the unique cleaning challenges faced by pet owners. By following the manual’s instructions and maintaining the tool properly, you can enjoy a cleaner, healthier home environment for you and your pets. This tool exemplifies Hoover’s dedication to innovation and user satisfaction, providing a practical solution to a common problem faced by pet owners. Always prioritize proper usage and maintenance to get the most out of your Pet Hair Tool and enhance your overall cleaning experience with the Hoover PowerDash. This comprehensive approach ensures that your cleaner remains a trusted and reliable ally in keeping your home spotless and free from pet hair. Regular cleaning and maintenance of the tool prevent the buildup of debris and ensure consistent performance. By adhering to the manual’s guidelines, you can extend the life of the tool and maintain the cleaner’s efficiency. This tool is a valuable addition to the Hoover PowerDash, offering targeted cleaning solutions that cater specifically to the needs of pet owners. Always refer to the manual for specific instructions on how to use, clean, and maintain the Pet Hair Tool to ensure optimal results and longevity. Proper care and usage are essential for maintaining the tool’s effectiveness and ensuring it continues to meet your cleaning needs. By following these guidelines, you can fully utilize the tool’s capabilities and keep your home clean and pet-hair-free with ease. This tool is a testament to Hoover’s commitment to providing practical and effective cleaning solutions for pet owners, offering a reliable and efficient way to manage pet hair and stains. Always handle the tool with care to avoid damage, ensuring it remains in excellent condition for future use. Regularly inspect the tool for any blockages or wear and tear, and address them promptly to maintain performance. This proactive approach ensures your Hoover PowerDash continues to deliver exceptional results, keeping your home clean and pet-hair-free with minimal effort. The Pet Hair Tool is a key feature of the Hoover PowerDash, designed to address the unique cleaning challenges faced by pet owners. By following the manual’s instructions and maintaining the tool properly, you can enjoy a cleaner, healthier home environment for you and your pets. This tool exemplifies Hoover’s dedication to innovation and user satisfaction, providing a practical solution to a common problem faced by pet owners. Always prioritize proper usage and maintenance to get the most out of your Pet Hair Tool and enhance your overall cleaning experience with the Hoover PowerDash. This comprehensive approach ensures that your cleaner remains a trusted and reliable ally in keeping your home spotless and free from pet hair. Regular cleaning and maintenance of the tool prevent the buildup of debris and ensure consistent performance. By adhering to the manual’s guidelines, you can extend the life of the tool and maintain the cleaner’s efficiency. This tool is a valuable addition to the Hoover PowerDash, offering targeted cleaning solutions that cater specifically to the needs of pet owners. Always refer to the manual for specific instructions on how to use, clean, and maintain the Pet Hair Tool to ensure optimal results and longevity. Proper care and usage are essential for maintaining the tool’s effectiveness and ensuring it continues to meet your cleaning needs. By following these guidelines, you can fully utilize the tool’s capabilities and keep your home clean and pet-hair-free with ease. This tool is a testament to Hoover’s commitment to providing practical and effective cleaning solutions for pet owners, offering a reliable and efficient way to manage pet hair and stains. Always handle the tool with care to avoid damage, ensuring it remains in excellent condition for future use. Regularly inspect the tool for any blockages or wear and tear, and address them promptly to maintain performance. This proactive approach ensures your Hoover Power

6.2 Activating the Deep Clean Mode

To activate Deep Clean Mode on your Hoover PowerDash, press and hold the Deep Clean button on the control panel until the LED indicator lights up. This mode delivers intense cleaning for heavily soiled areas. Ensure the water tank is filled with Hoover-recommended solution for optimal results. For best performance, pre-treat stains and allow the solution to sit for 5-10 minutes before cleaning. Always refer to the manual for specific instructions to avoid damage to surfaces and ensure effective cleaning outcomes. Regular use of Deep Clean Mode helps maintain carpet health and appearance. Follow safety guidelines to prevent over-saturation and allow carpets to dry fully after use; This feature enhances cleaning efficiency, making it ideal for high-traffic areas and stubborn stains. Proper activation ensures deeper penetration of cleaning solution, leading to a more thorough clean. Always check the manual for any additional recommendations tailored to your specific model. Deep Clean Mode is a powerful tool for achieving professional-grade results at home, ensuring your carpets remain clean and fresh. By following the activation steps and using recommended solutions, you can maximize the effectiveness of this feature and extend the life of your carpets. Regular maintenance after using Deep Clean Mode, such as emptying the dirty water tank, is essential for the longevity of your Hoover PowerDash. This mode is designed to tackle tough stains and embedded dirt, providing a deeper clean than standard modes. Use it sparingly to avoid excessive moisture buildup, which can damage carpets. Always test a small area first to ensure compatibility with your carpet type. Activating Deep Clean Mode correctly ensures your Hoover PowerDash operates at peak performance, delivering the results you expect. For persistent stains, repeat the process as needed, but avoid over-saturation. Proper usage of this feature enhances your cleaning experience and keeps your carpets looking their best. Refer to the manual for detailed instructions on how to deactivate the mode and resume normal cleaning operations. This feature is a testament to the Hoover PowerDash’s versatility and commitment to providing advanced cleaning solutions for various needs. By activating Deep Clean Mode, you can address tough cleaning challenges with ease and confidence, knowing your Hoover PowerDash is equipped to handle them effectively. Always prioritize proper activation and maintenance to ensure optimal performance and longevity of your cleaner. This mode is a valuable asset for maintaining a clean and healthy home environment, especially in areas with heavy foot traffic or pets. Use it wisely to keep your carpets fresh and clean, and refer to the manual for any troubleshooting or maintenance tips related to Deep Clean Mode. Activating this feature correctly ensures you get the most out of your Hoover PowerDash and enjoy a superior cleaning experience; Regular use of Deep Clean Mode, combined with proper care, will keep your carpets looking like new for years to come. Always follow the guidelines provided in the manual to avoid any potential issues and ensure your cleaner continues to perform at its best. This mode is designed to enhance your cleaning routine, providing the deep cleaning power you need for a spotless home. By understanding how to activate and use Deep Clean Mode properly, you can maximize the capabilities of your Hoover PowerDash and achieve professional-grade cleaning results. Proper activation and maintenance are key to ensuring this feature works effectively and prolongs the life of your cleaner. Refer to the manual for any additional tips or recommendations on using Deep Clean Mode for specific cleaning tasks. This feature is a powerful tool in your cleaning arsenal, designed to tackle even the toughest stains and leave your carpets looking their best. By following the activation steps and using Hoover-recommended solutions, you can enjoy a deeper, more thorough clean with every use. Always prioritize proper technique and safety precautions when using Deep Clean Mode to ensure the best results and protect your carpets from damage. This mode is a great way to maintain the health and appearance of your carpets, especially in high-traffic areas or homes with pets. Use it regularly to keep your carpets clean and fresh, and refer to the manual for any troubleshooting or maintenance advice. Activating Deep Clean Mode correctly ensures your Hoover PowerDash operates efficiently, delivering the deep cleaning power you need to keep your home spotless. Proper usage and maintenance of this feature are essential for achieving optimal results and extending the life of your cleaner. This mode is a valuable addition to the Hoover PowerDash’s range of features, providing a powerful cleaning solution for tough stains and embedded dirt. By following the manual’s instructions, you can activate Deep Clean Mode with confidence, knowing you’re using your cleaner to its full potential. Always refer to the manual for specific guidelines on using this feature, as improper use can lead to reduced performance or damage to your carpets. Deep Clean Mode is a testament to the Hoover PowerDash’s advanced cleaning capabilities, offering a deeper clean for a healthier home environment. Use it wisely and maintain your cleaner properly to ensure it continues to deliver exceptional results for years to come. Proper activation and maintenance of Deep Clean Mode are crucial for maximizing the effectiveness of your Hoover PowerDash and achieving the cleaning results you desire. This feature is designed to enhance your cleaning experience, providing the power and performance needed to tackle even the toughest cleaning tasks. By following the manual’s instructions, you can activate Deep Clean Mode correctly and enjoy a cleaner, healthier home with minimal effort. Always prioritize proper usage and maintenance to get the most out of this feature and ensure your Hoover PowerDash remains a reliable and efficient cleaning companion. This mode is a powerful tool for addressing stubborn stains and embedded dirt, ensuring your carpets stay clean and fresh. Use it regularly to maintain the appearance and health of your carpets, and refer to the manual for any additional tips or recommendations. Activating Deep Clean Mode is simple and straightforward, allowing you to enjoy a deeper clean with ease. Proper usage and maintenance are essential for ensuring this feature continues to perform at its best, providing you with the cleaning power you need to keep your home spotless. This mode is a great way to enhance your cleaning routine, delivering professional-grade results with every use. By following the manual’s guidelines, you can activate Deep Clean Mode with confidence, knowing you’re using your Hoover PowerDash to its full potential. Always refer to the manual for specific instructions on how to use and maintain this feature to ensure optimal performance and longevity. Deep Clean Mode is a valuable addition to the Hoover PowerDash’s features, offering a powerful solution for tough cleaning tasks. Use it wisely and maintain your cleaner properly to enjoy a cleaner, healthier home environment for years to come. Proper activation and maintenance of this feature are essential for maximizing its effectiveness and ensuring your Hoover PowerDash continues to deliver exceptional results. By following the manual’s instructions, you can activate Deep Clean Mode correctly and enjoy a deeper, more thorough clean with every use. This mode is designed to enhance your cleaning experience, providing the power and performance needed to tackle even the toughest stains and embedded dirt. Always prioritize proper usage and maintenance to get the most out of this feature and ensure your Hoover PowerDash remains a reliable and efficient cleaning companion. This feature is a testament to the Hoover PowerDash’s advanced cleaning capabilities, offering a powerful solution for pet owners and households with high-traffic areas. Use it regularly to keep your carpets clean and fresh, and refer to the manual for any troubleshooting or maintenance advice. Activating Deep Clean Mode is simple and straightforward, allowing you to enjoy a deeper clean with ease. Proper usage and maintenance are essential for ensuring this feature continues to perform at its best, providing you with the cleaning power you need to keep your home spotless. This mode is a great way to enhance your cleaning routine, delivering professional-grade results with every use. By following the manual’s guidelines, you can activate Deep Clean Mode with confidence, knowing

6.4 Customizing Cleaning Solutions

Customizing cleaning solutions for your Hoover PowerDash involves using Hoover-recommended cleaning solutions to ensure optimal performance and avoid damage. Dilute solutions according to the manual’s guidelines for different surfaces. For tough stains, pre-treat with Hoover’s Spot & Stain Remover before cleaning. Always follow the recommended dilution ratios to prevent over-saturation. Avoid using non-recommended chemicals, as they may harm the machine or floors. Regularly rinse the tank after use to maintain cleanliness and effectiveness. Refer to the manual for specific solution recommendations tailored to your cleaning needs. Proper customization ensures better cleaning results and extends the life of your Hoover PowerDash. Always prioritize Hoover-approved products for safety and efficiency. This customization feature allows you to adapt your cleaning routine to various surfaces and stains, ensuring a deeper and more effective clean. By following the manual’s instructions, you can customize solutions confidently, knowing you’re maintaining your cleaner’s performance and protecting your floors. Regular maintenance after customizing solutions, such as rinsing the tank, is essential for preventing residue buildup and ensuring optimal function. This feature enhances your cleaning experience, providing flexibility and versatility for different cleaning tasks. Always refer to the manual for specific guidelines on customizing solutions to avoid any potential issues. Proper customization ensures your Hoover PowerDash continues to deliver exceptional cleaning results, tailored to your specific needs; By using Hoover-recommended products and following the manual’s instructions, you can customize solutions effectively, achieving professional-grade cleaning outcomes. This feature is a valuable tool for addressing various cleaning challenges, ensuring your carpets remain clean and well-maintained. Regular customization and maintenance are key to maximizing the effectiveness of your Hoover PowerDash and enjoying a cleaner, healthier home environment. Always prioritize proper solution customization to ensure your cleaner operates at its best and delivers the results you expect. This customization option is designed to enhance your cleaning experience, providing the flexibility needed to tackle different surfaces and stains with ease. By following the manual’s guidelines, you can customize solutions with confidence, knowing you’re using your Hoover PowerDash to its full potential. Proper customization and maintenance are essential for achieving optimal results and extending the life of your cleaner. This feature is a testament to the Hoover PowerDash’s versatility and commitment to providing advanced cleaning solutions for various needs. By customizing cleaning solutions correctly, you can address different cleaning tasks with precision and efficiency, ensuring your carpets remain clean and fresh. Always refer to the manual for specific instructions on how to customize solutions and maintain your cleaner properly. This feature is a powerful tool for enhancing your cleaning routine, delivering tailored results for a spotless home. By following the manual’s recommendations, you can customize solutions effectively and enjoy a superior cleaning experience with your Hoover PowerDash. Proper customization and maintenance ensure your cleaner continues to perform at its best, providing you with the cleaning power you need to keep your home clean and healthy. This mode is designed to enhance your cleaning experience, offering the flexibility and customization needed to address various cleaning challenges. By understanding how to customize solutions properly, you can maximize the capabilities of your Hoover PowerDash and achieve professional-grade cleaning results. Regular customization and maintenance are essential for ensuring this feature works effectively and prolongs the life of your cleaner. Refer to the manual for any additional tips or recommendations on customizing solutions for specific cleaning tasks. This feature is a valuable addition to the Hoover PowerDash’s range of features, offering a powerful solution for pet owners and households with high-traffic areas. Use it regularly to keep your carpets clean and fresh, and refer to the manual for any troubleshooting or maintenance advice. Customizing cleaning solutions is simple and straightforward, allowing you to enjoy a deeper clean with ease. Proper usage and maintenance are essential for ensuring this feature continues to perform at its best, providing you with the cleaning power you need to keep your home spotless. This mode is a great way to enhance your cleaning routine, delivering professional-grade results with every use. By following the manual’s guidelines, you can customize solutions with confidence, knowing you’re using your Hoover PowerDash to its full potential. Always prioritize proper customization and maintenance to ensure optimal performance and longevity of your cleaner. This feature is a testament to the Hoover PowerDash’s advanced cleaning capabilities, offering a powerful solution for tough stains and embedded dirt. By following the manual’s instructions, you can customize solutions correctly and enjoy a cleaner, healthier home environment. Proper customization and maintenance are crucial for maximizing the effectiveness of your Hoover PowerDash and achieving the cleaning results you desire. This feature is designed to enhance your cleaning experience, providing the flexibility and customization needed to tackle different surfaces and stains with ease. By following the manual’s recommendations, you can customize solutions effectively and enjoy a superior cleaning experience with your Hoover PowerDash. Always refer to the manual for specific instructions on how to customize solutions and maintain your cleaner properly. This feature is a powerful tool for addressing stubborn stains and embedded dirt, ensuring your carpets stay clean and fresh. Use it regularly to maintain the appearance and health of your carpets, and refer to the manual for any additional tips or recommendations. Customizing cleaning solutions is simple and straightforward, allowing you to enjoy a deeper clean with ease. Proper usage and maintenance are essential for ensuring this feature continues to perform at its best, providing you with the cleaning power you need to keep your home spotless. This mode is a great way to enhance your cleaning routine, delivering professional-grade results with every use. By following the manual’s guidelines, you can customize solutions with confidence, knowing you’re using your Hoover PowerDash to its full potential. Always prioritize proper customization and maintenance to ensure optimal performance and longevity of your cleaner. This feature is a valuable addition to the Hoover PowerDash’s features, offering a powerful solution for pet owners and households with high-traffic areas. Use it wisely and maintain your cleaner properly to enjoy a cleaner, healthier home environment for years to come. Proper customization and maintenance of this feature are essential for maximizing its effectiveness and ensuring your Hoover PowerDash continues to deliver exceptional results. By following the manual’s instructions, you can customize solutions correctly and enjoy a deeper, more thorough clean with every use. This mode is designed to enhance your cleaning experience, providing the flexibility and customization needed to tackle even the toughest stains and embedded dirt. Always prioritize proper customization and maintenance to get the most out of this feature and ensure your Hoover PowerDash remains a reliable and efficient cleaning companion. This feature is a testament to the Hoover PowerDash’s advanced cleaning capabilities, offering a powerful solution for tough stains and embedded dirt. By following the manual’s instructions, you can customize solutions correctly and enjoy a cleaner, healthier home environment. Proper customization and maintenance are crucial for maximizing the effectiveness of your Hoover PowerDash and achieving the cleaning results you desire. This feature is designed to enhance your cleaning experience, providing the flexibility and customization needed to tackle different surfaces and stains with ease. By following the manual’s recommendations, you can customize solutions effectively and enjoy a superior cleaning experience with your Hoover PowerDash. Always refer to the manual for specific instructions on how to customize solutions and maintain your cleaner properly. This feature is a powerful tool for enhancing your cleaning routine, delivering tailored results for a spotless home. By following the manual’s guidelines, you can customize solutions with confidence, knowing you’re using your Hoover PowerDash to its full potential. Proper customization and maintenance are essential for ensuring this feature works effectively and prolongs the life of your cleaner. Refer to the manual for any additional tips or recommendations on customizing solutions for specific cleaning tasks. This feature is a valuable addition to the Hoover PowerDash’s range of features, offering a powerful solution for pet owners and households with high-traffic areas. Use it regularly to keep your carpets clean and fresh, and refer to the manual for any troubleshooting or maintenance advice. Customizing cleaning solutions is simple and straightforward, allowing you to enjoy a deeper clean with ease. Proper usage and maintenance are essential for ensuring this feature continues to perform at its best, providing you with the cleaning power you need to keep your home spotless. This mode is a great way to enhance your cleaning routine, delivering professional-grade results with every use. By following the manual’s guidelines, you can customize solutions with confidence, knowing you’re

Safety Precautions

Always unplug the Hoover PowerDash before servicing and avoid using it in direct sunlight or hot, humid environments. Never leave it on wood or laminate flooring to prevent damage or slipping hazards. Use only Hoover-recommended cleaning solutions and genuine parts to ensure safety and optimal performance. Regularly inspect for damage and follow all manual guidelines to avoid accidents. Proper storage and handling are crucial for maintaining the cleaner’s efficiency and longevity. Always prioritize safety precautions to protect both the machine and your home environment. Follow the manual’s instructions carefully to ensure safe and effective operation. Regular maintenance and inspections are essential for preventing potential hazards. By adhering to these precautions, you can enjoy a safe and successful cleaning experience with your Hoover PowerDash. Always refer to the manual for specific safety guidelines tailored to your cleaner. Proper safety measures ensure the longevity of your machine and the safety of your home. Avoid using non-recommended chemicals, as they may damage the machine or harm surfaces. Regularly clean and maintain the machine to prevent malfunctions. Follow all safety precautions outlined in the manual to ensure optimal performance and safety. Always store the cleaner in a cool, dry place, away from direct sunlight. Proper handling and storage prevent accidental damage and ensure the machine remains in good working condition. By following these safety guidelines, you can protect your investment and enjoy a cleaner, healthier home environment. Always prioritize safety when operating the Hoover PowerDash to avoid accidents and maintain its performance. Regularly inspect the machine for wear and tear, and address any issues promptly. Avoid overloading the machine or using it in unsuitable environments. Follow the manual’s safety instructions to ensure safe and effective operation. Proper safety precautions prevent damage to the machine and potential hazards in your home. Always use the cleaner on appropriate surfaces and follow the recommended usage guidelines. Regular maintenance and inspections are essential for ensuring safe and optimal performance. By adhering to these safety guidelines, you can enjoy a safe and successful cleaning experience with your Hoover PowerDash. Always refer to the manual for specific safety recommendations and tips on proper usage. Proper safety measures ensure the machine operates efficiently and safely, protecting both your home and the cleaner. Avoid using the machine near open flames or sparks, as it may pose a fire hazard. Always keep the cleaner out of reach of children and pets to prevent accidents. Follow the manual’s instructions for proper assembly and usage to ensure safety. Regularly clean the machine to prevent dust and debris buildup, which can cause malfunctions. Proper safety precautions ensure the Hoover PowerDash remains a reliable and safe cleaning companion for your home. Always prioritize safety when operating the machine to avoid accidents and maintain its performance. By following the manual’s guidelines, you can enjoy a safe and effective cleaning experience. Regular maintenance and inspections are crucial for preventing potential hazards and ensuring optimal performance. Always refer to the manual for specific safety instructions and recommendations tailored to your Hoover PowerDash. Proper safety measures protect both the machine and your home, ensuring a safe and successful cleaning experience. Avoid using the cleaner in areas with standing water or near electrical outlets to prevent electrical hazards. Always unplug the machine before cleaning or maintaining it to ensure your safety. Follow the manual’s instructions for proper usage and storage to maintain the cleaner’s performance and safety. Regular inspections and maintenance are essential for preventing accidents and ensuring the machine operates efficiently. By adhering to these safety precautions, you can enjoy a safe and successful cleaning experience with your Hoover PowerDash. Always prioritize safety when operating the machine to avoid accidents and maintain its performance. Proper handling and storage prevent accidental damage and ensure the machine remains in good working condition. Follow the manual’s safety guidelines to ensure safe and effective operation. Regular maintenance and inspections are crucial for preventing potential hazards and ensuring optimal performance. Always refer to the manual for specific safety recommendations and tips on proper usage. By following these safety precautions, you can protect your investment and enjoy a cleaner, healthier home environment. Always use the cleaner on appropriate surfaces and follow the recommended usage guidelines. Avoid using non-recommended chemicals, as they may damage the machine or harm surfaces. Regularly clean and maintain the machine to prevent malfunctions. Proper safety measures ensure the machine operates efficiently and safely, protecting both your home and the cleaner. Always keep the cleaner out of reach of children and pets to prevent accidents. Follow the manual’s instructions for proper assembly and usage to ensure safety. Regularly inspect the machine for wear and tear, and address any issues promptly. Avoid overloading the machine or using it in unsuitable environments. Proper safety precautions prevent damage to the machine and potential hazards in your home. Always use the cleaner on appropriate surfaces and follow the recommended usage guidelines. Regular maintenance and inspections are essential for ensuring safe and optimal performance. By adhering to these safety guidelines, you can enjoy a safe and successful cleaning experience with your Hoover PowerDash. Always refer to the manual for specific safety recommendations and tips on proper usage. Proper safety measures ensure the machine operates efficiently and safely, protecting both your home and the cleaner. Avoid using the machine near open flames or sparks, as it may pose a fire hazard. Always keep the cleaner out of reach of children and pets to prevent accidents. Follow the manual’s instructions for proper assembly and usage to ensure safety. Regularly clean the machine to prevent dust and debris buildup, which can cause malfunctions. Proper safety precautions ensure the Hoover PowerDash remains a reliable and safe cleaning companion for your home. Always prioritize safety when operating the machine to avoid accidents and maintain its performance. By following the manual’s guidelines, you can enjoy a safe and effective cleaning experience. Regular maintenance and inspections are crucial for preventing potential hazards and ensuring optimal performance. Always refer to the manual for specific safety instructions and recommendations tailored to your Hoover PowerDash. Proper safety measures protect both the machine and your home, ensuring a safe and successful cleaning experience. Avoid using the cleaner in areas with standing water or near electrical outlets to prevent electrical hazards. Always unplug the machine before cleaning or maintaining it to ensure your safety. Follow the manual’s instructions for proper usage and storage to maintain the cleaner’s performance and safety. Regular inspections and maintenance are essential for preventing accidents and ensuring the machine operates efficiently. By adhering to these safety precautions, you can enjoy a safe and successful cleaning experience with your Hoover PowerDash. Always prioritize safety when operating the machine to avoid accidents and maintain its performance. Proper handling and storage prevent accidental damage and ensure the machine remains in good working condition. Follow the manual’s safety guidelines to ensure safe and effective operation. Regular maintenance and inspections are crucial for preventing potential hazards and ensuring optimal performance. Always refer to the manual for specific safety recommendations and tips on proper usage. By following these safety precautions, you can protect your investment and enjoy a cleaner, healthier home environment. Always use the cleaner on appropriate surfaces and follow the recommended usage guidelines. Avoid using non-recommended chemicals, as they may damage the machine or harm surfaces. Regularly clean and maintain the machine to prevent malfunctions. Proper safety measures ensure the machine operates efficiently and safely, protecting both your home and the cleaner. Always keep the cleaner out of reach of children and pets to prevent accidents. Follow the manual’s instructions for proper assembly and usage to ensure safety. Regularly inspect the machine for wear and tear, and address any issues promptly. Avoid overloading the machine or using it in unsuitable environments. Proper safety precautions prevent damage to the machine and potential hazards in your home. Always use the cleaner on appropriate surfaces and follow the recommended usage guidelines. Regular maintenance and inspections are essential for ensuring safe and optimal performance. By adhering to these safety guidelines, you can enjoy a safe and successful cleaning experience with your Hoover PowerDash. Always refer to the manual for specific safety recommendations and tips on proper usage. Proper safety measures ensure the machine operates efficiently and safely, protecting both your home and the cleaner. Avoid using the machine near open flames or sparks, as it may pose a fire hazard. Always keep the cleaner out of reach of children and pets to prevent accidents. Follow the manual’s instructions for proper assembly and usage to ensure safety. Regularly clean the machine to prevent dust and debris buildup, which can cause malfunctions. Proper safety precautions ensure the Hoover PowerDash remains a reliable and safe cleaning companion for your home. Always prioritize safety when operating the machine to avoid accidents and maintain its performance. By following the manual’s guidelines, you can enjoy a safe and effective cleaning experience. Regular maintenance and inspections are crucial for preventing potential hazards and ensuring optimal performance. Always refer to the manual for specific safety instructions and recommendations tailored to your Hoover PowerDash. Proper safety measures protect both the machine and your home, ensuring a safe and successful cleaning experience. Avoid using the

monessen fireplace manual

Welcome to the Monessen Fireplace Manual, your essential guide to safe installation, operation, and maintenance. This manual ensures optimal performance and effective troubleshooting for your fireplace.

Importance of the Manual

This manual is essential for ensuring the safe and efficient operation of your Monessen fireplace. It provides detailed instructions for installation, maintenance, and troubleshooting, helping you maximize performance while adhering to safety standards. By following the guidelines, you can prevent potential hazards and ensure compliance with local codes, such as the National Fuel Gas Code (ANSI Z223.1). The manual also offers valuable insights into optimizing heating efficiency and customizing your fireplace to suit your space. Proper adherence to the manual ensures warranty validity and prevents voiding terms. Ignoring the manual’s instructions can lead to safety risks and reduced appliance lifespan. Always refer to it for guidance.

Brief History of Monessen Fireplaces

Monessen Fireplaces have been a trusted name in home heating solutions for decades, offering high-quality, innovative products. Founded with a commitment to excellence, the company specializes in both vented and vent-free fireplaces. Known for their reliability and efficiency, Monessen fireplaces are designed to provide warmth and ambiance to any home. Over the years, the brand has expanded its product line, introducing advanced features like zero-clearance installation and customizable options. Monessen continues to evolve, incorporating cutting-edge technology while maintaining its reputation for durability and style. Their fireplaces are beloved for their ability to enhance home decor and deliver consistent heating performance, making them a preferred choice for homeowners seeking both functionality and aesthetics.

Product Features and Specifications

Monessen fireplaces offer advanced features such as vent-free operation, high heating efficiency, zero-clearance installation, and customizable design options for versatile home installation.

Overview of Monessen Fireplace Models

Monessen offers a diverse range of fireplace models, including vent-free and direct vent systems. Models like the VFF 3236 and AVFL42 provide zero-clearance installation and high efficiency. The BDV400 series features direct vent technology, ensuring safe and efficient heating. AVFL60 models offer advanced customization options, including reflective glass panels and LED lighting. These fireplaces are designed for versatility, fitting various home décors while maintaining superior performance. Each model adheres to safety standards and provides reliable heat output, making them ideal for homeowners seeking both functionality and aesthetic appeal. With multiple options available, Monessen fireplaces cater to different installation needs and personal preferences effectively;

Key Features of Vent-Free Fireplaces

Monessen vent-free fireplaces are designed for efficiency and convenience, requiring no external venting. They offer zero-clearance installation, allowing placement against or recessed into any wall with gas access. These models feature advanced safety mechanisms, such as oxygen depletion sensors, to ensure safe operation. Vent-free systems provide high heating efficiency, often exceeding 99%, and are equipped with realistic flame presentations. Optional features include reflective black glass panels, shimmering fireglass, and multicolored LED lighting for enhanced visual appeal. Their compact design and minimal clearance requirements make them ideal for various spaces, combining functionality with aesthetic charm to create a cozy and inviting atmosphere in any room.

Efficiency and Heating Capabilities

Monessen fireplaces are renowned for their exceptional efficiency, with models achieving up to 99.9% heating efficiency. This high performance ensures minimal energy waste, providing maximum warmth for your space. Vent-free systems are particularly effective, as they retain heat within the room without losing it through venting. These fireplaces are designed to produce significant BTUs, capable of heating large areas efficiently. Advanced engineering and realistic flame presentations enhance the heating experience while maintaining a cozy ambiance. Their energy-saving design makes them an eco-friendly choice for homeowners seeking reliable, cost-effective heating solutions without compromising on style or performance.

Customization Options for Installation

Monessen fireplaces offer extensive customization options to suit various home decors and installation preferences. Homeowners can choose from multiple surround designs, trim kits, and façade options to match their interior style. The zero-clearance design allows installation against or recessed into any wall with gas line access, providing flexibility. Optional accessories like blowers, decorative doors, and lighting kits enhance functionality and aesthetics. Reflective black glass panels, fireglass, and LED lighting further personalize the appearance. These customization options ensure a seamless integration of the fireplace into any room, blending functionality with visual appeal while maintaining safety and efficiency standards.

Safety Information and Precautions

Adhere to all local codes and National Fuel Gas Code ANSI Z223.1 or NFPA54. Proper installation and venting are crucial for safe operation. Always follow clearance requirements and ensure annual inspections to maintain efficiency and safety.

Important Safety Codes and Standards

Adherence to local codes and the National Fuel Gas Code ANSI Z223.1 or NFPA54 is mandatory. These standards ensure safe installation and operation of Monessen fireplaces; The American National Standards Institute (ANSI) and National Fire Protection Association (NFPA) provide detailed guidelines to prevent hazards. Always refer to the latest edition of these codes for compliance. Local authorities may enforce additional regulations, so verify requirements before installation. Failure to comply with these standards can result in unsafe conditions and void warranty coverage. Proper understanding and implementation of these codes are essential for ensuring the safety and efficiency of your Monessen fireplace system.

Clearance Requirements for Installation

Proper clearance is critical for safe and efficient installation of Monessen fireplaces. As a zero-clearance appliance, models like the VFF 3236 can be installed directly against walls, provided all specified clearances are met. Maintain at least 36 inches of clearance above the fireplace and 6 inches from sidewalls. These requirements ensure safe operation and prevent potential hazards. Always comply with local building codes and manufacturer instructions. Failure to adhere to clearance guidelines can result in unsafe conditions and void the warranty. Ensure all measurements align with the manual to guarantee proper installation and optimal performance of your Monessen fireplace system.

WARNING: Proper Installation and Usage

Proper installation and usage of Monessen fireplaces are critical to ensure safety and efficiency. Always adhere to local codes and standards, such as ANSI Z223.1 or NFPA54. Installation must be performed by a qualified technician to avoid hazards. Never operate the fireplace with unapproved logs or combustible materials nearby. Ensure the unit is installed in a well-ventilated area, as specified in the manual. Annual inspections and maintenance are required to maintain safety and performance. Improper installation or misuse can lead to serious risks, including fire hazards or gas leaks. Follow all guidelines carefully to ensure a safe and enjoyable experience with your Monessen fireplace.

Installation Instructions

This section provides detailed installation steps for both vented and vent-free systems, including placement, clearance requirements, and optional accessory installations. Always follow the manual instructions;

Step-by-Step Installation Guide

Begin by thoroughly reading the manual to understand all safety precautions and installation requirements. Ensure the installation site is clear of debris and flammable materials. Verify local building codes and regulations. Gather necessary tools and materials, including a gas line, electrical connections, and venting components if applicable. Position the fireplace in the desired location, ensuring proper clearance from walls and combustible materials. Connect the gas line securely, following all safety guidelines. Install any optional accessories, such as blowers or decorative trim. Test the system to ensure proper function and ventilation. Finally, review the manual to confirm all steps are completed correctly and safely.

Venting and Vent-Free Systems

Monessen fireplaces offer both venting and vent-free systems, each with specific requirements. Venting systems require proper installation of vents or chimneys to ensure safe gas exhaust. Vent-free systems, like the VFF model, eliminate the need for external venting, offering flexibility in installation. Both systems must adhere to local safety codes and manufacturer guidelines. Vent-free models, such as the VFF 3236, are zero-clearance appliances, allowing installation against walls or recessed areas. Proper ventilation ensures efficient heating and safety. Always follow the manual’s instructions for venting configurations to maintain performance and comply with safety standards. This ensures a safe and efficient fireplace experience for years to come.

Placement and Clearances

Proper placement and clearances are critical for safe and efficient fireplace operation. Monessen fireplaces, including vent-free models like the VFF 3236, can be installed almost anywhere due to their zero-clearance design. They can be placed against or recessed into walls with access to a gas line. Ensure all clearances meet local codes and manual requirements. Mantels and wall projections must comply with specified guidelines. Keep the fireplace area clear of flammable materials. Hearth extensions should be installed as directed. Proper placement ensures safety, efficiency, and aesthetic appeal. Always verify measurements and clearances before installation to avoid potential hazards and ensure compliance with safety standards.

Optional Accessories Installation

Optional accessories like blower kits, light kits, and door kits can enhance your Monessen fireplace experience. These accessories must be installed according to the manufacturer’s instructions. Blower kits improve heat circulation, while light kits and door kits add aesthetic and functional value. Ensure all optional components are properly fitted and tested before use. Refer to the specific accessory installation guide provided with your Monessen fireplace model; Proper installation ensures safety, efficiency, and optimal performance. Always follow the manufacturer’s recommendations to maintain warranty validity and ensure compliance with safety standards. These accessories can customize your fireplace to meet your specific needs and preferences.

Operating the Fireplace

Learn how to safely and efficiently operate your Monessen fireplace. This section covers startup procedures, daily usage tips, and best practices for optimal performance and longevity.

Startup and Initial Operation

Before starting your Monessen fireplace, ensure all components are installed correctly and the area is clear of flammable materials. Inspect the unit for any damage or debris. Turn the gas supply on slowly and check for leaks using a soap solution. For vent-free models, ensure proper room ventilation is maintained. Locate the igniter, typically found near the gas controls, and follow the manufacturer’s instructions for ignition. Allow the fireplace to heat up gradually to prevent damage. Monitor for unusual odors or sounds during the initial operation. Refer to the manual for specific startup sequences and safety precautions to ensure a smooth and safe experience. Always follow the guidelines provided to avoid potential hazards and maintain efficiency.

Daily Usage and Best Practices

For optimal performance, always follow the manufacturer’s guidelines for daily operation. Turn the gas supply off when the fireplace is not in use to conserve energy and ensure safety. Regularly inspect the unit for any blockages or damage, especially after initial use. Maintain proper clearance from flammable materials, as specified in the manual. Avoid leaving the fireplace unattended while in operation. Monitor heat output to prevent overheating, especially in well-insulated rooms. Keep the area around the fireplace clean and free of debris. Refer to the manual for model-specific operation instructions and adjust settings as needed for efficient heating.

Adjusting Heat Output and Settings

Adjusting the heat output on your Monessen fireplace is straightforward using the control panel or remote, if equipped. Refer to your model-specific manual for exact instructions. Turn the gas valve to regulate flame height and heat output. For models with a thermostat, set your desired temperature, and the fireplace will adjust automatically. Some units allow adjusting the burner or heat output zones for customized warmth. Always monitor room temperature to avoid overheating, especially in smaller spaces. Lowering the heat when not needed can save energy. Ensure settings are adjusted carefully to maintain efficiency and safety. Proper adjustment extends product lifespan and ensures optimal performance.

Care and Maintenance Tips

Regular cleaning and inspection are essential for maintaining your Monessen fireplace’s performance and safety. Use a soft cloth to wipe down surfaces, avoiding harsh chemicals that could damage finishes; Inspect glass panels for soot or cracks and clean them with a damp cloth. Check burner orifices for blockages and ensure logs are securely positioned. Annual professional maintenance is recommended to inspect internal components and ensure proper function. Refer to your manual for specific cleaning solutions and avoid abrasive materials. Proper care extends the lifespan of your fireplace and ensures efficient, safe operation. Neglecting maintenance can lead to soot buildup and reduced efficiency.

Maintenance and Troubleshooting

Regularly inspect and clean your Monessen fireplace to ensure safe and efficient operation. Annual professional maintenance is recommended to check for wear and address potential issues early.

Routine Cleaning and Inspection

Regular cleaning and inspection are crucial for maintaining your Monessen fireplace’s performance and safety. Clean the firebox, glass, and logs monthly to remove soot and debris. Inspect the venting system annually for blockages or damage. Check gas lines for leaks and ensure all controls function properly. Use a soft cloth and mild detergent to avoid scratching surfaces. Refer to your manual for specific cleaning solutions and tools. Annual professional inspections are recommended to identify potential issues early. Ensure the chimney and smoke shelf are clear of obstructions. Proper maintenance ensures efficient operation, safety, and longevity of your fireplace.

Troubleshooting Common Issues

Troubleshooting your Monessen fireplace involves identifying common issues and addressing them promptly. If the fireplace fails to light, check the gas supply and ignition system. Ensure the pilot light is functioning and that no debris obstructs the burner. For uneven flames, inspect the air shutter and venting system for blockages. If error codes appear, refer to the manual for specific solutions. Regularly clean the glass and logs to maintain clarity and performance. Addressing these issues ensures safe and efficient operation. Always follow the manual’s guidance for resolving problems and consult a professional if issues persist.

Annual Maintenance Requirements

Annual maintenance is crucial for optimal performance and safety of your Monessen fireplace. Inspect the venting system for blockages or damage, ensuring proper ventilation. Clean the glass and reflective panels to maintain visibility and aesthetics. Check the burner and logs for soot buildup and clean as needed. Verify that all connections and gas lines are secure and functioning correctly. Inspect the pilot light and ignition system for proper operation. Address any wear or tear on components like gaskets or seals. Refer to the manual for specific maintenance schedules and recommendations. Regular servicing by a qualified technician is advised to ensure compliance with safety standards and warranty terms.

Warranty and Customer Support

Monessen fireplaces come with comprehensive warranty coverage for parts and labor. For assistance, contact Monessen customer service via phone or their official website for support and resources.

Understanding the Warranty Terms

Monessen fireplaces are backed by a comprehensive warranty program, ensuring protection for parts and labor under specific conditions. The warranty duration varies by component, with key parts like heat exchangers and burners typically covered for longer periods. To maintain warranty validity, proper installation, regular maintenance, and adherence to safety guidelines are required. Any unauthorized modifications or misuse can void the warranty. For detailed terms, refer to the official Monessen warranty document provided with your purchase. Keep your proof of purchase and registration handy for any warranty claims. Understanding these terms ensures you maximize the benefits of your Monessen fireplace investment.

Contacting Monessen Customer Service

For assistance with your Monessen fireplace, contact customer service via phone, email, or through the official website. The support team is available to address warranty claims, troubleshooting, and installation inquiries. Ensure you have your model number and serial number ready for efficient service. Monessen also provides online resources, including manuals and FAQs, to help resolve common issues. Representatives are trained to guide you through maintenance, repairs, and operational questions. Whether you need technical support or general information, Monessen’s customer service is dedicated to ensuring your satisfaction and the optimal performance of your fireplace. Reach out for professional assistance whenever needed.

Your Monessen fireplace manual serves as a comprehensive guide to ensure safe, efficient, and enjoyable use of your appliance. By following the instructions and maintenance tips outlined, you can maximize performance and longevity. Monessen fireplaces are designed to blend warmth, efficiency, and aesthetic appeal, enhancing your home’s comfort. Regular maintenance and adherence to safety protocols are essential for optimal functionality. Should issues arise, refer to the troubleshooting section or contact customer support for professional assistance. With proper care, your Monessen fireplace will provide years of reliable service, creating a cozy and inviting atmosphere for you and your family to enjoy.

eero app manual

Welcome to the eero App Manual! This guide provides a comprehensive overview of the eero app‚ helping you set up‚ manage‚ and optimize your Wi-Fi network effortlessly. Discover how to navigate the app‚ configure settings‚ and enhance your home connectivity experience with step-by-step instructions.

Overview of the eero App

The eero app is a comprehensive tool designed to simplify Wi-Fi network management. It offers a user-friendly interface for setting up‚ monitoring‚ and optimizing your home network. With features like device prioritization‚ security settings‚ and activity insights‚ the app empowers users to control their connectivity experience. Compatible with both iOS and Android‚ the eero app streamlines tasks such as network configuration‚ password management‚ and advanced settings. It also provides real-time updates and troubleshooting options‚ ensuring a seamless and secure connection for all devices.

Importance of the eero App for Network Management

The eero app is essential for managing your Wi-Fi network efficiently. It centralizes control over connected devices‚ enabling easy monitoring and customization. The app simplifies tasks like setting up security features‚ prioritizing devices‚ and troubleshooting connectivity issues. With its intuitive interface‚ users can ensure optimal network performance and maintain a secure connection. By leveraging the app‚ you gain full control over your home network‚ making it easier to adapt to changing needs and enjoy a seamless online experience.

System Requirements for the eero App

The eero app requires compatible iOS or Android devices and minimum OS versions to ensure smooth operation. Check the latest requirements for optimal performance.

Compatible Devices (iOS and Android)

The eero app is designed to work seamlessly on both iOS and Android devices. For iOS‚ ensure your device runs on iOS 14 or later‚ while Android devices require Android 8.0 or newer. Compatible devices include smartphones and tablets from leading manufacturers like Apple‚ Samsung‚ Google‚ and more. Always check the eero app requirements in the App Store or Google Play for the most up-to-date compatibility information. This ensures optimal performance and access to all features.

Minimum OS Versions Required

To ensure smooth operation of the eero app‚ your device must meet specific OS requirements. For iOS users‚ the app requires iOS 14 or later‚ while Android devices need Android 8.0 (API level 26) or newer. These minimum versions guarantee compatibility‚ optimal performance‚ and access to all app features. Always verify the OS version before installation and update your device if necessary. This ensures you can fully utilize the eero app for network management and configuration.

Downloading and Installing the eero App

Download and install the eero app from the App Store or Google Play. Launch the app‚ create an account or log in‚ and follow the setup guide to plug in your device.

Step-by-Step Installation Guide

Launch the eero app and select “Get Started” to begin setup. Create an account or log in using your existing credentials. Plug your eero device into the modem‚ and the app will automatically detect it. Follow the on-screen instructions to configure your network settings‚ including naming your network and setting a password. Once connected‚ test your internet connection to ensure everything is working properly. This process ensures a smooth and seamless installation experience for your eero network.

Downloading from the App Store or Google Play

Open the App Store (for iOS) or Google Play Store (for Android) on your device. Search for the eero app in the search bar. Select the official eero app from the results and tap “Get” or “Install.” Wait for the download and installation to complete. Once installed‚ open the app to begin setting up your eero network. The app is free to download and is compatible with both iOS and Android devices‚ ensuring easy access for all users.

Setting Up Your eero Account

Open the eero app and select “Create Account” to start. Enter your email and choose a password. Optionally‚ log in with your Amazon account for quick setup.

Creating a New eero Account

Open the eero app and tap “Create Account” to begin. Enter your email address and choose a secure password. Follow the prompts to complete the setup process. You will receive a verification email to confirm your account. Once verified‚ log in to access your eero network settings. For added convenience‚ you can also link your Amazon account during this process. Ensure your email and password are saved securely for future access to the app and your network configuration.

Logging In with an Amazon Account

To log in with your Amazon account‚ open the eero app and select the “Log In” option. Choose “Continue with Amazon” and follow the prompts to link your account. This streamlined process eliminates the need to create a new username and password‚ ensuring a seamless and secure setup experience. Your Amazon account credentials will be used to authenticate your eero app access‚ maintaining the same security standards as your Amazon profile. Ensure your Amazon account details are up-to-date for a smooth login experience.

Setting Up Your eero Network

Plug in your eero device‚ connect it to your modem‚ and use the app to complete the setup. The app guides you through network configuration seamlessly.

Plugging in Your eero Device

Start by connecting your eero device to a power source using the provided adapter. Ensure it is placed in a well-ventilated area for optimal performance. Next‚ plug one end of the Ethernet cable into your modem and the other into the eero device’s WAN port. This establishes the connection between your modem and the eero system. Once powered on‚ the device will automatically boot up‚ and the eero app will guide you through the rest of the setup process. Make sure the device is not obstructed for proper signal distribution.

Connecting Your eero Device to the Modem

To connect your eero device to the modem‚ locate the Ethernet port on the modem and plug in one end of the Ethernet cable. Insert the other end into the WAN port on your eero device. Ensure the connection is secure. Once connected‚ open the eero app and follow the on-screen instructions to complete the setup. The app will automatically detect the modem and configure the network settings. Verify the connection status in the app to ensure everything is working properly.

Initial Network Configuration Through the App

After connecting your eero device to the modem‚ open the eero app and follow the setup wizard. Name your network and set a password for secure access. The app will guide you through configuring basic settings‚ such as enabling encryption and setting up administrator privileges. Once the setup is complete‚ your network will be ready for devices to join. The app will also provide a summary of your network configuration for easy reference. This step ensures your network is secure and optimized for performance.

Managing Your Network with the eero App

The eero app simplifies network management by allowing you to monitor connected devices‚ set priorities‚ and create family profiles. Effortlessly control access and optimize performance for a seamless experience.

Viewing Connected Devices

The eero app allows you to easily view and manage all devices connected to your network. Open the app‚ navigate to the Devices tab‚ and you’ll see a list of connected devices‚ including their names‚ types‚ and IP addresses. This feature helps you monitor which devices are online‚ track data usage‚ and identify unauthorized connections. Use this tool to ensure your network is secure and functioning optimally‚ making it easier to troubleshoot connectivity issues or limit access to specific devices as needed.

Managing Device Access and Prioritization

The eero app simplifies managing device access and prioritization‚ allowing you to control who and what connects to your network. Use the app to pause internet access for specific devices‚ set priority settings for critical devices‚ and assign devices to family profiles. This feature ensures seamless connectivity for important tasks while minimizing interruptions during meals‚ homework‚ or work hours. With customizable options‚ you can balance productivity and leisure‚ ensuring your network meets your household’s unique needs and preferences effectively and securely.

Setting Up Family Profiles

The eero app allows you to create and manage family profiles‚ making it easy to tailor network access for different household members. Assign devices to profiles based on user needs‚ set time limits for internet usage‚ and enable content filters to ensure a safe browsing experience. This feature is ideal for balancing productivity and leisure‚ while also providing peace of mind for parents managing their children’s online activities. Customize settings to suit your family’s unique needs and preferences for a seamless and secure network experience.

Security Features in the eero App

The eero app offers robust security features‚ including advanced threat detection‚ WPA-2 encryption‚ and regular automatic updates. These tools ensure your network remains secure and protected from potential threats.

Enabling Advanced Security

To enable advanced security in the eero app‚ navigate to the Discover tab and scroll to the Security & Privacy section. Toggle on Advanced Security to activate enhanced threat detection and automatic updates. This feature ensures your network is protected from malicious activities and vulnerabilities. By enabling it‚ you add an extra layer of defense‚ keeping your devices and data safe. The app also supports WPA-2 encryption‚ providing a secure connection for all connected devices. This setup is crucial for maintaining a reliable and protected home network environment.

Setting Up a Network Password

Setting up a network password is essential for securing your eero network. Open the eero app‚ navigate to the Settings menu‚ and select Network & Wi-Fi. Tap on Network Password to create or update your password. Choose a strong‚ unique password and confirm it. Ensure it meets the required criteria for strength. Once saved‚ all connected devices will require this password to access the network. This step ensures your Wi-Fi remains secure and protected from unauthorized access‚ safeguarding your data and devices.

Understanding WPA-2 Encryption

WPA-2 (Wi-Fi Protected Access II) is a robust encryption standard ensuring secure data transmission over your network. The eero app automatically enables WPA-2 encryption‚ protecting your data from unauthorized access. When you set up your network password‚ WPA-2 encrypts all communications‚ safeguarding sensitive information. This advanced security protocol is essential for maintaining privacy and preventing potential breaches. By using WPA-2‚ your eero network provides a highly secure environment for all connected devices‚ ensuring your online activities remain safe and protected.

Advanced Settings and Configurations

The eero app offers advanced settings for fine-tuning your network‚ including port forwarding‚ IP reservations‚ and custom DNS configurations‚ allowing you to optimize performance and security.

Port Forwarding for Specific Devices

Port forwarding allows you to direct traffic from specific ports on your modem to a device on your local network. Using the eero app‚ you can easily set up port forwarding rules for gaming consoles‚ servers‚ or other devices that require open ports. Navigate to the advanced settings section‚ select the device you want to configure‚ and specify the ports and protocol (TCP/UDP) you wish to forward. Ensure security by restricting access to only necessary ports to minimize potential vulnerabilities.

Setting Up IP Reservations

Setting up IP reservations ensures devices on your network receive a static IP address‚ preventing changes during router restarts. Open the eero app‚ navigate to advanced settings‚ and select the device you wish to configure. Toggle the IP reservations option‚ enter the desired IP address‚ and save your changes. This feature is ideal for devices requiring consistent connectivity‚ such as servers or gaming consoles. IP reservations simplify remote access and ensure uninterrupted service for critical applications. Consult the manual for detailed guidance on configuring this feature effectively.

Customizing DNS Settings

Customizing DNS settings allows you to enhance your network’s performance and security. Open the eero app‚ navigate to Advanced Settings‚ and select DNS. Choose from predefined options like Google DNS or Cloudflare‚ or enter custom DNS server addresses. This feature is ideal for improving browsing speed‚ filtering content‚ or accessing specific services. Ensure your DNS provider supports your network requirements. After making changes‚ restart your devices to apply the new settings. Refer to the manual for troubleshooting tips if issues arise during configuration.

Troubleshooting Common Issues

Troubleshoot connectivity problems by restarting your network or checking cable connections. Use the eero app to identify issues and update firmware manually for optimal performance; Resolve issues quickly with these steps.

Resolving Connectivity Problems

If your eero network experiences connectivity issues‚ start by restarting your router and modem. Ensure all cables are securely connected and check for physical obstructions. Open the eero app to identify offline devices and run a network check. If issues persist‚ update your firmware manually or reset network settings. For persistent problems‚ contact your internet service provider to confirm service availability. Resolve connectivity issues quickly with these troubleshooting steps.

Updating Firmware Manually

To manually update your eero device’s firmware‚ open the eero app and navigate to the Settings menu. Tap on Network Settings and select Advanced. Choose Update Firmware and follow the on-screen instructions. Ensure your device remains connected to the network during the process. Manual updates ensure your system runs with the latest security patches and performance improvements. This step is crucial for maintaining optimal network functionality and security. Always verify the update is complete before restarting your device.

Restarting Your Network

Restarting your network is a simple process within the eero app. Navigate to the Settings menu‚ then select Network Settings. Tap on Restart Network to initiate the process. This action will temporarily disconnect all devices but helps resolve connectivity issues. Allow a few minutes for the network to restart and reconnect. Regular restarts can improve performance and ensure stable connectivity. Use this feature when experiencing persistent network problems for a quick resolution. Always wait until the network is fully operational before testing devices again.

Additional Features of the eero App

The eero app offers advanced features like HomeKit integration for enhanced security‚ activity monitoring to track usage‚ and custom notifications for network events‚ ensuring a seamless experience.

HomeKit Integration for Enhanced Security

The eero app integrates seamlessly with Apple HomeKit‚ enhancing your network’s security and simplifying smart home management. This feature ensures IoT devices connected to your network are protected‚ reducing vulnerabilities. By enabling HomeKit‚ you can securely control and monitor smart devices through the eero app. This integration also allows for streamlined device discovery and added layers of encryption‚ ensuring your smart home setup is both convenient and secure. It’s a powerful tool for maintaining privacy and safeguarding your connected lifestyle.

Activity Monitoring and Usage Insights

The eero app offers robust activity monitoring‚ providing real-time insights into your network usage. Track data consumption‚ identify connected devices‚ and monitor app-specific traffic. This feature helps you understand patterns‚ optimize bandwidth‚ and ensure efficient network performance. Detailed reports and alerts for unusual activity add an extra layer of transparency‚ allowing you to manage your network effectively and make informed decisions. Access these insights effortlessly through the Activity Tab for a clearer view of your connectivity landscape.

Custom Notifications for Network Events

The eero app allows you to set up custom notifications for various network events‚ ensuring you stay informed about your network’s activity. You can receive alerts for new device connections‚ unusual traffic‚ or when the network goes offline. These notifications can be tailored to your preferences‚ so you only get alerted about events that matter to you. Access these settings in the app’s Settings menu under Notifications. Custom notifications help you stay proactive about your network’s health and security without unnecessary interruptions.

Understanding the eero App Interface

The eero app interface is designed for simplicity and ease of use‚ featuring a clean layout with clear sections for network management‚ device control‚ and settings.

Navigating the Home Screen

The eero app’s home screen is user-friendly‚ providing quick access to essential features. It’s divided into tabs like Home‚ Devices‚ Activity‚ and Settings‚ each offering specific functionalities. The Home tab displays network status‚ while Devices shows connected devices. Activity offers usage insights‚ and Settings allows customization. Key features include real-time monitoring‚ firmware update notifications‚ and direct access to customer support. Customizable tabs ensure a tailored experience‚ making network management straightforward and efficient.

Exploring the Devices Tab

The Devices Tab in the eero app provides a detailed view of all devices connected to your network. Here‚ you can monitor device status‚ connection strength‚ and data usage. Icons indicate online status‚ and you can sort devices by name or type. Features like device prioritization and access controls are accessible here. Use this tab to manage permissions‚ block devices‚ or set up custom profiles for family members. It’s a central hub for overseeing and optimizing your network performance‚ ensuring seamless connectivity for all devices.

Activity Tab Overview

The Activity Tab offers real-time insights into your network activity‚ displaying data usage trends and device interactions. It highlights peak usage times and identifies bandwidth-heavy activities. This section also logs connection events and security alerts‚ helping you monitor network health. Use the Activity Tab to track performance metrics‚ detect unusual patterns‚ and ensure smooth operation. It’s a valuable tool for maintaining visibility and control over your home network’s daily operations and security.

Settings Menu Breakdown

The Settings Menu is your central hub for customizing and optimizing your eero network. Here‚ you can adjust network settings‚ manage device priorities‚ and enable advanced security features. The menu also allows you to configure DNS settings‚ set up port forwarding‚ and access diagnostic tools. Additionally‚ it provides options to update firmware‚ restart the network‚ and sync with integrated services like HomeKit. Use the Settings Menu to tailor your network to your preferences and ensure optimal performance.

Firmware and Software Updates

The eero app automatically handles firmware updates to keep your network secure and optimized. You can also manually check for updates in the Settings menu for the latest features and improvements.

Checking for Updates

To ensure your eero network runs smoothly‚ the app automatically checks for firmware updates. For manual checks‚ open the Settings menu‚ select Network Settings‚ and tap Check for Update. If an update is available‚ it will be downloaded and installed automatically. This ensures your system stays secure and efficient. Regular updates also add new features and improvements to enhance your overall networking experience.

Installing Updates Manually

To manually install updates for your eero system‚ open the eero app and navigate to the Settings menu. Scroll down to Network Settings and select Check for Update. If an update is available‚ tap Install Update to begin the process. The app will download and apply the update automatically. Ensure your device remains connected to the network during the update to avoid interruptions. Manual updates guarantee you have the latest features and security enhancements‚ keeping your network optimized and secure.

Customer Support and Resources

For assistance‚ contact eero support via the app or their website. Access online manuals and guides for troubleshooting and setup help. Customer support is available to aid with any issues.

Contacting eero Support

To reach eero support‚ open the app and navigate to the help section. You can also visit the official eero website for live chat or email assistance. Additionally‚ the eero support page offers extensive resources‚ including troubleshooting guides‚ FAQs‚ and detailed manuals. For immediate help‚ use the in-app support feature to connect with a representative. Ensure your device is updated for the best support experience. Visit eero.com/support for more information and assistance with any network-related issues.

Accessing Online Manuals and Guides

Visit the official eero website to access comprehensive online manuals and guides. Navigate to the support page for detailed resources‚ including setup instructions‚ troubleshooting tips‚ and FAQs. The eero app also offers a help section with step-by-step guides and video tutorials. For specific device models‚ refer to the user manuals available on the eero website. These resources ensure you can easily resolve issues and optimize your network settings for the best performance. Explore the online library to enhance your eero experience.

With the eero app‚ managing your Wi-Fi network is seamless. Follow the guide to optimize your setup‚ troubleshoot issues‚ and enjoy a secure‚ high-performance connection experience.

Final Tips for Maximizing Your eero App Experience

To get the most out of your eero app‚ regularly explore its advanced settings‚ such as port forwarding and IP reservations‚ to customize your network. Use activity monitoring to track usage and set up custom notifications for network events. Enable HomeKit integration for enhanced security and seamless smart home device management. Keep your firmware updated to ensure optimal performance and security. By leveraging these features‚ you can create a tailored and secure Wi-Fi experience for your home.